Category Archives: Chicken

Easy Indian Butter Chicken

November 10, 2020

I’m so excited to share this butter chicken recipe today! Dustin and I love Indian food but I never thought I’d be able to replicate our favorite Indian dishes at home- until this recipe! It’s just so so good. And easy.

Let’s talk about a few of the ingredients. You can use chicken breast and/or thighs here. Just be careful not to overcook chicken breast or it’ll be dry. The chili powder this recipe calls for pure ground chili, which I don’t have, so I used cayenne. I reduced the amount of cayenne pepper quite a bit (to be safe for kids) and found it still had a kick. Also, don’t try and make this dish too healthy. If you use low-fat substitutes it’s just not going to taste as good/like the real thing. Butter chicken actually doesn’t have as much butter in it as I expected but gets its richness from some heavy cream.

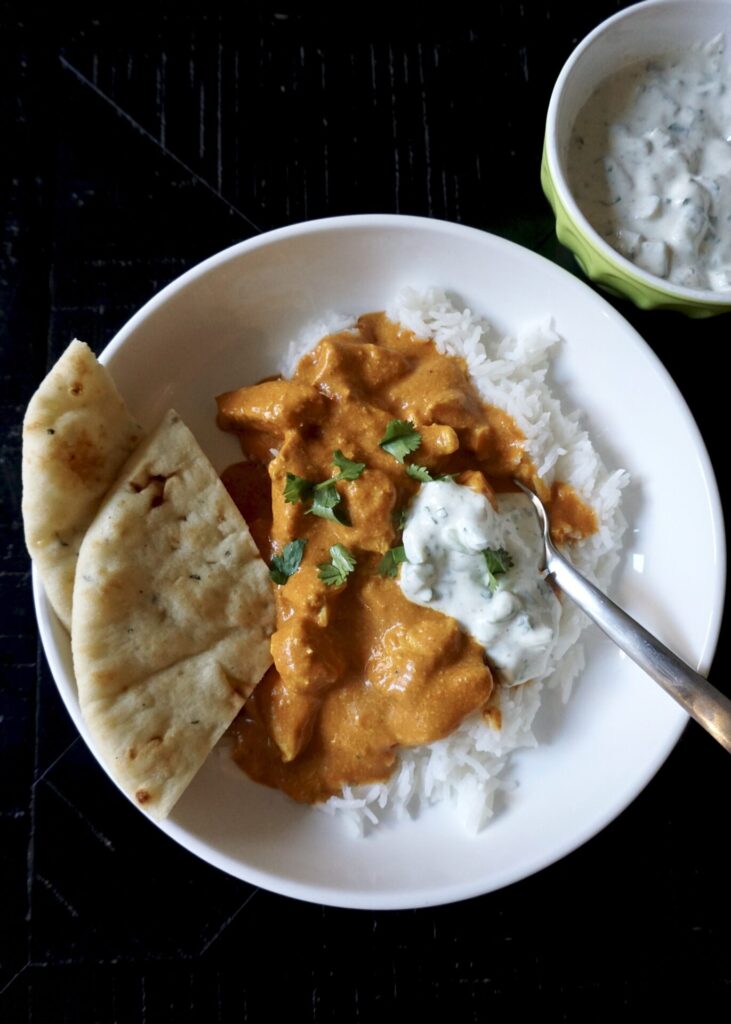
We had this butter chicken over basmati rice, with fresh cilantro and warm garlic naan for scooping up all that sauce. I also made a cucumber raita (which I’ll be posting right away) to serve alongside.

Easy Indian Butter Chicken

INGREDIENTS

Marinade:
1/2 cup plain full-fat yogurt (I used Greek yogurt)
1 Tbsp. lemon juice
1 tsp. turmeric powder
2 tsp. garam masala
1/2 tsp. pure ground chili powder or cayenne pepper (I used 1/8 tsp. cayenne pepper and it had a slight kick)
1 tsp. ground cumin
1 Tbsp. grated fresh ginger
2 cloves garlic, minced
1 1/2 lbs. boneless skinless chicken breast or thighs, cut into bite size pieces (I used chicken breast)

Sauce:
2 Tbsp. butter or ghee
1 cup tomato puree
1 Tbsp. sugar
~1 tsp. salt
1/2 cup heavy cream
1 Tbsp. cornstarch + 1 Tbsp. water (to thicken, optional)

For Serving:
basmati rice
garlic naan
fresh chopped cilantro
cucumber raita (optional)

DIRECTIONS

  1. Whisk together the marinade ingredients until smooth and then stir in the chicken until the chicken is thoroughly coated. Marinate for at least 3 hours, or up to 24 hours.
  2. In a large frying pan, heat the butter/ghee over medium-high heat. Add the chicken (discard the extra marinade) and cook for a few minutes, then turn the chicken pieces so they cook on the other side. Add the tomato puree, sugar and salt and let simmer on low-heat for about 10-20 minutes, until the chicken is cooked completely through. Stir in the whipping cream. If you want to thicken the sauce, whisk the cornstarch and water together in a small bowl or cup with a fork then pour into the sauce. Let the sauce come to a simmer again and cook for a minute or two to thicken, then adjust salt to taste. Garnish with fresh chopped cilantro and serve with basmati rice, naan bread, and cucumber raita (optional).

Serves 4.

(Adapted from RecipeTin Eats via Everyday Reading)

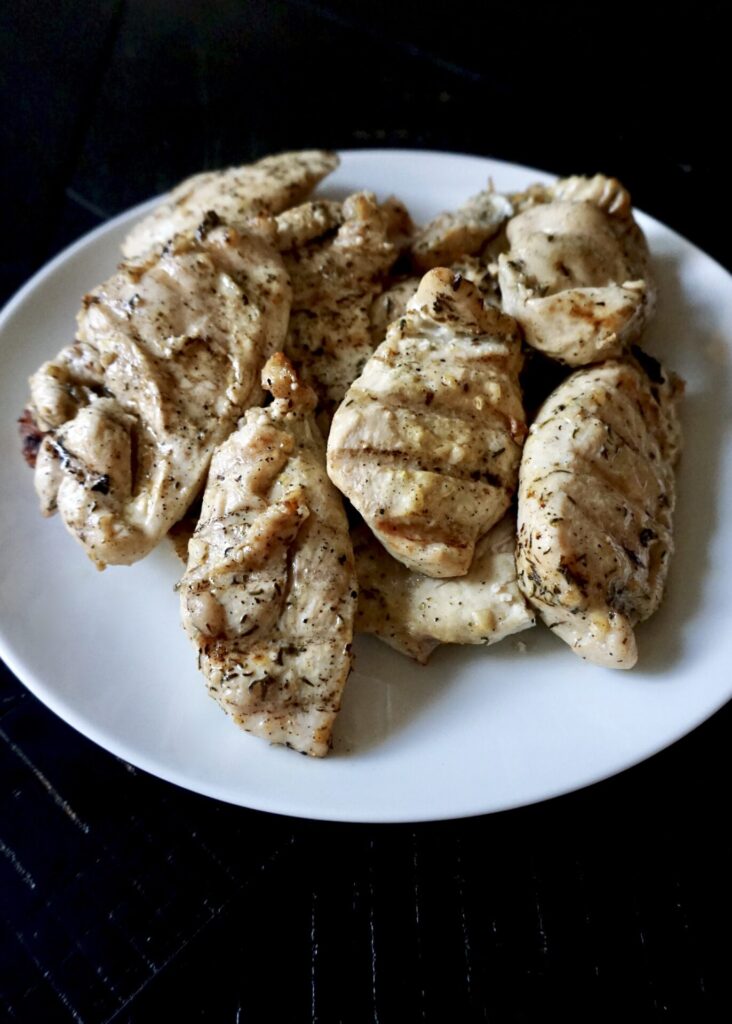
The Best Marinated Grilled Chicken

November 4, 2020

I’ve tried a lot of chicken marinades in my 30-something years and for grilled chicken breast, this one is the best! We cooked it on the Traeger (I included instructions for regular and Traeger grills below) and it was incredibly tender, moist, and flavorful. Our family and guests loved it. Jenn at Once Upon a Chef said using the lemon zest, instead of the juice, is the secret to this recipe’s success. She said the acidic lemon juice can actually make the chicken tougher, while the zest imparts flavor without having that effect! All I know is that this is some delicious chicken. We served it alongside this Persian Tomato, Cucumber, and Pomegranate salad, roasted cauliflower, and smashed roasted potatoes.

The Best Marinated Grilled Chicken

INGREDIENTS

2 lbs. boneless, skinless chicken breasts
6 Tbsp. extra virgin olive oil
4 large garlic cloves, minced
1 tsp. dried thyme
1/2 tsp. dried oregano
1 1/4 tsp. salt
1/2 tsp. freshly ground black pepper
1 1/2 tsp. lemon zest, from one lemon

DIRECTIONS

  1. One at a time, place the chicken breasts in a 1-gallon zip-lock bag; using a meat mallet, pound to an even ½-inch thickness. (Or instead of pounding, slice chicken breasts in half lengthwise so you have two thin pieces.)
  2. Mix all of the ingredients except for the chicken together in a 1-gallon zip-lock bag (go ahead and use the same one you used for pounding if it is still in good shape). Add the chicken breasts to the bag and massage the marinade into the meat until evenly coated. Seal the bag and place in a bowl in the refrigerator (the bowl protects against leakage); let the chicken marinate for at least 4 hours or overnight.
  3. Preheat the grill to high heat and oil the grates. Place the chicken breasts on the grill and cook, covered, for 2 to 3 minutes per side. Do not overcook. (We cooked them on a Traeger grill at 450 until a temperature probe reached 165 F, which took 10-15 minutes depending on the size of the piece.) Transfer the chicken to a platter and serve.

Serves 6.

(Adapted from Once Upon a Chef)

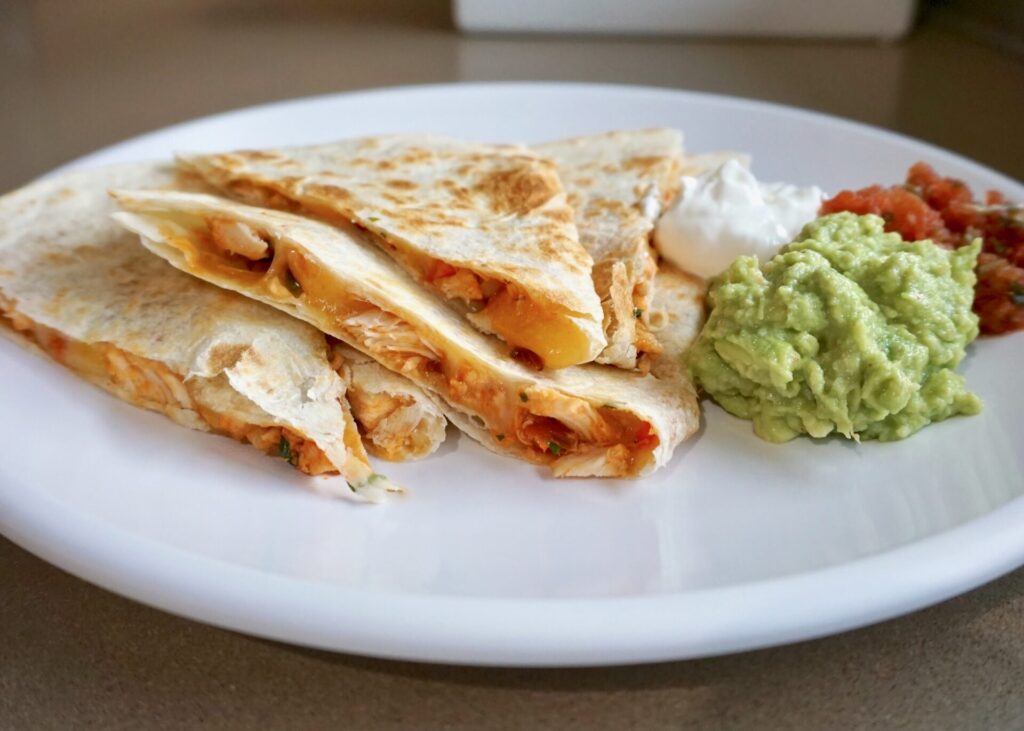
Chipotle Chicken Quesadillas

October 7, 2020

We eat a lot of quesadillas. Usually we don’t get too fancy and just melt some cheese (with veggies, beans, and/or leftover chicken) between two tortillas, top it with some salsa and guacamole and call it a meal. But the idea of Chipotle (delicious smoked jalapeno peppers canned in adobo sauce) flavored chicken stuffed in a cheesy quesadilla enticed me. And turns out this quesadilla filling is worth the bit of extra work!

I didn’t want to make it too spicy so that my kids couldn’t complain. So I settled on 1 1/2 chipotle peppers and if you taste the filling by itself it’s decently spicy (yes, I was sneaking licks from the pan…yum!) but combined with all that cheese and tortilla it tones down to somewhere between mild-medium. (It also depends how much filling you use on each quesadilla.) If you want more heat, use more peppers! I used canned crushed tomatoes because that’s what I always have on hand, but fresh diced/pureed tomatoes could work- they’ll just take longer to cook and reduce down. Rotisserie chicken makes this meal quick, but any cooked chicken will do- you’ll just need to add more salt and pepper if the chicken is not already seasoned.

**Click here for a delicious nacho version of this recipe!**

Chipotle Chicken Quesadillas

INGREDIENTS
drizzle olive oil
1/4 cup diced red bell pepper (and/or onion)
1 clove garlic, minced
1+ chipotle peppers in adobo sauce, minced (1 for mild, more to make it spicier- 1 1/2 peppers was just right for us)
1/2 cup crushed tomatoes (could use fresh tomatoes or tomato puree/sauce)
1 tsp. honey
1 green onion, thinly sliced
2 cups rotisserie chicken, chopped or shredded
2 Tbsp. chopped fresh cilantro
salt and freshly ground black pepper, to taste

corn or flour tortillas
Mexican cheese, grated (I like the Tillamook Mexican cheese blend, also good with Cheddar or Colby jack)

optional for serving:
sour cream
salsa
guacamole
lime wedges

DIRECTIONS

  1. In a large sauté pan, heat a drizzle of olive oil over medium heat. Add the bell pepper (and/or onion) and sauté until tender, several minutes. Add the garlic and cook 1 minute more. Stir in the chipotle peppers and tomatoes. Cook until most of the liquid from the tomatoes has evaporated and the mixture is thickened, stirring often, about 5 minutes (if you’re using fresh tomatoes it will take longer). Stir in the honey, green onions, chicken, and cilantro. Season to taste with salt and pepper. Keep warm.
  2. Heat a sauté pan over medium heat and spray lightly with nonstick cooking spray (optional- I don’t grease the pan if it’s nonstick). Lay a tortilla in the pan and sprinkle cheese evenly overtop. Spread some of the chicken mixture over half of the tortilla. When the cheese is mostly melted, fold the tortilla over to cover the filling and form a half-moon shape. Cook until the tortilla is crisp and golden and the cheese is melted, adjusting the heat as necessary, a minute or so per side. Repeat with the remaining tortillas. Cut quesadillas into wedges and serve with sour cream, salsa, guacamole, and lime wedges, if desired.

Makes enough filling for ~6 quesadillas.

(Adapted from Once Upon a Chef)

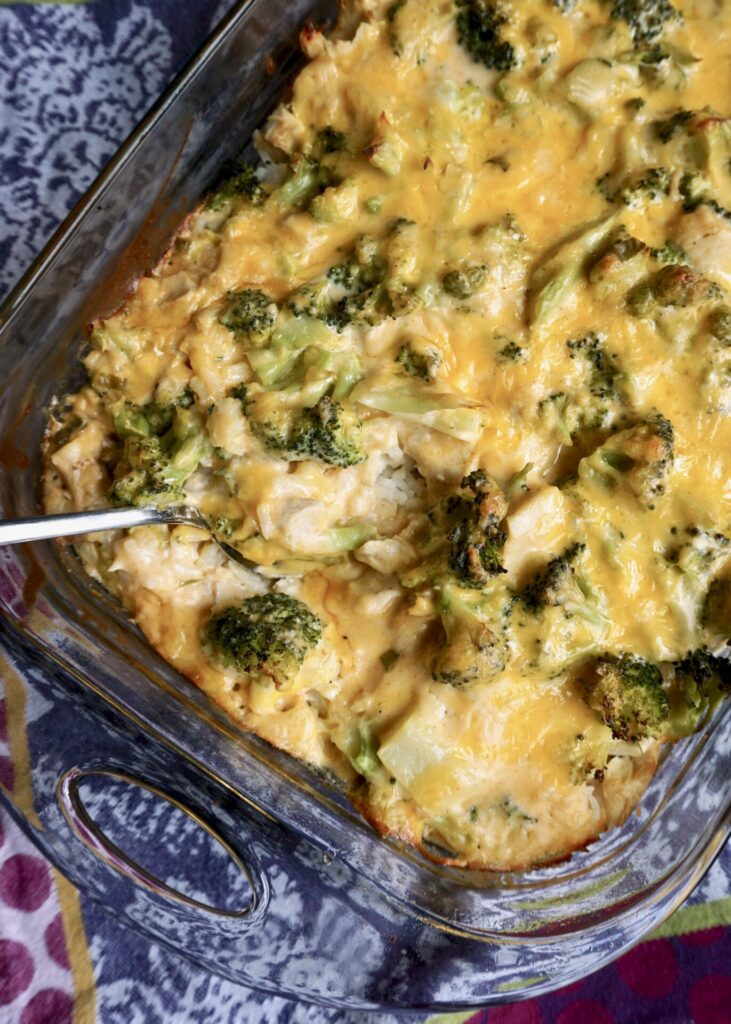
Easy Broccoli Chicken Rice Casserole

September 11, 2020

I grew up on chicken broccoli casserole but it was made with a can of cream of something and loads of mayo. I wanted a more natural and bit healthier approach, and found success with this recipe! (I also have a version with wild rice and broccoli in the archives.) I did increase the ingredient amounts from the original recipe linked to fill a 9×13 pan and it worked out just right. The creamy cheese sauce starts with some onion and garlic cooked in a roux and then a few spices and cream cheese and Cheddar are stirred in. Then the sauce is layered with cooked chicken (rotisserie makes it easy), just-tender broccoli and steamed rice, more cheese is sprinkled on top, and then the whole casserole bakes until browned and bubbling. These flavors familiar to my childhood are once again a family favorite!

Easy Broccoli Chicken Rice Casserole

INGREDIENTS

3 Tbsp. Butter
3 Tbsp. flour
3/4 cup diced yellow, white, or green onion
1/2 tsp. garlic powder (or 1-2 cloves fresh garlic, minced)
1 tsp. kosher salt (adjust to taste)
1/4 tsp. black pepper (adjust to taste)
3 cups milk
3/4 tsp. dry mustard powder
3/4 tsp. paprika
pinch cayenne pepper or crushed red pepper flakes (to taste)
4 Tbsp. cream cheese
3 cups sharp cheddar, divided
3 cups cooked rice
4-5 cups broccoli
2-3 cups cooked chicken, shredded or cubed (rotisserie chicken works great)

DIRECTIONS

  1. Preheat oven to 350 F.
  2. Cook onion and butter on medium-low heat until softened and translucent. Stir in flour, garlic powder (or garlic), salt and pepper. Cook an additional 2 minutes.
    Gradually pour in milk while whisking. Continue whisking over medium heat until thick and bubbly. Remove from heat and add dry mustard, paprika, a pinch of cayenne or red pepper flakes, cream cheese and 2 cups cheddar cheese. Stir until melted. Taste and adjust seasonings to taste.
  3. Steam or boil broccoli for several minutes, until tender-crisp. You still want it slightly crisp as it cooks more in the oven.
  4. In a 9×13 casserole dish, layer the rice, broccoli, chicken and cheese sauce. Top with remaining 1 cup cheese and bake 30-40 minutes or until bubbly and cheese is lightly browned on top.

Makes a 9×13 casserole.

(Adapted from Spend with Pennies)

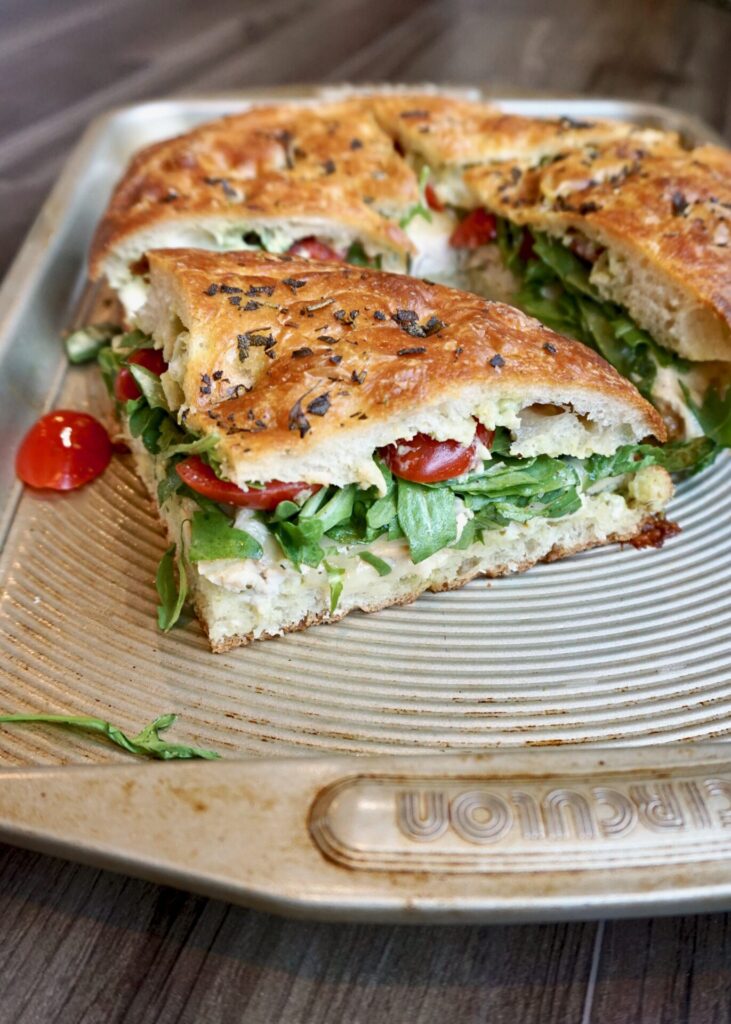
Pesto Turkey (Or Chicken) Sandwich

September 7, 2020

I’ve been making this sandwich combination of turkey/chicken with a creamy pesto mayo for years and it’s about time it made it to the site! There are lots of options for how to prepare it- crusty sliced sourdough, ciabatta, and herb focaccia (as pictured) are all favorite bread choices. You can add arugula and tomatoes as I’ve done. Sliced red onion and bacon are also a good idea. And pick a cheese that melts well as this sandwich is best served hot! You can make your own pesto (I linked to a recipe below) or I often buy it prepared (Costco has great pesto) and what I don’t use right away I stash in the freezer for later.

Pesto Turkey (Or Chicken) Sandwich

INGREDIENTS

thinly sliced or shredded turkey or chicken (here I used a rotisserie chicken)
crusty bread or rolls, sliced (here I used an herb Focaccia)
basil pesto
mayonnaise (can use half mayo and half plain Greek yogurt)
sliced cheese, such as Provolone (smoked Provolone is especially delicious), Fontina, Havarti, etc. 

optional add-ons:
thinly sliced red onion
arugula or baby spinach
sliced tomato or roasted red pepper
bacon

DIRECTIONS

  1. In a small bowl, miix equal parts mayo (can use half Greek yogurt) and basil pesto until well combined.
  2. Spread the pesto-mayo on one side of the top and bottom slices of bread/roll. Top with sliced cheese, turkey/chicken, and any optional add-ons (red onion, arugula, tomato/roasted red pepper, and/or bacon). Top with the second slice of bread (spread side down). Repeat to make as many sandwiches as needed. 
  3. To bake*, preheat oven to 350 F.  Place sandwiches on a baking sheet and cover with aluminum foil. Bake for 10-15 minutes, until the cheese has started to melt. Uncover and bake for 5 more minutes until the top is crisp and the sandwich is warmed throughout. Slice and serve. 

*Or sandwiches can be grilled on a pan/panini press or placed open-faced under the broiler (watch closely- they’ll go quick!) until the cheese is melted and the bread is toasted.