Category Archives: Chocolate

Red Velvet Cupcakes with Cream Cheese Frosting

February 28, 2014

IMG_3694

This was my Valentine’s treat to myself. And Dustin and Clara. But I never know for sure if Dustin will like a dessert I make, unless it’s chocolate chip cookies or  a brownie without nuts or frosting. He’s picky about his cake, can’t handle anything too rich or chocolatey (there is no such thing), and claims to dislike any dessert tainted with fruit, raisins, or coconut. Except that he usually eats them anyway. I don’t know what to believe so I continue baking what I please and just deal with the occasional complaints. Clara will eat anything sweet. Despite years of suggesting he learn to cook, bake, make anything, Dustin is still lost in the kitchen. So if I want a homemade holiday treat (or any meal, for that matter), I have to make it myself. I’ll be baking my own birthday cake next week. I’ve done so almost every year since we’ve been married- except for last year when we picked up german chocolate cupcakes from a local bakery (which are my favorite, Dustin can’t stand the frosting).

red velvet cupcake

These red velvet cupcakes were approved by every member of the family. It was my first red velvet cake (I’ve made a whoopie pie version before) and needn’t look further. The cupcakes were soft and fluffy and not at all dry. And I could have eaten a whole bowl of the cream cheese frosting. It would be a great compliment to so many cakes- carrot, spice, hummingbird, chocolate. But let’s stop talking about cake. I’m suddenly very hungry.
Collages3

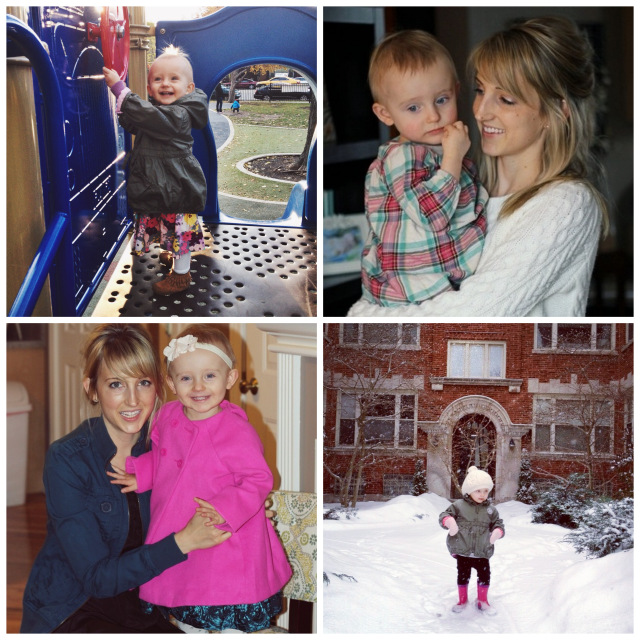
I realized I haven’t posted any photos of Clara (or myself) on here in a very long time. She’s no longer a baby and perhaps some of you would like to see us once and a while. Here a few shots from my private Instagram feed. Clara is 2 months shy of 2 and talks like she’s grown up already.

Red Velvet Cupcakes with Cream Cheese Frosting

INGREDIENTS

Red Velvet Cupcakes:
4 Tbsp. unsalted butter, at room temperature
3/4 cup sugar
1 egg
2 1/2 Tbsp. unsweetened cocoa powder
2 Tbsp. red food coloring
1/2 tsp. pure vanilla extract
1/2 cup buttermilk
1 cup + 2 Tbsp. all-purpose flour
1/2 tsp. salt
1/2 tsp. baking soda
1 1/2 tsp. distilled white vinegar

Cream Cheese Frosting:
4 oz. butter, at room temperature
4 oz. cream cheese, at room temperature
2 1/2 cups powdered sugar
2 tsp. pure vanilla extract
scant 1/4 tsp. ground cinnamon (optional)

DIRECTIONS

1. Preheat oven to 350 F. Line a 12-cup muffin/cupcake pan with liners.

2. In a large bowl with an electric mixer, cream the butter and sugar until light and fluffy, about 3 minutes. Turn the mixer to high and add the egg. Beat until well incorporated, scraping down the sides of the bowl if necessary.

3. In a separate small bowl, mix together the cocoa powder, vanilla extract, and red food coloring to make a thick paste. Add to the batter and mix on medium speed until well combined, stopping the mixer to scrape down the sides of the bowl if necessary.

4. Reduce the mixer speed to low and add half of the buttermilk. Add half of the flour and mix until combined. Scrape the bowl if necessary and add the remaining buttermilk and flour. Beat on high until smooth. Reduce the mixer speed to low and add the salt, baking soda, and vinegar. Turn to high and beat for another couple minutes until completely smooth.

5. Divide the batter evenly between the cupcake liners and bake for 15-20 minutes, until a toothpick inserted into the center of a muffin comes out clean. Cool for several minutes in the pan before removing the cupcakes to a wire rack to cool completely before frosting.

6. To make the frosting, beat or whisk butter and cream cheese in a large bowl with an electric mixer on medium-high speed for 5 minutes. Reduce the speed to low and slowly add the powdered sugar until well incorporated. Add the vanilla and cinnamon (if using) and mix to combine. Increase the speed to medium-high and whip for a few more minutes until the frosting is light and fluffy, scraping down the sides of the bowl if necessary.

Makes 12 cupcakes and more than enough frosting (recipe and frosting can be doubled to make an 8 or 9-inch layer cake).

(Adapted from Brown Eyed Baker and Joy the Baker)

Chocolate Cake with Chocolate Buttercream Frosting

July 20, 2013

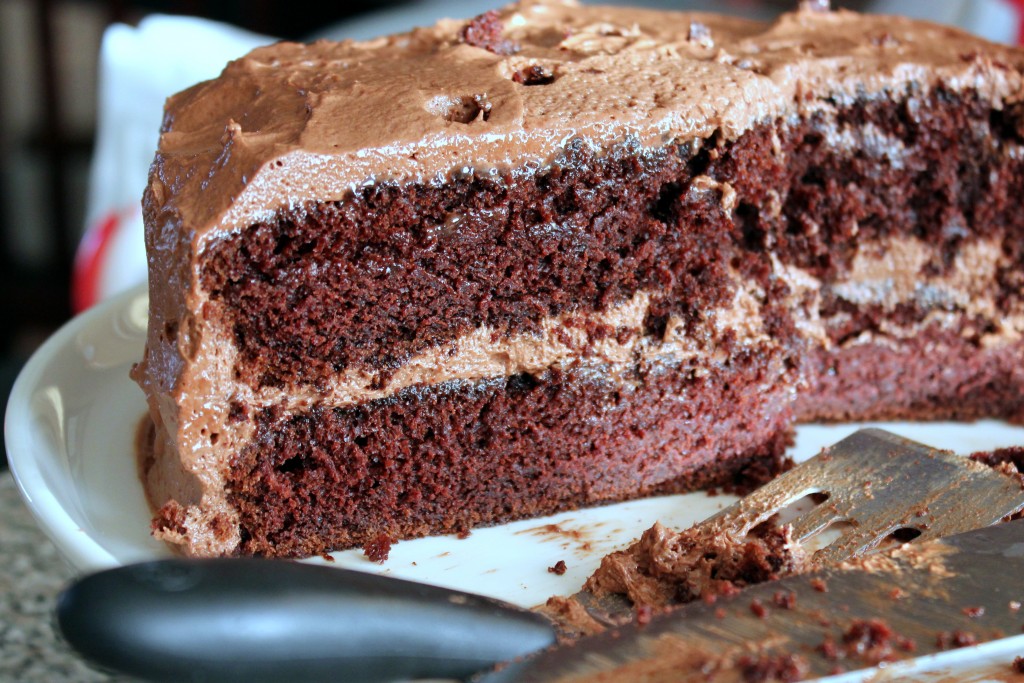
chocolate cake recipe

The changes are (so far) subtle, but you might have noticed you’re visiting a different site. Welcome to my new space! Over the last week I switched over from Blogger to WordPress (with a lot of help- thank you, Jeni). And I love the change! I’m still figuring my way around so it’ll be a slow transformation, but I’ve already added some new features: a navigation bar that includes the original recipe index and favorite blog links, as well as a new contact form. You can easily subscribe by RSS, e-mail, or Bloglovin’, search the archives by date or category, follow me on Facebook, Pinterest, Twitter, or Instagram (coming soon!), and share your favorite posts with your method of choice! But I’m most excited about that little print button you see at the bottom each post. I’m sick of copying and pasting my own recipes in order to print them. No more! Just click that button and they’re ready to go!

More importantly though, let’s talk about cake. I gathered quite a few recipes I’m anxious to share with you over the last couple weeks. (Of course, it’s when I can’t post that I’m suddenly making all sorts of delicious things). But I decided to start with this one because we’re celebrating my new domain and because it’s amazing (the cake, that is)! I made it for Dustin’s birthday last weekend. (And amidst the celebration didn’t get a decent photo of it before we dug in. Don’t mind the candle holes and general mess.) And then ate it for dinner the next day and way too many times during this past week. This is the chocolate cake. It’s pretty much perfect and likely the only one I’ll ever again make. It’s rich and moist and astonishingly simple to prepare. I paired it with an easy chocolate buttercream, which will also be my go-to recipe from here on out. Don’t wait to make this one. You need a decadent chocolate cake up your sleeve.

Chocolate Cake

INGREDIENTS

1 ¾ cups all-purpose flour
2 cups sugar
¾ cup unsweetened cocoa powder
1 ½ tsp. baking soda
¾ tsp. salt
2 large eggs
1 cup buttermilk
½ cup butter, melted
1 Tbsp. pure vanilla extract
1 cup boiling water (or 1 cup hot coffee or 2 tsp. instant coffee in 1 cup boiling water)

DIRECTIONS

1. Preheat oven to 350 F. Butter and flour (or line with parchment paper circles and lightly coat with cooking spray) 2 9-inch round baking pans.

2. In a large bowl of a stand mixer or with an electric beater, stir together flour, sugar, cocoa powder, baking soda, and salt. Add the eggs, buttermilk, melted butter, and vanilla extract and beat until smooth, several minutes. Stir in boiling water (or coffee) with a rubber spatula (batter will be runny).

3. Pour batter into the two prepared pans (diving it as evenly as possible) and bake in the preheated oven for 22-25 minutes, until a toothpick inserted in the center comes out clean with just a few moist crumbs attached. (NOTE: The original recipe said to bake for 35 minutes. My cake was done after 22 minutes.)

4. Allow cake to cool in pans for 15 minutes before removing to a wire rack to cool completely before frosting.

Makes a 2-layer 9-inch round cake.

(Cake adapted from Foodess)

Chocolate Buttercream Frosting

INGREDIENTS

1 cup (2 sticks) unsalted butter, room temperature
3 ½ cups powdered sugar
½ cup unsweetened cocoa powder
½ tsp. salt
2 tsp. pure vanilla extract or 1 tsp. almond extract
4 Tbsp. milk or heavy cream

DIRECTIONS

1. In a stand mixer or with electric beaters cream butter for a few minutes on medium speed. Turn off the mixer and sift powdered sugar and cocoa powder into the bowl. Turn the mixer on and slowly increase speed (so the sugar and cocoa don’t blow everywhere) until they are absorbed by the butter. Add the salt and vanilla and milk and beat on medium speed for 3 minutes until smooth. (To thin frosting, slowly add more milk/cream. To stiffen frosting, add more powdered sugar.)

Makes about 3 cups of frosting (enough to frost a double layer 9-inch round cake).

(Frosting adapted from Savory Sweet Life)

Chocolate Chip, Butterscotch, and Walnut Cookie Bars

December 26, 2012

This recipe isn’t much different than our favorite chocolate chip cookies. But it’s baked in bar form, which results in a giant soft/gooey cookie than can be cut into bite-size bars for sharing (or not). And it’s stuffed with walnuts and butterscotch chips in addition to the chocolate. There’s something about those butterscotch morsels that I can’t resist. While I thought they were perfect as written, you could use almonds or cashews in place of the walnuts. And then there are endless options with dark chocolate and white chocolate and peanut butter, etc. chips. However you make them, they’re likely to disappear fast.

Chocolate Chip, Butterscotch, and Walnut Cookie Bars

INGREDIENTS

2 1/4 cups all-purpose flour
2 tsp. baking powder
1 tsp. sea salt
1 cup (2 sticks) unsalted butter, room temperature
3/4 cup sugar
3/4 cup brown sugar (I used dark brown)
1 tsp. pure vanilla extract
2 large eggs
1 cup chocolate chips
1 cup butterscotch chips
1 cup walnuts, chopped (toast for even more flavor)

DIRECTIONS

1. Preheat oven to 350 F. Lightly grease a 9×13 baking dish.

2. With an electric mixer on medium, cream butter, sugar, and vanilla extract until smooth. Add the eggs, one at a time, mixing well after each addition.

3. In a separate bowl, whisk to combine the flour, baking powder, and salt. With the mixer running on low, gradually add the dry ingredients and mix until well combined. Stir in the chocolate chips, butterscotch chips, and walnuts by hand.

4. Drop dough into the prepared baking dish and spread with a spatula until even. Bake in preheated oven for about 18 minutes, until the edges and top are golden brown. Cool on a wire rack before cutting into bars and serving.

Fills a 9×13 pan.

(Adapted from Passports and Pancakes)

Chocolate Coconut Bars

September 20, 2012

There aren’t a lot of dessert options when you’re eating dairy-free. Desserts that don’t include any milk, butter, buttermilk, yogurt, cream, cream cheese, etc. are not only hard to come by, but usually not too enticing. I know dairy-free margarine and several other substitutes exist. (I’ve got some and I’ll try them out eventually.) They just don’t excite me. Thankfully, not all chocolate is made with milk (especially the dark varieties). And coconut oil makes an excellent replacement for butter in some recipes.

I just discovered coconut oil and I love it. And from what I hear/read- it happens to be good for you. I’ll eat it for breakfast spread on a toasted english muffin. Yum. Anyway, its health benefits are probably negated by the copious amounts of sugar used in this recipe. But this is after all, dessert. Feel free to use butter instead. I’m sure (in fact, I know) that would be good. But the oil adds even more coconut flavor without sacrificing richness or texture in this recipe.

Chocolate Coconut Bars

INGREDIENTS

1 cup all-purpose flour
1/8 tsp. salt
1/2 cup unsalted butter, melted and at room temperature (I used 1/2 cup coconut oil)
1 cup light brown sugar
1 large egg
1 1/2 tsp. pure vanilla extract
1 cup sweetened coconut flakes + extra for sprinkling on top
1 cup chocolate chips

DIRECTIONS

1. Preheat oven to 350 F. Spray an 8-inch square baking pan with cooking spray.

2. Combine the flour and salt; whisk and set aside.

3. Stir together the melted butter (or coconut oil) and brown sugar until smooth and creamy; beat in egg and vanilla extract until well blended.

4. Slowly beat in the flour and salt mixture until just blended. Next, stir in the coconut and chocolate chips. Scrape the batter into the pan. Make sure the batter is spread evenly, smooth with a spatula. Sprinkle extra coconut on top of the bars.

5. Bake for about 20-25 minutes, or until set in the center but still soft. (Mine were almost overly done after 18 minutes- this may be due to my hot oven or replacing the butter with coconut oil.) Do not overbake the bars. Let cool slightly before cutting the bars into squares and serving.

Makes an 8×8 pan.

(Adapted from Brown Eyed Baker via Lahatchita Eats)

Triple Chocolate Trifle with Raspberries

August 3, 2012

My husband loves chocolate desserts. And I love anything with fruit. Add a little (or whole lot) of fresh whipped cream, even better. So when I stumbled upon this recipe I knew we had a winner. Decadent chocolate brownies layered with creamy chocolate custard, summer raspberries, lightly whipped cream, and bittersweet chocolate shavings. It was as awesome as it sounds. The original recipe called for cocoa in the whipped cream as well. For aesthetic reasons more than taste, I left it out. Technically its addition would make this a quadruple chocolate trifle and I think that might just be overdoing it. I also forgot to add the chocolate shavings between the layers, but didn’t miss them. I think a hearty sprinkling on top is just the right amount.

Triple Chocolate Trifle with Raspberries

INGREDIENTS

Brownies:
1 cup + 2 Tbsp. unsalted butter
3 oz. unsweetened chocolate, finely chopped (I used 3 oz. milk chocolate and reduced the sugar)
1/2 cup cocoa powder
2 1/2 cups sugar (I used 2 cups, see above)
3 eggs, beaten
1 Tbsp. pure vanilla extract
1 1/2 cups all-purpose flour
1/2 tsp. kosher salt

Chocolate Custard:
1/2 cup sugar
3 Tbsp. cocoa powder
2 Tbsp. cornstarch
pinch salt
1 3/4 cups whole milk
1/2 cup heavy cream
2 large egg yolks
10 oz. (2 cups) bittersweet chocolate (I used 60% dark), finely chopped
2 Tbsp. unsalted butter
1 tsp. pure vanilla extract

Whipped Cream:
2 cups heavy whipping cream
1/4 cup powdered sugar
5 Tbsp. cocoa powder (optional- I omitted)

1-2 pints fresh raspberries
bittersweet chocolate (I used 60% dark), shaved or roughly chopped for layers and/or topping

DIRECTIONS

1. To make brownies, preheat oven to 350 F. Grease a 9-by-13-inch baking pan.

2. In a large saucepan, melt butter. Remove pan from heat and stir in chopped chocolate until fully melted. Stir in cocoa and sugar until combined. Slowly add eggs, whisking chocolate mixture constantly, then whisk in vanilla. Fold in flour and salt.

3. Pour batter into prepared pan. Bake until just firm, about 20-25 minutes (do not overbake). Transfer pan to a rack to cool.

4. In a large bowl, mix together granulated sugar, 3 tablespoons cocoa powder, cornstarch and salt. Whisk in 3/4 cup milk. In a large saucepan, bring remaining 1 cup milk and 1/2 cup cream to a boil over medium heat. Whisk hot milk mixture slowly into cocoa mixture. Return to saucepan. Cook over medium heat, whisking gently, until slightly thickened, about 2 minutes. (A simmering bubble or two is O.K., but do not let it boil.)

5. In a medium heat-resistant bowl, whisk yolks. Whisking them constantly, very slowly dribble about half the cocoa-milk mixture into yolks until fully combined. Pour yolk mixture into saucepan with remaining cocoa-milk mixture, whisking constantly. Cook, whisking occasionally, over medium-low heat, until thickened, about 5 minutes. (Do not let mixture come to a simmer. If pan begins to steam thickly, remove from heat for a few moments and stir well before continuing.) Let cool slightly.

6. Melt 5 ounces chopped chocolate with butter. Stir until smooth. Stir in vanilla. Cool 5 minutes, then fold into thickened egg mixture. Place plastic wrap directly against pudding (to prevent a skin from forming), and chill until set, about 3 hours. (Pudding and brownies can be made up to 5 days ahead, and refrigerated.)

7. Just before assembling, in an electric mixer, beat remaining 2 cups cream with remaining 5 tablespoons cocoa powder and 1/4 cup confectioners’ sugar until it forms soft peaks. Scrape down sides and fold in any excess cocoa or sugar.

8. Cut brownies into 1-inch squares. Fit a layer of brownie squares in bottom of a 4-quart trifle, glass, or other bowl. Top with half the pudding, a third of the whipped cream, a third of the remaining chopped chocolate and a third of the raspberries. Repeat layering until all ingredients have been used. Serve immediately, or cover with plastic wrap and chill for up to 24 hours before serving.

Serves 8-10.

(Adapted from The New York Times)