Category Archives: Seafood

Tuna (or Salmon) Melts

February 2, 2021

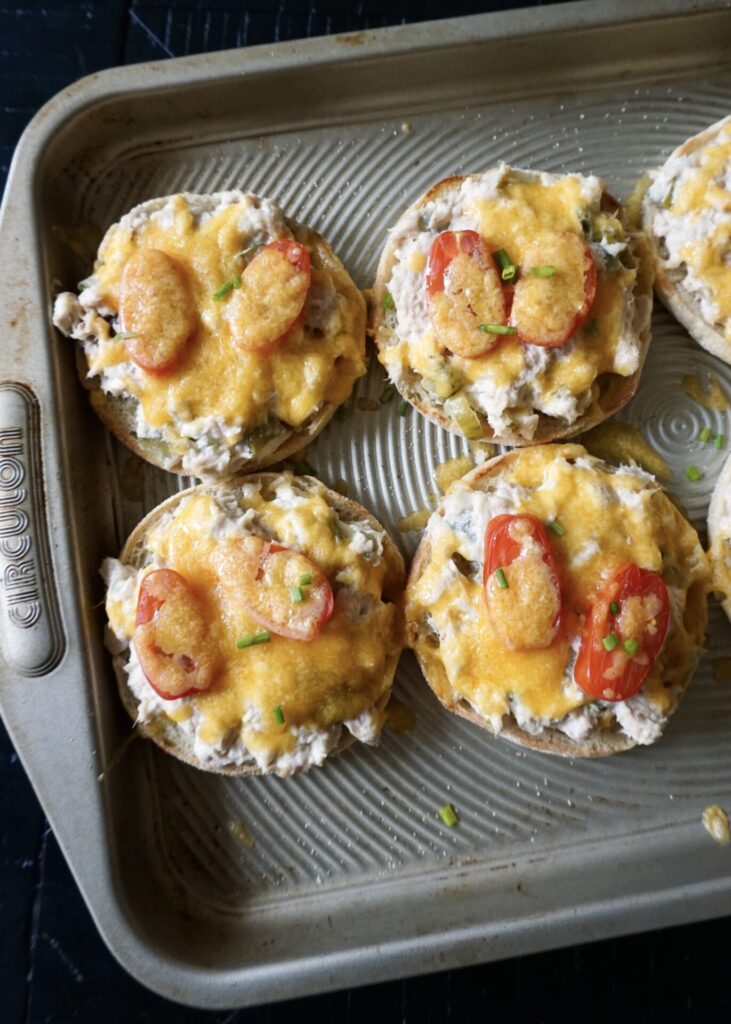
These tuna melts are another frequently made dish around here that I’ve never shared before. I haven’t included amounts because I never measure and it all depends on how many people you’re serving and how much they eat. (And how you like your tuna- light or heavy on the mayo, extra pickles or onion, etc.) About the pickles… trust me on this one- diced dill pickles make tuna salad so much better! My husband is the one who first convinced me to add them and now it’s the only way we make it.
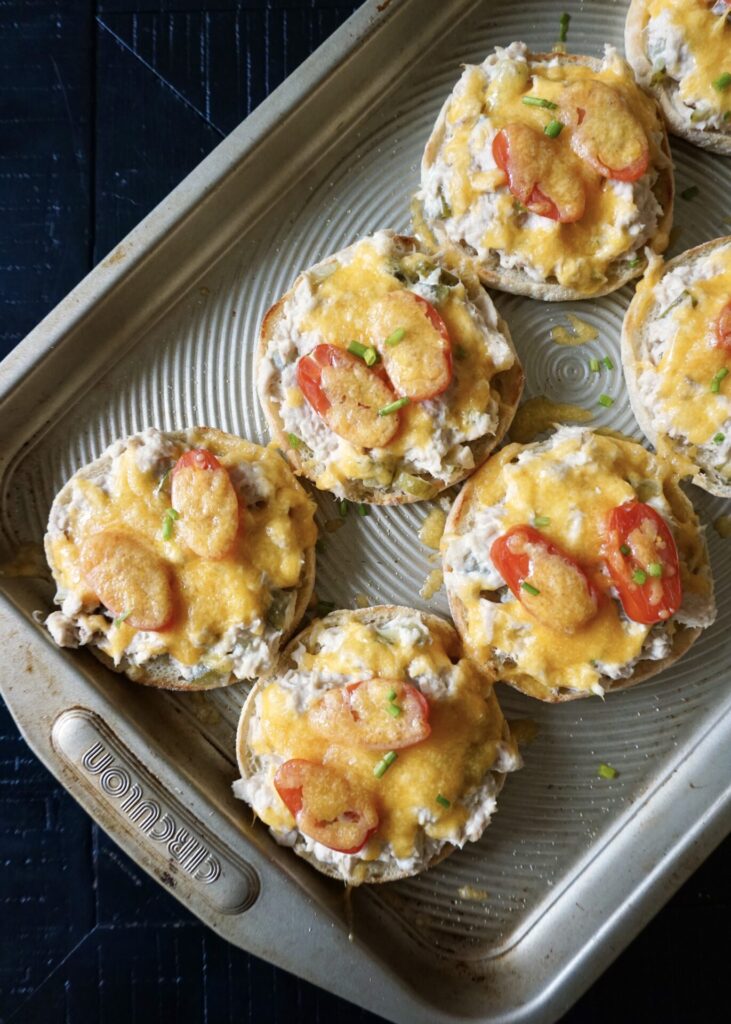
I’ve actually had an aversion to tuna since my last pregnancy (which ended ~2 1/2 years ago). Usually my many aversions ware off quickly after delivery, but for some reason tuna still isn’t very appetizing to me. So I make these same melts with canned salmon (I usually buy it at Trader Joe’s, which is where I also get our favorite kosher dill pickles) and they’re just as, maybe more, delicious!

Tuna (or Salmon) Melts

INGREDIENTS

canned tuna (or salmon), liquid drained
mayonnaise (I often use half mayo and half plain Greek yogurt)
kosher dill pickles, diced + pickle juice
freshly chopped chives (if I have them)
salt and freshly ground black pepper, to taste
English muffins, lightly toasted (or sandwich bread, sourdough, etc.)
tomato, sliced
Cheddar cheese (or Muenster), grated

DIRECTIONS

  1. Place the tuna (or salmon) in a medium bowl and break it apart with a fork. Add just enough mayonnaise (and yogurt, if using) to coat the tuna and mix it together with the fork. Stir in some diced dill pickles and a drizzle of pick juice (trust me, it adds great flavor!) and fresh chopped chives (optional, but recommended). If the mixture seems a bit dry, add more mayonnaise. Season with salt and freshly ground black pepper, to taste.
  2. Preheat oven broiler. Place the lightly toasted english muffin halves on a baking sheet. Top each with the tuna mixture, then a slice or two of tomato, and sprinkle with grated cheese.
  3. Broil for 1-2 minutes (watch them closely so they don’t burn!) until the cheese is melted and bubbling. Garnish with extra chives (optional) and serve immediately.

Teriyaki Salmon (with Easy Teriyaki Sauce)

December 18, 2020

There’s a teriyaki place around every corner here and we’ve become fans of chicken or salmon teriyaki as a quick take-out option. I’ve attempted making it at home before and tried a few bottled teriyaki sauces but never been super impressed (Trader Joe’s Island Soyaki- with pineapple!- is the best I’ve found). But after trying this recipe I won’t be going back to bottled! This quick and easy homemade teriyaki sauce is just so good- and paired with salmon (chicken would work as well), steamed rice, and veggies, it’s a win.

Have I shared my secret to keeping fresh ginger on hand? Freeze it! Whenever I buy ginger root I throw it in a ziplock bag (I don’t even bother peeling it first) and keep it in the freezer until needed. I just chop/grate off the amount I need for a recipe and then it goes back into the freezer until next time. It should stay good frozen for up to about 6 months!

Teriyaki Salmon

INGREDIENTS

1 Tbsp. vegetable oil
~1 lb. salmon filets (skinless)
1 clove garlic, minced
1/2 tsp. fresh ginger, grated or minced
1/4 cup low-sodium soy sauce
2 Tbsp. water
2-3 Tbsp. brown sugar (3 Tbsp. for a sweeter Teriyaki sauce)
1 Tbsp. unseasoned rice vinegar
1 tsp. sesame oil
1 tsp. cornstarch
1 Tbsp. water
sliced green onions, for garnish
toasted sesame seeds, for garnish
steamed rice, for serving

DIRECTIONS

  1. Add garlic, ginger, soy sauce, water, brown sugar, rice vinegar and sesame oil to a medium bowl. Add half of the marinade to a ziplock bag and the other half to a small saucepan and set aside. Place salmon filets in the ziplock bag and marinate for 30 minutes.
  2. Heat oil in a large skillet. Add salmon filets making sure not to overcrowd pan. Cook 3-4 minutes on each side until desired doneness. (OR salmon can be grilled over medium-high heat OR baked in the oven at 400 F for approx. 10-15 min until just cooked through/flakes easily with a fork.)
  3. Meanwhile, heat the reserved marinade in the saucepan over medium heat and bring to a simmer. Add cornstarch and water to a small bowl and whisk to combine.
    Slowly whisk in the cornstarch mixture to the marinade and simmer until thickened.
  4. Serve immediately over steamed rice with the teriyaki sauce drizzled on top and garnish with green onions and sesame seeds.

(Adapted from Chef Savvy)

Broiled Parmesan-Crusted Tilapia (or Halibut)

November 6, 2020

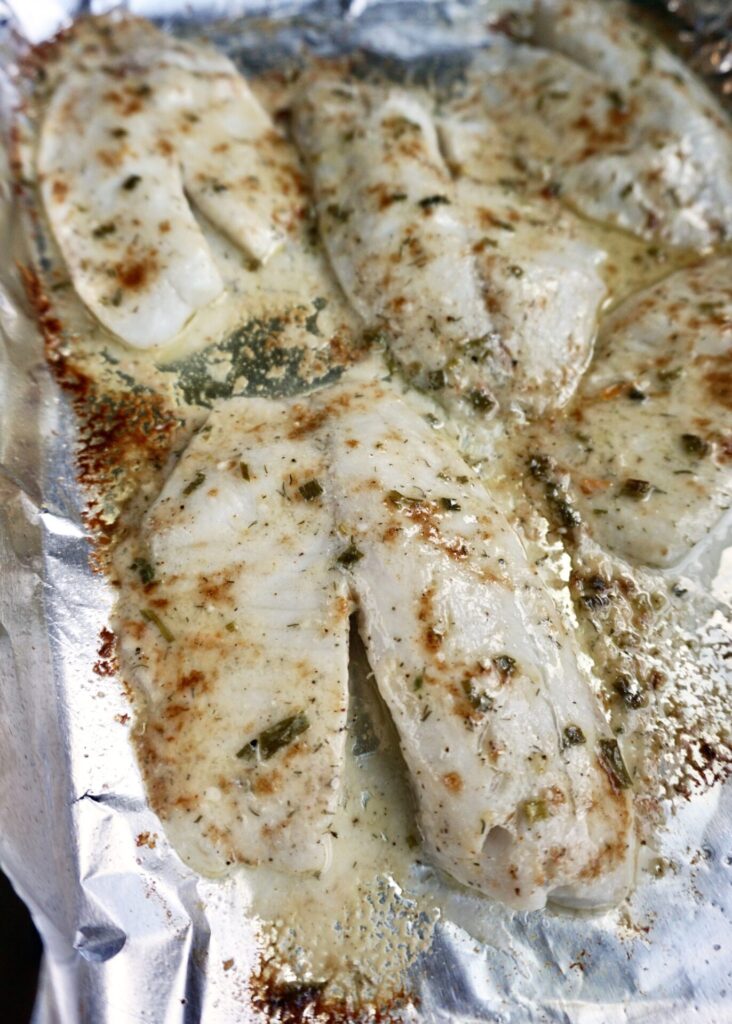
We LOVE halibut and have had it at restaurants and fish and chip stands around the Northwest but I’d never bought it to prepare myself before because it’s usually so $$$ and I was afraid I’d ruin such a fancy fillet of fish. Hah you’d think I’d have more confidence in my cooking by now. But then I found fresh halibut for a relatively reasonable price at Costco and bought it. And then I found this recipe that promised heavenly halibut so I give it a shot…

I did reduce the amount of butter and mayo quite a bit because I knew it wasn’t necessary and I wanted to actually taste the fish! And the recipe was right, it was heavenly. And easy. And now we want to eat halibut every night (though can’t afford it.)

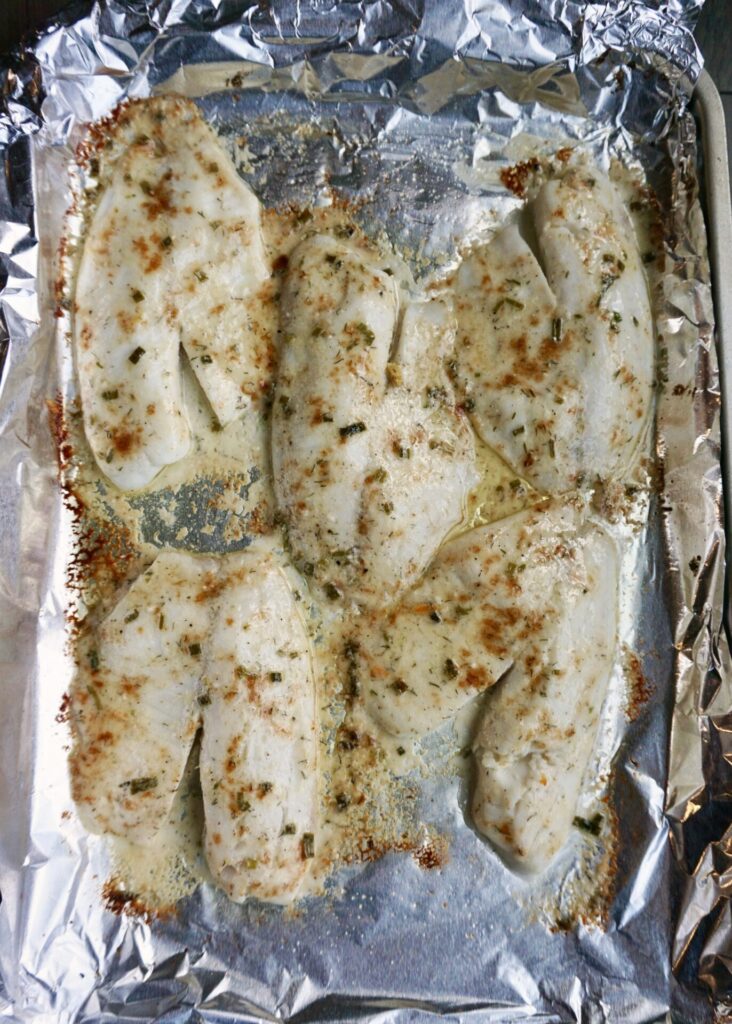
The second time around I made this recipe with tilapia (as pictured), which is much cheaper and I had some in the freezer. And guess what? Still absolutely delicious! Use high quality mayo and freshly grated Parmesan for the best flavor. A bit of lemon juice and green onion/chives balances out the richness. And a pinch of dill and cayenne to taste make it more interesting.

Broiled Parmesan-Crusted Tilapia (or Halibut)

INGREDIENTS

~1 lb. tilapia, halibut, or another flaky white fish
1/4 cup freshly grated Parmesan
1 Tbsp. butter, melted
1 Tbsp. mayonnaise
1 Tbsp. freshly squeezed lemon juice
1 Tbsp. chopped green onion or chives
pinch fresh or dried dill (or another herb such as parsley)
dash cayenne pepper, to taste
salt and freshly ground black pepper
extra lemon or herbs for garnish (optional)

DIRECTIONS

  1. Line a large baking pan or dish with aluminum foil. Lightly coat the foil with nonstick cooking spray. Place the fish fillets on the foil (making sure to pat them dry if needed), and season the fish with salt and freshly ground black pepper.
  2. In a medium bowl, stir to combine the Parmesan, butter, mayonnaise, lemon juice, green onion/chives, dill (or herb of choice) and cayenne pepper. Add a dash of salt and pepper.
  3. Spread the Parmesan mixture over the tops of the fillets, coating them evenly.
  4. Adjust the oven rack depending on the thickness of your fish fillets: If they are very thin the rack can be close to the top. If they are thicker, move the rack lower down so the tops don’t burn before the fillets cook through.
  5. Turn on the oven broiler to high.
  6. Place the pan under the broiler and cook until the topping is golden brown and the fish is just done and flakes easily with a fork. It should take anywhere from about 4-10 minutes, depending on the size of the fillets. (My thin tilapia fillets only took 4 minutes. When I’ve made halibut it takes a few minutes longer.)

Serves 3-4.

(Adapted from Spend with Pennis and AllRecipes)

Pan-Seared Salmon

September 16, 2020

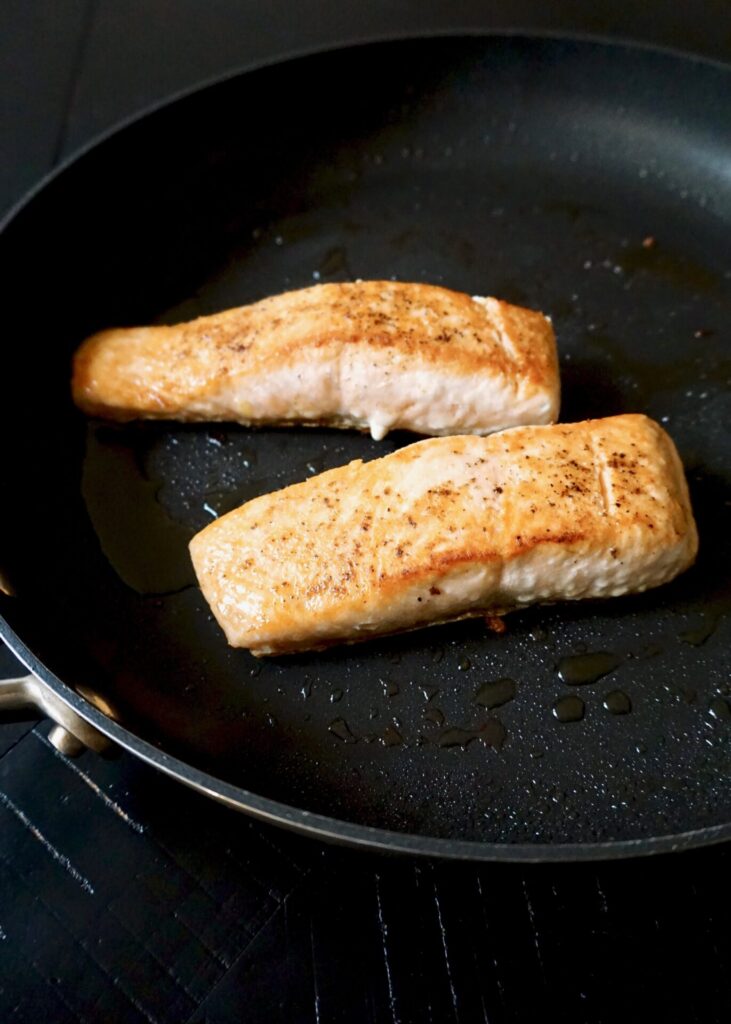
I’ve made salmon so many ways- roasted/baked, grilled, smoked, and broiled, but I’ve never pan-fried it before. And this recipe was just perfect! Searing the salmon in a bit of olive oil on a hot skillet creates a wonderful crust on the top and bottom and then you reduce the heat a bit and cook it until the middle is just cooked through and flakes easily. All you need to season the fish is some kosher salt and freshly ground black pepper. As the original recipe promised, it really is as delicious as the salmon you’d find at a fancy restaurant!

Pan-Seared Salmon

INGREDIENTS

1 Tbsp. extra-virgin olive oil
1/2 tsp. kosher salt
freshly ground black pepper
4 (6-oz.) salmon fillets, ~1-1/4 in thick (you can remove the skin, but it’s fine to leave it on)

DIRECTIONS

  1. Season the salmon with the salt and a few grinds of pepper. Heat the oil in a 12-inch nonstick skillet over medium-high heat until hot and shimmering. Cook the salmon, without moving, skin side up, until golden and crisp, about 4 minutes. Carefully flip the fillets and reduce the heat to medium. Continue cooking until done to your liking, 4 to 5 minutes more. Transfer to a platter and serve.

(Adapted from Once Upon a Chef)

Blackened Shrimp Tacos

August 12, 2020

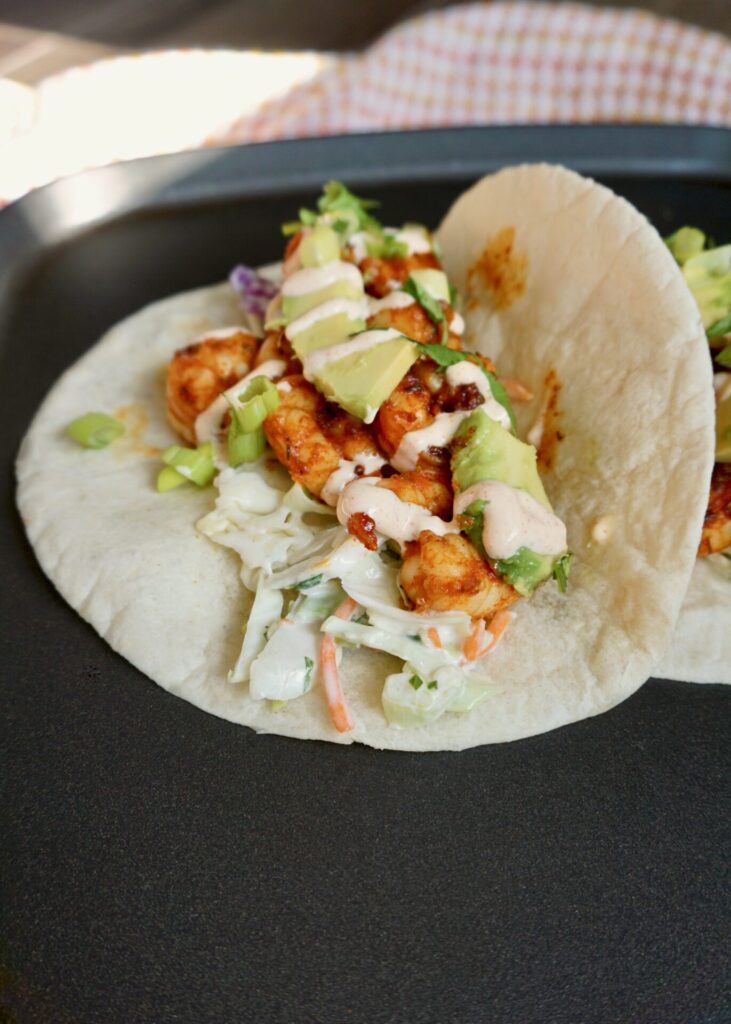
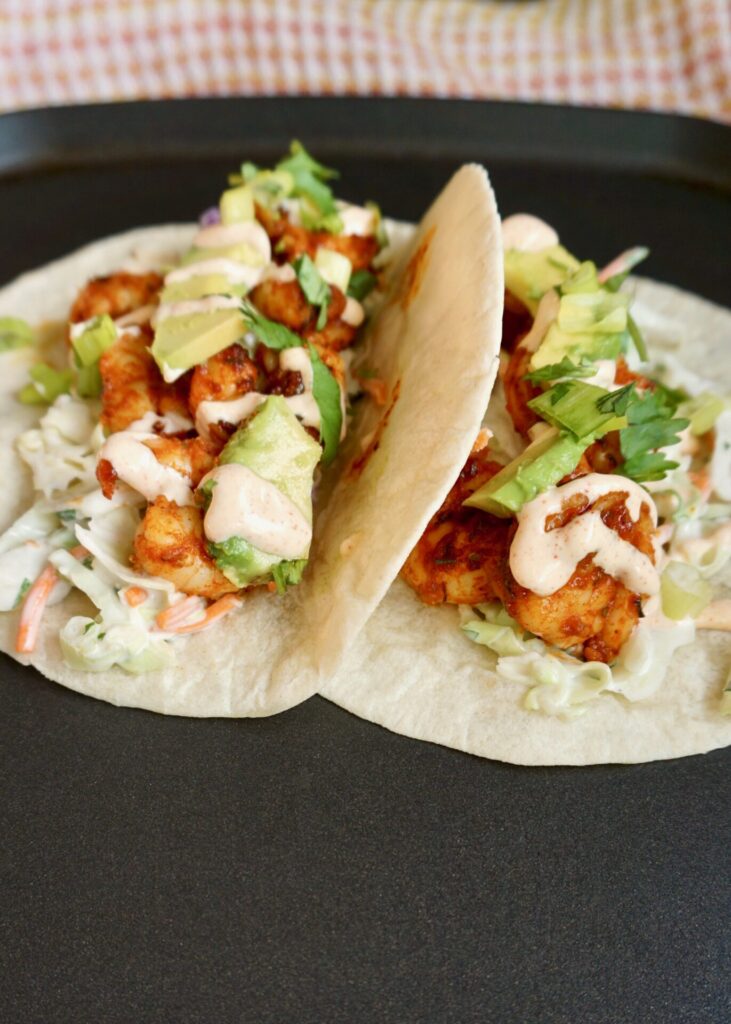
There are few foods we love more than good tacos. Bonus if they come from a truck! We tried a new taco truck in Seattle (actually, Renton) this weekend and it was one of the best we’ve had in the area. But I think my recently posted fish tacos and these shrimp tacos are better!

Notes:

Make the slaw and sauce and prep the other ingredients ahead of time. The shrimp cook really quickly so you need everything else ready to go.

I like to buy shrimp on the smaller size (I think these were 51/60 per lb. or something like that) so you can eat them in one bite.

The blackening seasoning has just the right amount of spice to make these interesting; combined with the creamy sauce and avocado it’s not too hot.

Smoked paprika is an amazing spice. You CAN NOT substitute regular paprika and get the same result. Also, make sure it’s not hot paprika because that would make these way too spicy!

The slaw is delicious on it’s own. (I had a hard time not eating it all from the bowl while I prepped the rest of the tacos!)

Corn tortillas are traditional but we prefer flour and that’s what I usually have on hand so that’s what I used.

Blackened Shrimp Tacos

INGREDIENTS

Coleslaw:
1/3 cup mayonnaise (I used half mayo and half plain Greek yogurt)
1/2 Tbsp. honey
1 tsp. Dijon mustard
1 tsp. red wine vinegar
1/4 tsp. salt
freshly cracked pepper, to taste
1/2 bag coleslaw mix (shredded cabbage and carrots)
3 green onions, sliced
~2 Tbsp. fresh cilantro, chopped (optional)

Smoky Garlic Lime Sauce:
1/3 cup mayonnaise (once again, I used half mayo and half plain Greek yogurt)
1/8 tsp. garlic powder
1/4 tsp. smoked paprika
1/8 tsp salt
1 Tbsp. lime juice

Blackening Seasoning:
1 Tbsp. smoked paprika
1 tsp. dried thyme
1 tsp. dried oregano
1/2 tsp. cumin
1/4 tsp. cayenne
1/4 tsp. garlic powder
1/4 tsp. onion powder
1/4 tsp. salt
freshly ground black pepper, to taste

Tacos:
1 lb. peeled and deveined shrimp
1 Tbsp. butter
1 clove garlic, minced
corn or flour tortillas (this recipe has a method for making crispy tortillas in the oven that would be great here!)
green onions, sliced
fresh cilantro, chopped
sliced avocado
lime wedges

DIRECTIONS

  1. To prepare the coleslaw dressing, mix together the mayonnaise, honey, Dijon, red wine vinegar, salt, and some freshly cracked pepper in a bowl. Place the coleslaw mix and sliced green onions (and cilantro, if using) in a bowl and add about 3/4 of the dressing. Stir until everything is coated in dressing, then add more dressing if desired. Refrigerate the slaw until ready to serve.
  2. To prepare the smoky garlic lime sauce, stir together the mayonnaise, garlic powder, smoked paprika, and lime juice in a small bowl. Save the other half of the lime to serve as wedges with the finished tacos.
  3. Heat a dry skillet over medium heat. Once the skillet is hot, toast the tortillas on each side until browned on the edges. Place the toasted tortillas on stacked on a plate and covered with a towel until ready to serve.
  4. Prepare the blackening seasoning by stirring together the smoked paprika, thyme, oregano, cumin, cayenne, garlic powder, onion powder, salt, and freshly cracked pepper in a bowl. Pour the seasoning over the shrimp and stir until the shrimp are coated.
  5. Add the butter and minced garlic to a large skillet. Cook over medium heat for about one minute, or until the garlic is fragrant and slightly softened. Add the seasoned shrimp and sauté just until the shrimp is firm (about 3-5 minutes). Remove the skillet from the heat to prevent over cooking the shrimp.
  6. To serve the tacos, place some coleslaw in each tortilla, top with shrimp, a drizzle of the smoky garlic lime sauce, avocado, and garnish with green onion and cilantro. Squeeze a wedge of fresh lime over top.

Serves 3-4.

Adapted from Budget Bytes