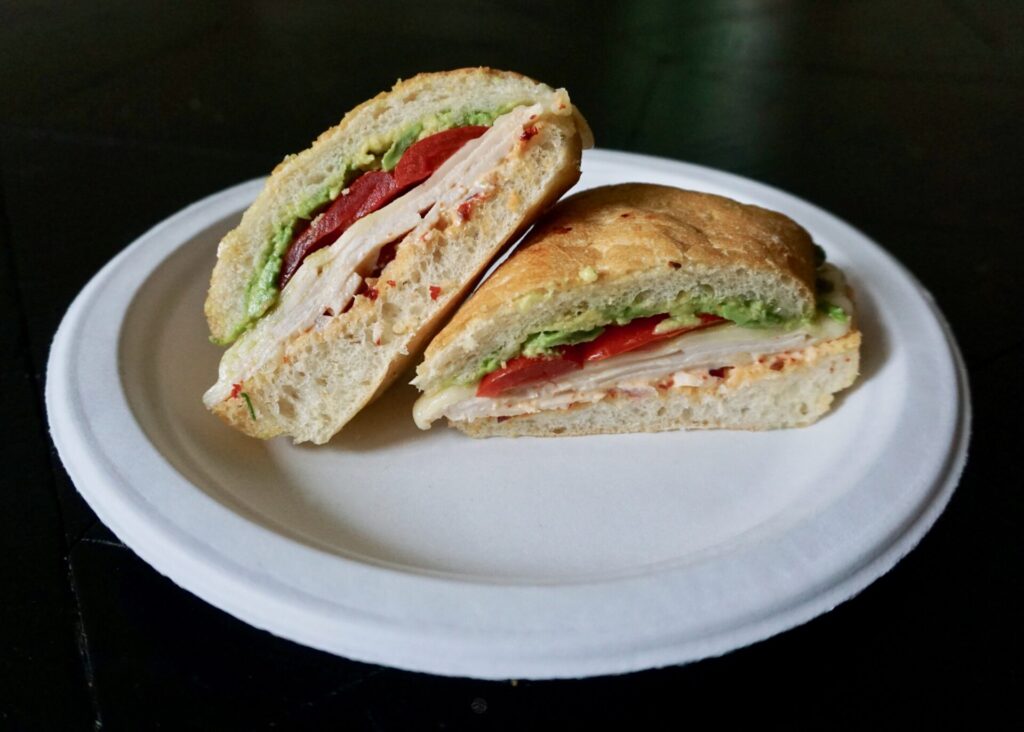
Turkey Avocado Sandwich with Chipotle Mayo

September 22, 2020

All of my favorite foods include carbohydrates with really good bread and pizza topping the list. Which must be why I love sandwiches so much as well! And all good sandwiches start with good bread. Even the best of sandwich fillings can be ruined by dry/dull/flavorless bread so always make the bread a priority in your sandwich building!

Today’s turkey sandwich is piled high on a chewy ciabatta roll, one half spread with a spicy chipotle mayo (the star of the show!) and the other half with mashed avocado. About that chipotle mayo (or aioli if you want to get fancy)… it’s so delicious. I promise it’s worth the effort. It adds a smoky garlicky heat to this sandwich and you’re going to want to spread it on everything. I went with Havarti cheese when I photographed this recipe but you can choose any mild cheese that melts well- I listed some suggestions below. The tomato and lettuce/spinach/arugula are optional add-ons. I chose tomato this time. I’m now realizing that adding bacon wouldn’t be a horrible idea… by all means throw some bacon on as well!

Turkey Avocado Sandwich with Chipotle Mayo

INGREDIENTS

Chipotle Mayo:
1/2 cup mayo
2 Tbsp. + 2 tsp. chipotle in adobo, minced
1 tsp. lime juice
1 Tbsp. fresh chopped chives
1 clove garlic, minced
salt and freshly ground black pepper, to taste

crusty white or wheat bread, sliced (I used ciabatta rolls)
roasted turkey, thinly sliced
cheese, thinly sliced (I used Havarti- Colby Jack, Provolone, Cheddar, and Gouda would also be delicious)
avocado, thinly sliced
salt and freshly ground black pepper
tomato, thinly sliced (optional)
lettuce/baby spinach/arugula (optional)

DIRECTIONS

  1. To make the chipotle mayo, in a small bowl whisk to combine all ingredients. Adjust salt and freshly ground black pepper to taste. (Or you can combine the ingredients in a food processor and process until smooth.)
  2. To make the sandwich, spread chipotle mayo on a slice of bread. Top with roasted turkey, cheese, tomato (if using), and lettuce/spinach/arugula (if using). Layer the avocado on a second slice of bread (I like to mash it down a bit with a fork so it doesn’t slide off the sandwich when I bite into it), season the avocado with a bit of salt and pepper, and place on top of the sandwich, avocado side down.
  3. If, like me, you prefer your sandwich served warm, grill the sandwich (or place open-faced under the broiler) until the cheese melts and the bread is golden and crisp, then slice and serve.

(Aioli adapted from Epicurious)

French Bread Rolls

September 18, 2020

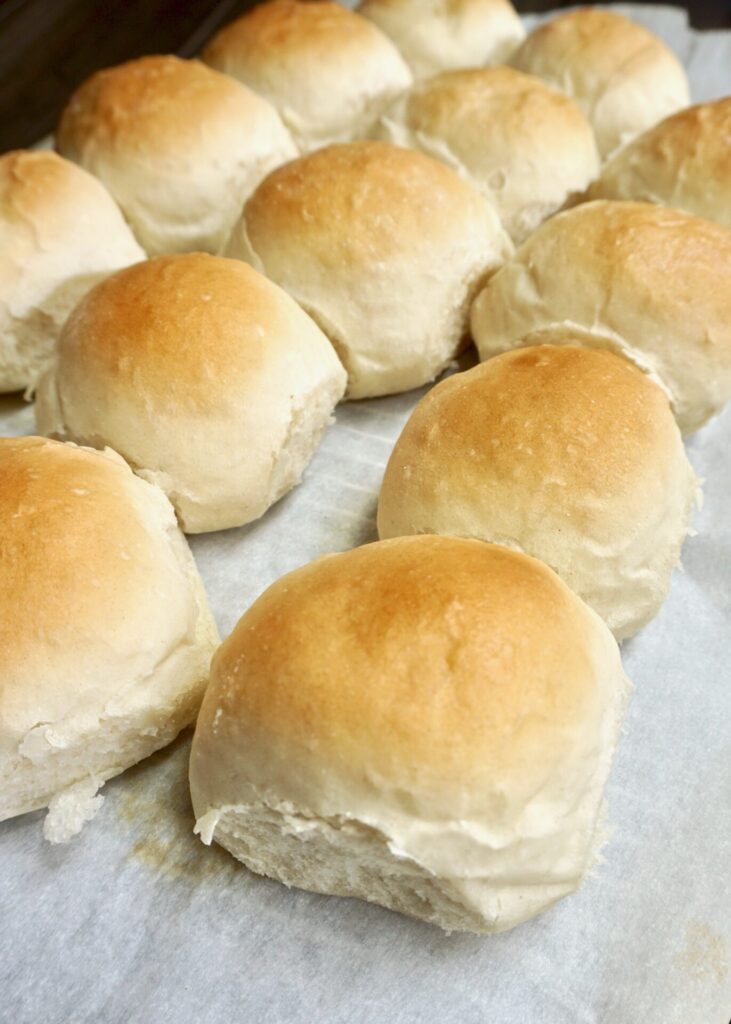
I’m still making my way through the pile (or rather, digital files) of recipes I came to love during my blogging absence. This is one of them I’ve made time and time again now and its debut is overdue. These fluffy soft rolls are similar to french bread in taste and texture. They’re naturally dairy-free (just don’t brush with butter at the end!) and adaptable to whole grains (I’d start by replacing half of the flour with whole wheat).

My tips for roll success:

I almost always knead by hand because I trust myself more than a mixer. There are instructions provided for either method though.

Don’t over-flour the dough! After kneading the dough should still be slightly sticky or “tacky”. If you use some whole wheat flour you’ll need less flour as you knead because whole wheat absorbs more water. No matter the type of flour you use, if you’re baking somewhere humid you might need more flour because the dough will be more wet.

I like these rolls best baked in a 9×13 pan- when they’re crammed together they’re less likely to dry out. And remove the rolls from the oven just when they turn golden brown. There’s nothing more disappointing than over-baked bread. (If you’re bread obsessed like I am, anyway.)

French Bread Rolls

INGREDIENTS

1 1/2 cups warm water
3/4 Tbsp. instant yeast (or 1 Tbsp. active dry yeast)
2 Tbsp. sugar or honey
2 Tbsp. neutral-flavored oil (such as canola, grapeseed, or olive oil)
1 tsp. salt
3 1/2 – 4 cups all-purpose flour

DIRECTIONS

  1. In the bowl of a stand mixer fitted with the dough hook or in a large bowl by hand, combine the warm water, instant yeast, sugar, oil, salt and 2 cups of the flour. If you are using active dry yeast instead of instant yeast, let the yeast proof in the warm water and sugar for about 3-5 minutes until it is foamy and bubbly before adding the oil, salt and flour.
  2. Begin mixing, and continue to add the rest of the flour gradually until the dough has pulled away from the sides of the bowl. Begin kneading the dough for 4-5 minutes in a stand mixer (7-9 minutes by hand).
  3. The dough should be soft and smooth but still slightly tacky to the touch. After a few minutes of kneading, stop the mixer and grab a small piece of dough to test if it needs more flour or not. It might leave a little bit of sticky residue on your fingers, but if you can roll it into a small ball without it sticking all over to your hands, it is good to go. If not, gradually add a bit more flour as needed.
  4. Lightly grease a container or large bowl with nonstick cooking spray, and place the kneaded dough in the container.
  5. Cover the bowl with lightly greased plastic wrap or a large tea towel. Let the dough rise until it has doubled (this usually takes about an hour, depending on the warmth of the kitchen).
  6. Lightly punch down the dough and turn it out onto a lightly greased countertop.
    Divide the dough into 12-15 equal pieces, and form the dough into round balls.
  7. Place the rolls in a lightly greased 9X13-inch pan or on a large, rimmed baking sheet lined with parchment or lightly greased. Space the rolls about 1/2- to 1-inch apart.
    Cover the rolls with lightly greased plastic wrap taking care not to pin the plastic wrap under the baking sheet or else the rolls will flatten while rising. Let the plastic wrap gently hang over the sides of the pan to fully cover the rolls but not press them down.
  8. Let the rolls rise until very puffy and doubled, about 45 minutes to 1 hour.
  9. Preheat the oven to 400 degrees. Bake for about 15 minutes until lightly browned and cooked through.
  10. Immediately out of the oven, brush with butter (optional).

Makes 12-15 rolls.

(Adapted from Mel’s Kitchen Cafe)

Pan-Seared Salmon

September 16, 2020

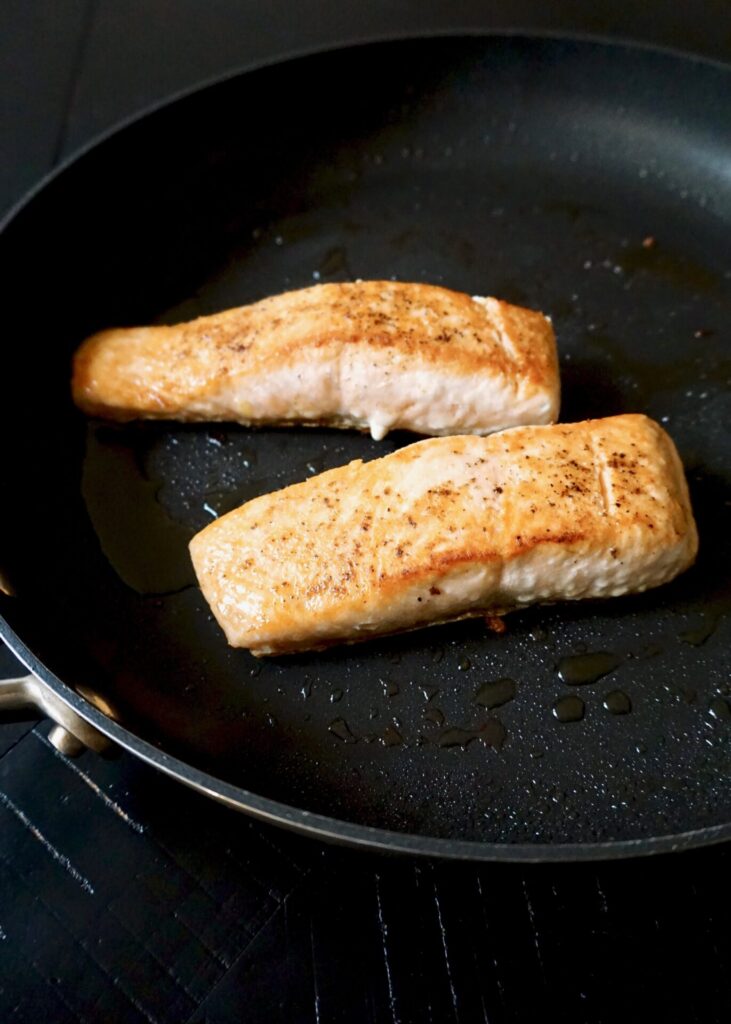
I’ve made salmon so many ways- roasted/baked, grilled, smoked, and broiled, but I’ve never pan-fried it before. And this recipe was just perfect! Searing the salmon in a bit of olive oil on a hot skillet creates a wonderful crust on the top and bottom and then you reduce the heat a bit and cook it until the middle is just cooked through and flakes easily. All you need to season the fish is some kosher salt and freshly ground black pepper. As the original recipe promised, it really is as delicious as the salmon you’d find at a fancy restaurant!

Pan-Seared Salmon

INGREDIENTS

1 Tbsp. extra-virgin olive oil
1/2 tsp. kosher salt
freshly ground black pepper
4 (6-oz.) salmon fillets, ~1-1/4 in thick (you can remove the skin, but it’s fine to leave it on)

DIRECTIONS

  1. Season the salmon with the salt and a few grinds of pepper. Heat the oil in a 12-inch nonstick skillet over medium-high heat until hot and shimmering. Cook the salmon, without moving, skin side up, until golden and crisp, about 4 minutes. Carefully flip the fillets and reduce the heat to medium. Continue cooking until done to your liking, 4 to 5 minutes more. Transfer to a platter and serve.

(Adapted from Once Upon a Chef)

Orzo with Spinach and Parmesan

September 15, 2020

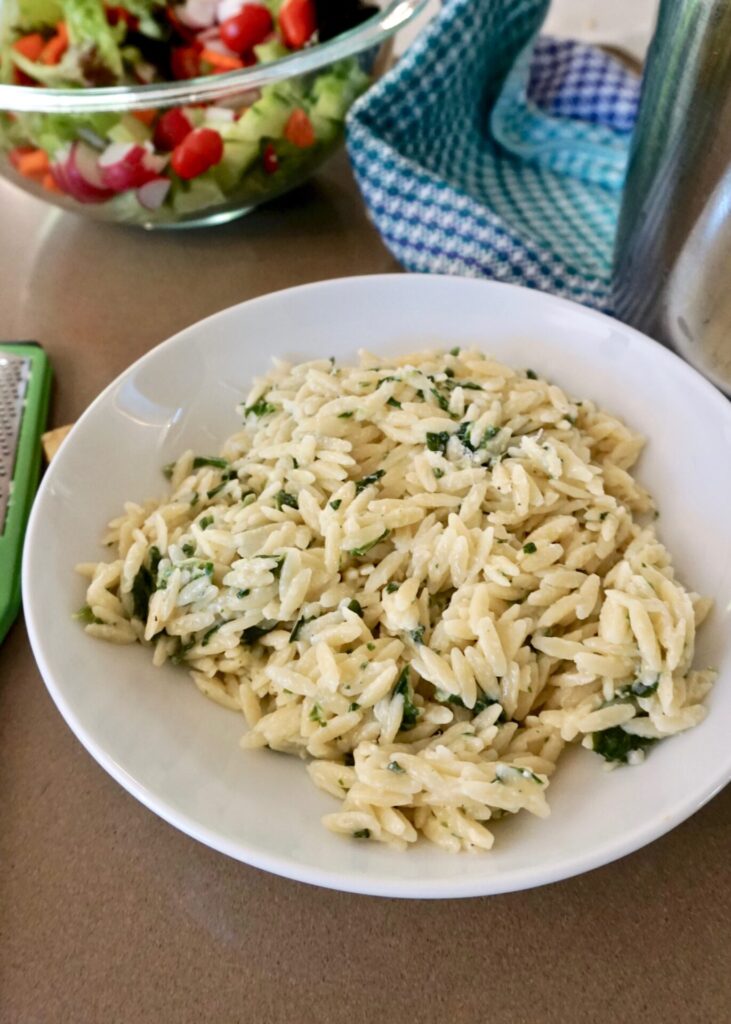
Easy cheesy pasta dishes are always welcome here. This orzo has garlic + spinach + Parmesan and a pinch of red pepper flakes if, like me, you can’t resist adding some kick. Serve with some browned chicken sausage or meatballs (or even stir them in!) for extra protein. This go-to mixed green salad would be perfect on the side.

Orzo with Spinach and Parmesan

INGREDIENTS

16 oz. (1 lb.) orzo pasta
1 Tbsp. butter
1 Tbsp. olive oil
2 cloves garlic, minced
1 Tbsp. all-purpose flour
1 cup of milk (I used whole milk)
1 1/2 packed cups baby spinach (I used the same amount of frozen chopped spinach, measured before being thawed)
1 cup freshly grated Parmesan cheese + extra for serving
salt and freshly ground black pepper, to taste
pinch crushed red pepper flakes, to taste (optional)

DIRECTIONS 

  1. Cook orzo according to directions on the box. Before draining, reserve some of the pasta water to add at the end, then drain and set aside.
  2. In a large pot over medium high heat, cook garlic in butter and olive oil until fragrant, about 1 minute.
  3. Sprinkle flour into the pot then gently whisk in the milk. Let mixture thicken, about 1-2 minutes then add in the spinach and Parmesan cheese.
  4. Add the orzo pasta to the pot, stir to coat and incorporate. Add some of the reserved pasta water, if needed, to thin the sauce and make it more creamy. Season with salt and pepper, and crushed red pepper flakes, to taste.
  5. Serve hot and top with extra Parmesan cheese, if desired.

(Adapted from Table for Two)


Omelet Tortilla Wrap

September 14, 2020

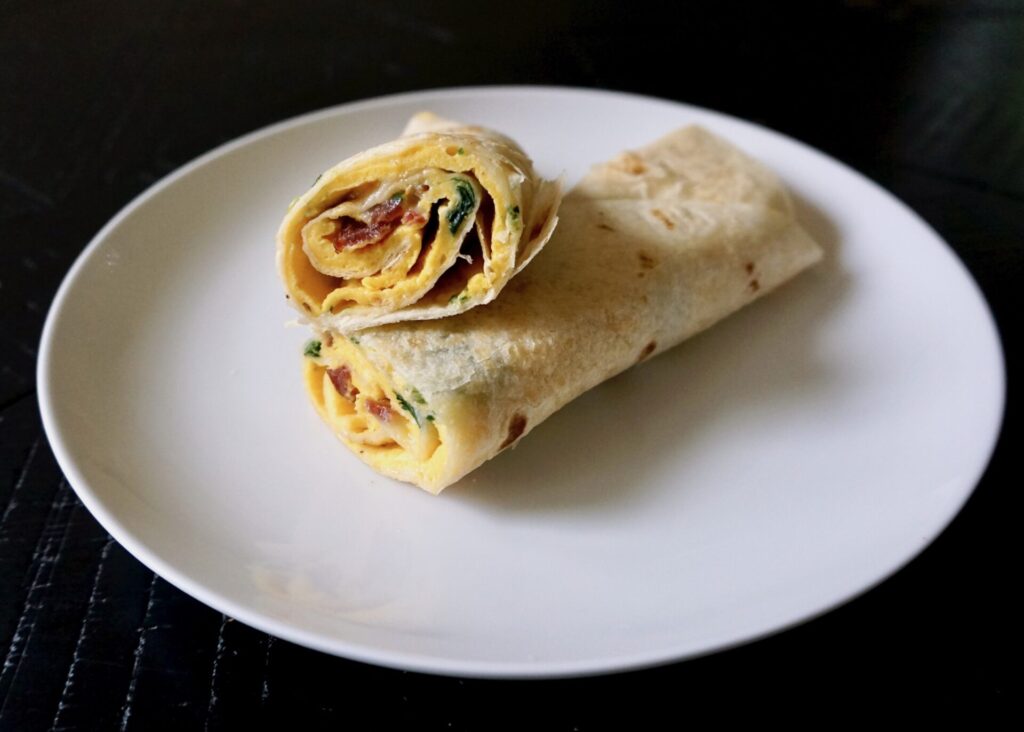
I first saw this omelet-tortilla concoction on a cooking show (which is the one type of television that I can tolerate and convince my kids to watch alongside me- especially if it’s the Great British Baking Show!). And when I saw this egg-wrap fusion made on the screen in front of me I had to bring it to life! Then I found this recipe by Skinnytaste that is very similar and made it my own.

After making these wraps several times I have some tips for success…

Most importantly, prep everything ahead of time. The eggs need to be whisked and seasoned, and the fillings (meat, veggies, cheese) chopped/grated/etc. ahead of time so you can grab them and go. These omelet-tortilla wraps cook quickly and you won’t have time to pause once you stop! I’m usually make 5+ in a row so it’s extra important everything is ready to go. On that note, if you need 5 wraps, times the recipe by 5. That means you’d need to whisk 10 eggs and increase the seasonings accordingly. I whisk the eggs all together and just try to pour in an approximately even amount for each one. No worries if it’s not perfect.

What you put in your omelet is totally up to you! I’ve stuffed it with only veggies and made it with bacon as well. I’ve used cheese every time because I love cheese so much, but just leave it out if you’re going for dairy-free. Hot sauce and salsa are options for serving on the side.

Omelet Tortilla Wrap

INGREDIENTS

2 large eggs, beaten
¼ tsp. kosher salt
pinch freshly ground black pepper
pinch fresh minced garlic or garlic powder (optional)
1 (8 or 10-inch) tortilla

Optional Additions:
bacon, cooked and crumbled (or sliced ham, Canadian bacon, etc.)
thinly sliced mushroom (or another vegetable- I’ve also made it with sun-dried tomatoes and that is especially delicious!)
chopped baby spinach (or another green/herb)
grated cheese (I used Pepper Jack)

hot sauce or salsa, for serving (optional)

DIRECTIONS

  1. In a small bowl whisk together the eggs, salt, pepper, and garlic (if using) and set aside.
  2. Heat a large (at least the size of your tortilla) non-stick skillet over medium heat. Lightly coat with cooking spray. Pour in the egg mixture and swirl the pan so the eggs evenly coat the bottom of the pan.
  3. Top the eggs with your add-ins of choice (I used crumbled bacon, chopped baby spinach, sliced mushrooms, and Pepper Jack cheese). Then place the tortilla on top of the omelet and press gently with your hands, using the uncooked part of the egg as a sort-of glue. Allow to set for about 10 seconds.
  4. Run a flat spatula along the outside of the omelet, carefully releasing the edge to prepare for flipping. Quickly flip the omelet and cook, tortilla side down for about 1 minute more, until the eggs are cooked through and the tortilla is browned and beginning to crisp.
  5. Transfer to a plate and carefully roll up the tortilla. Place seam side down and cut in half. Serve with fresh salsa or hot sauce, if desired.

Makes 1 wrap, but recipe can be repeated as many times as desired.

(Adapted from SkinnyTaste)