Salsa Verde Chicken Tostadas

August 19, 2020

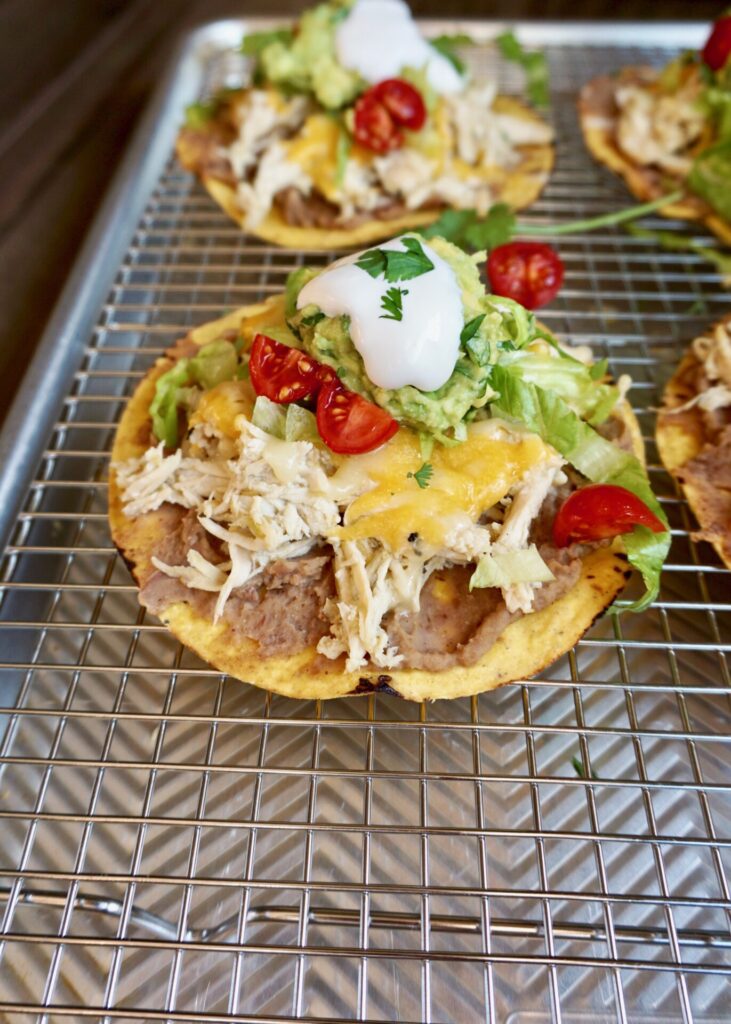
I’ve been making salsa verde chicken (throw some chicken breast or thighs in the slow cooker with a few spices and jar of salsa verde and a few hours later it’s done!) for years now and using it in burritos/tacos/quesadillas but this is the first time I’ve made tostadas and it was a big hit! And I love the simple refried bean recipe I found to top the tostadas. We can’t unanimously agree on a brand of canned refried beans but we all liked these! (This recipe uses canned pinto beans cooked with some garlic, olive oil, and a few spices to make your own and it’s quick and easy.) I bought the tostada shells but you can certainly make your own- I provided a link to a recipe below.

Salsa Verde Chicken Tostadas

INGREDIENTS

Slow Cooker Salsa Verde Chicken:
1 1/2 lbs. boneless skinless chicken breast (or thighs)
1 12 oz. jar salsa verde (I use Trader Joe’s brand)
1/4 tsp. garlic powder
1/8 tsp. cumin
1/8 tsp. Mexican oregano
pinch cayenne
salt and freshly ground black pepper

Tostadas:
tostada shells (I used Guerrero brand, here is a recipe to make your own)
refried beans (canned or see recipe below)
grated cheese (Cheddar, Pepper/Colby Jack, Mexican blend, etc.)
shredded lettuce
guacamole or sliced avocado
diced tomatoes or pico de gallo
sliced green onion
sour cream
chopped cilantro (optional)
pickled jalapeno (optional)
lime wedges, for serving

Refried Beans:
2 (16 oz.) cans pinto beans
2 Tbsp. olive oil
1 clove garlic
1/2 tsp. chili powder
1/2 tsp. coriander
1 tsp. cumin
salt and freshly ground black pepper (~1/2 tsp. each or to taste)
pinch cayenne pepper (to taste)

DIRECTIONS

Slow-Cooker Salsa Verde Chicken:

  1. Season chicken with garlic powder, cumin, oregano, a pinch of cayenne and salt and pepper and place in the bottom of the slow cooker. Cover with salsa verde, cover and cook HIGH 2 hours.
  2. Remove chicken from the slow cooker and shred with 2 forks. Remove 2/3 cup of liquid from the slow cooker, and discard. Place shredded chicken back into the crock pot with remaining salsa, adjust seasoning to taste if needed and keep warm.

Refried Beans:

  1. While chicken is cooking, make the refried beans. Place two tablespoons of olive oil into a saucepan over medium low heat. Add the garlic and cook for about 1 minute, be careful to not burn garlic. Add two cans of pinto beans, undrained (I drained and rinsed my beans and then added about 1/2 cup water back in), to the garlic mixture. Add chili powder, coriander, cumin, cayenne, salt and pepper to the beans. Mix well. Cook for about 10 minutes on medium heat. Adjust seasonings to taste.
  2. Using a potato masher, smash the beans until fairly smooth. (I used an immersion blender and blended until smooth, adding some more water to thin them.) The beans will continue to thicken as they cool. Remove beans from heat, place in a bowl or keep warm until ready to serve.

Tostadas:

  1. Preheat the oven to 350°F.
  2. Place tostada shells on a baking sheet. When the oven is hot, spread some refried beans on top of each tostada shell, top with salsa verde chicken and sprinkle with grated cheese. Bake until the cheese is melted and the shells are crisp, about 4 minutes.
  3. Remove tostadas from the oven and top with lettuce, guacamole/avocado, tomatoes/pico, green onion, sour cream, cilantro, pickled jalapeno, etc. and serve with a squeeze of lime.

Serves 6.

Adapted from Skinnytaste and A Bountiful Kitchen

Avocado, Arugula, and Goat Cheese Panini

August 17, 2020

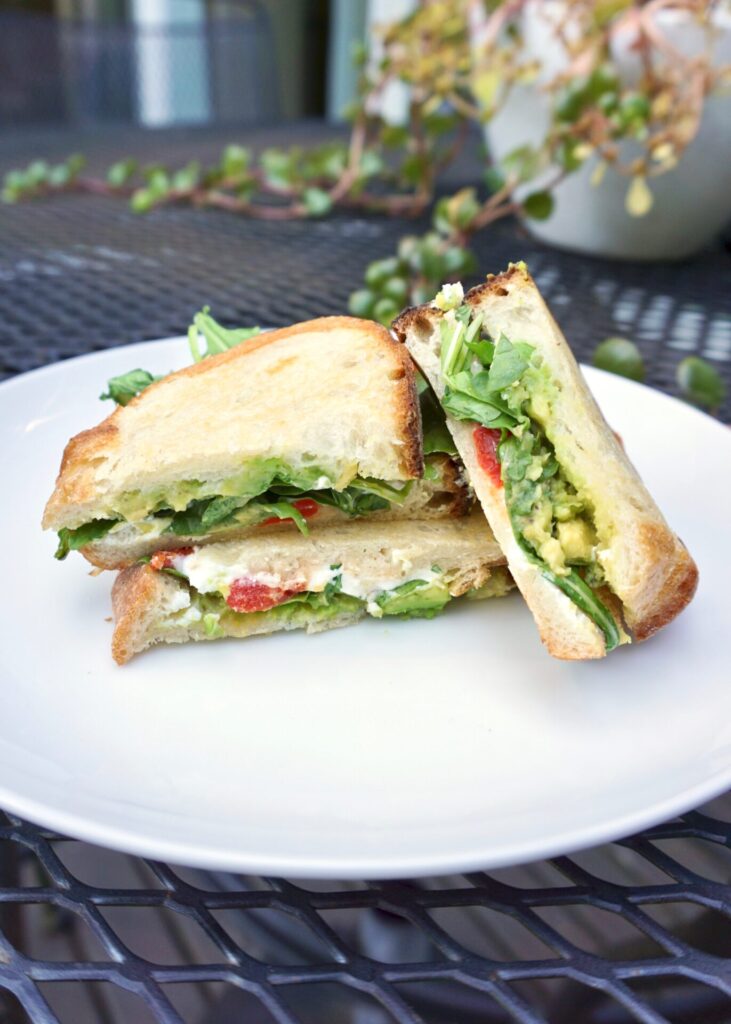
Today’s recipe is inspired by the same cafe as this turkey havarti panini. They had an avocado goat cheese sandwich on the menu that also become a part of my regular order. My girls loved it too. And it is so simple to make at home! Sliced white or multigrain bread (I recommend sourdough) is spread with creamy goat cheese, ripe avocado (don’t skip seasoning it with some sea salt and pepper flakes), topped with roasted red pepper and arugula, and grilled until melty and crisp. You can add sliced turkey or bacon. Or replace the roasted red pepper with sliced tomato or sun-dried tomato. All would be delicious!

Avocado Goat Cheese Panini

INGREDIENTS

crusty white or multigrain bread, sliced (I use sourdough)
avocado, sliced
goat cheese (I love the creamy goat cheese spread from Trader Joes)
baby arugula
roasted red pepper, sliced (I have also used spicy Mama Lil’s peppers, or use sliced tomato or sun-dried tomatoes)
salt and freshly ground black pepper/crushed red pepper flakes
olive oil, for grilling

DIRECTIONS

  1. Preheat a pan on the stove or panini press to medium heat. Coat with some olive oil or nonstick cooking spray.
  2. Spread avocado on a slice of bread. (I like to mash it a bit with a fork so it doesn’t slide around.) Season with salt and pepper and/or crushed red pepper flakes. Top with roasted red pepper and arugula.
  3. Spread goat cheese on a second slide of bread and place on top of the sandwich.
  4. Grill on the preheated pan or panini press, flipping halfway through if necessary, until the bread is crisp and golden brown and the goat cheese has melted. (If you’re using a regular pan you can use a lid or second pan to press the sandwich down while grilling and achieve the panini effect.) Slice and serve.

Berries and Cream Ice Cream

August 13, 2020

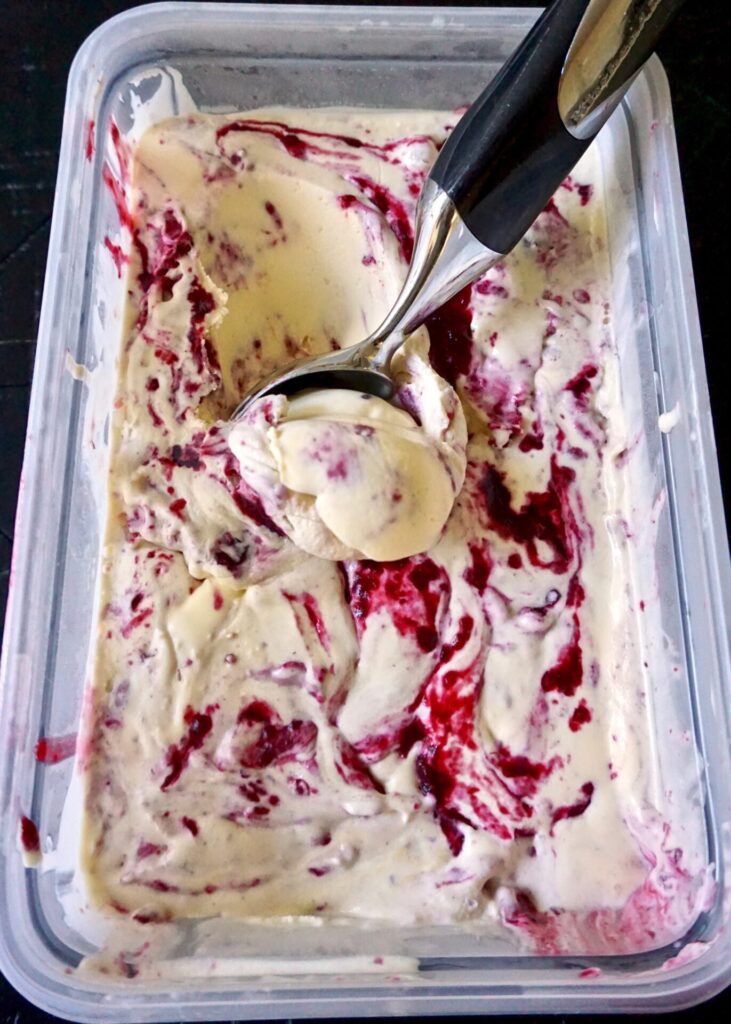
Lots of sunshine, days at the lake, and local berries are the best parts of summer around Seattle. We’ve visited farms and picked our own strawberries, blueberries, and raspberries this season. And we can find blackberries growing wild just about anywhere we walk this month. (Including blackberry vines creeping under/over/through our fence!) When we pick berries I always freeze a few so we can enjoy them year round. This ice cream uses fresh or frozen berries to make a berry sauce that gets swirled in a vanilla custard base for a creamy decadent treat!

Homemade ice cream is not hard. It just takes some time and preparation. First, make sure the bowl of your ice cream maker is frozen. That step is essential. Then you’ll need to prepare the custard base and berry sauce the day, or at least morning ahead so it has time to chill. And after the ice cream is churned it needs another 4 or so hours in the freezer to set. You can eat it straight out of the ice cream machine but it’ll be very soft and melt almost instantly. By all means sneak a taste (or lick the bowl clean like my kids always request to) but I recommend letting it firm up in the freezer before serving so it’s scoop-able.

NOTE: The addition of vanilla or almond extract here is optional. I went with vanilla but almond and berries are a heavenly combination. If you leave the extract out even more of that berry flavor will shine through!

Berries and Cream Ice Cream

INGREDIENTS

2 cups heavy cream
1 cup whole milk (2% also works)
1 1/4 cups sugar
6 egg yolks
1 tsp. vanilla extra OR 1/4 tsp. almond extract (optional)
16 oz. fresh or frozen berries (I used approx. equal parts strawberries, raspberries, blackberries, and blueberries)
1 Tbsp. cornstarch + 1 Tbsp. water
1/2 cup brown sugar
squeeze lemon juice

DIRECTIONS

  1. In a saucepan over medium low heat, combine the heavy cream, milk, and sugar. Stir occasionally, heating the mixture until bubbles form around the edges. Remove from heat.
  2. Meanwhile, whisk 6 egg yolks together in a bowl vigorously until pale yellow. After you have removed the cream mixture from heat, remove a few tablespoons of the hot cream mixture from the pan, and slowly, whisking constantly, pour the hot cream mixture into the eggs. Do not add the eggs straight or they will scramble at the bottom. Once you have added about 3 tablespoons of the hot mixture return the pan with the cream mixture to medium-low heat and slowly whisk in the entire egg mixture. Heat, stirring constantly, until thickened. (You should be able to dip the back of a spoon into the mixture and the cream should coat the back of the spoon. You can test this by dragging your finger through the cream on the back of the spoon and if it leaves a trail you’re done.) Don’t cook hotter than 160 degrees.
  3. Remove from heat and chill in the refrigerator (for several hours or overnight).
    Once the mixture is chilled, freeze according to your ice cream maker’s instructions (a 4-5 quart machine).
  4. To make the berry mixture, add the berries, brown sugar, and a squeeze of lemon juice to a sauce pan and cook on medium low heat until the berries break down slightly. Combine the cornstarch and water in a small bowl and add to the berry mixture. Continue to simmer until the berries thicken to a sauce. Remove from a saucepan to a bowl and refrigerate until completely cool (for several hours or overnight). 
  5. When the ice cream is almost done churning, take a spoonful of berry mixture and drizzle it into the ice cream machine. Repeat with about half of the mixture (you can add as much or as little berry mixture as you want, the remainder can be served alongside or saved for pancakes/waffles/etc!).
  6. Transfer to a freezer-safe container a few scoops at a time, and freeze for at least four hours before serving. 

Adapted from Oh Sweet Basil

Blackened Shrimp Tacos

August 12, 2020

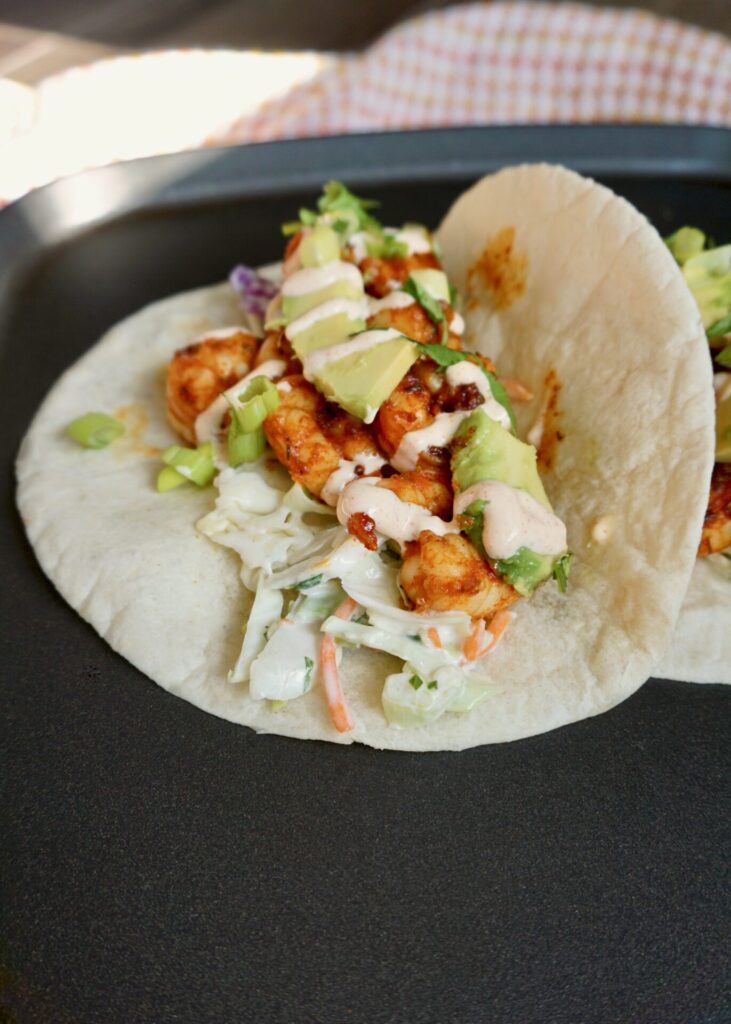
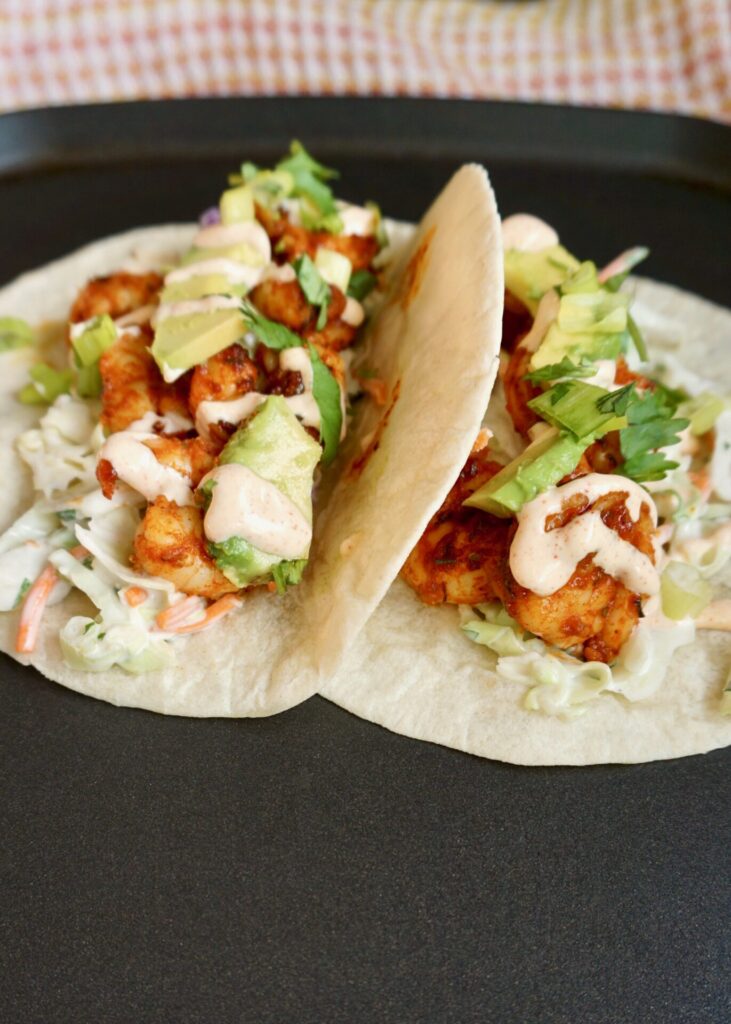
There are few foods we love more than good tacos. Bonus if they come from a truck! We tried a new taco truck in Seattle (actually, Renton) this weekend and it was one of the best we’ve had in the area. But I think my recently posted fish tacos and these shrimp tacos are better!

Notes:

Make the slaw and sauce and prep the other ingredients ahead of time. The shrimp cook really quickly so you need everything else ready to go.

I like to buy shrimp on the smaller size (I think these were 51/60 per lb. or something like that) so you can eat them in one bite.

The blackening seasoning has just the right amount of spice to make these interesting; combined with the creamy sauce and avocado it’s not too hot.

Smoked paprika is an amazing spice. You CAN NOT substitute regular paprika and get the same result. Also, make sure it’s not hot paprika because that would make these way too spicy!

The slaw is delicious on it’s own. (I had a hard time not eating it all from the bowl while I prepped the rest of the tacos!)

Corn tortillas are traditional but we prefer flour and that’s what I usually have on hand so that’s what I used.

Blackened Shrimp Tacos

INGREDIENTS

Coleslaw:
1/3 cup mayonnaise (I used half mayo and half plain Greek yogurt)
1/2 Tbsp. honey
1 tsp. Dijon mustard
1 tsp. red wine vinegar
1/4 tsp. salt
freshly cracked pepper, to taste
1/2 bag coleslaw mix (shredded cabbage and carrots)
3 green onions, sliced
~2 Tbsp. fresh cilantro, chopped (optional)

Smoky Garlic Lime Sauce:
1/3 cup mayonnaise (once again, I used half mayo and half plain Greek yogurt)
1/8 tsp. garlic powder
1/4 tsp. smoked paprika
1/8 tsp salt
1 Tbsp. lime juice

Blackening Seasoning:
1 Tbsp. smoked paprika
1 tsp. dried thyme
1 tsp. dried oregano
1/2 tsp. cumin
1/4 tsp. cayenne
1/4 tsp. garlic powder
1/4 tsp. onion powder
1/4 tsp. salt
freshly ground black pepper, to taste

Tacos:
1 lb. peeled and deveined shrimp
1 Tbsp. butter
1 clove garlic, minced
corn or flour tortillas (this recipe has a method for making crispy tortillas in the oven that would be great here!)
green onions, sliced
fresh cilantro, chopped
sliced avocado
lime wedges

DIRECTIONS

  1. To prepare the coleslaw dressing, mix together the mayonnaise, honey, Dijon, red wine vinegar, salt, and some freshly cracked pepper in a bowl. Place the coleslaw mix and sliced green onions (and cilantro, if using) in a bowl and add about 3/4 of the dressing. Stir until everything is coated in dressing, then add more dressing if desired. Refrigerate the slaw until ready to serve.
  2. To prepare the smoky garlic lime sauce, stir together the mayonnaise, garlic powder, smoked paprika, and lime juice in a small bowl. Save the other half of the lime to serve as wedges with the finished tacos.
  3. Heat a dry skillet over medium heat. Once the skillet is hot, toast the tortillas on each side until browned on the edges. Place the toasted tortillas on stacked on a plate and covered with a towel until ready to serve.
  4. Prepare the blackening seasoning by stirring together the smoked paprika, thyme, oregano, cumin, cayenne, garlic powder, onion powder, salt, and freshly cracked pepper in a bowl. Pour the seasoning over the shrimp and stir until the shrimp are coated.
  5. Add the butter and minced garlic to a large skillet. Cook over medium heat for about one minute, or until the garlic is fragrant and slightly softened. Add the seasoned shrimp and sauté just until the shrimp is firm (about 3-5 minutes). Remove the skillet from the heat to prevent over cooking the shrimp.
  6. To serve the tacos, place some coleslaw in each tortilla, top with shrimp, a drizzle of the smoky garlic lime sauce, avocado, and garnish with green onion and cilantro. Squeeze a wedge of fresh lime over top.

Serves 3-4.

Adapted from Budget Bytes

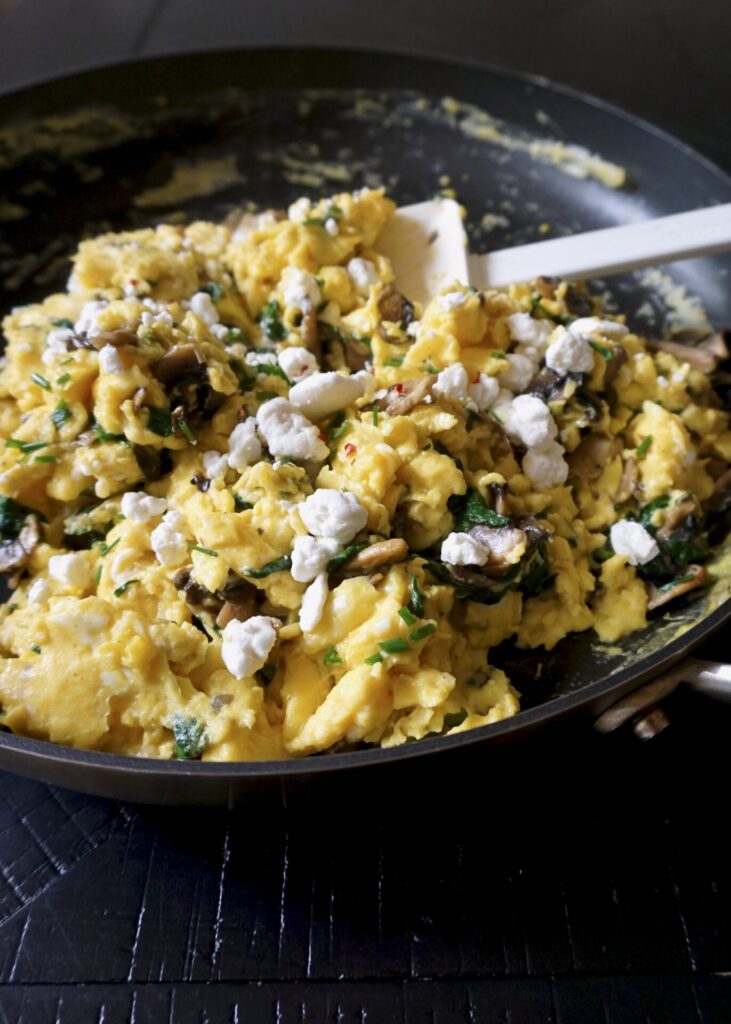
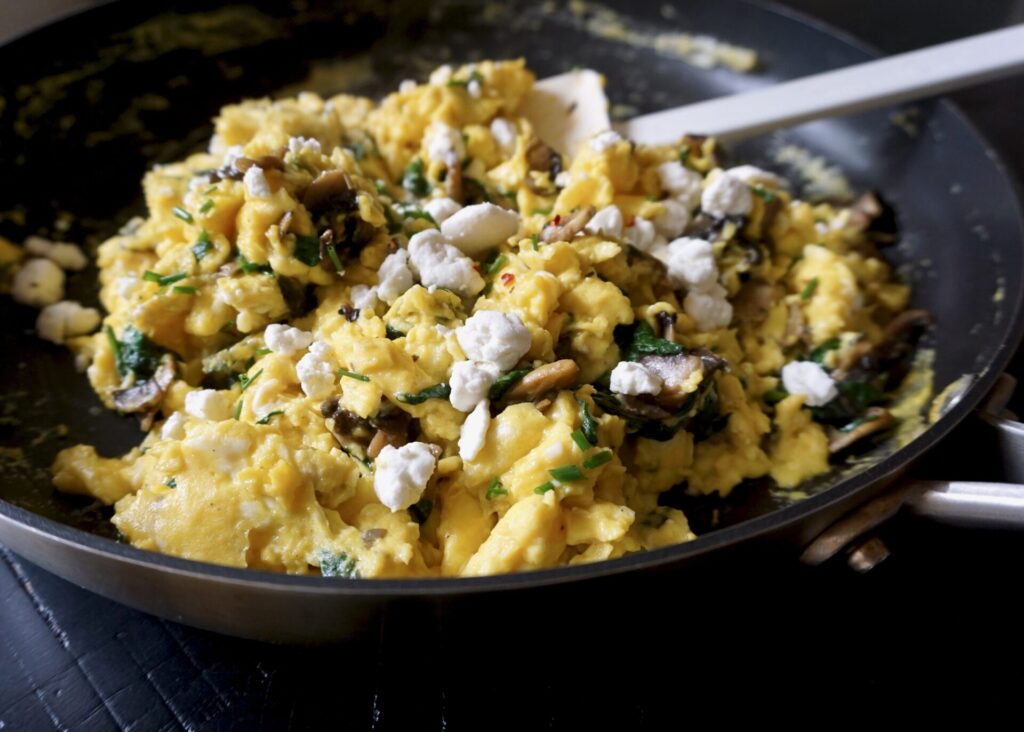
Mushroom and Spinach Scramble with Goat Cheese

August 11, 2020

Scrambles are a favorite easy breakfast/lunch/dinner around here. I’ve tried making omelets for five and it takes way too long and I’m much better at cooking eggs just right if they’re scrambled. So grab your largest skillet (I used a 12-inch here to fit a dozen eggs) and let’s get started. This scramble features mushrooms and spinach (also great in grilled cheese) and goat cheese. My kids fight over those goat cheese crumbles. But you can mix it up with feta or Parmesan, etc!

The secret to soft scrambled eggs is cooking them low and slow. And I prefer to cook the vegetables first, then remove them from the pan and clean it before starting the eggs. The mushrooms can turn the eggs a murky brown color if you don’t clean up a bit after cooking them. The eggs will still taste fine, but they’re less appealing. Add a bit of crushed red pepper for kick and fresh snipped chives before serving.

Mushroom and Spinach Scramble with Goat Cheese

INGREDIENTS

1 Tbsp. olive oil
8 oz. button or cremini mushrooms
2 cloves garlic, minced
pinch crushed red pepper flakes
3-4 cups baby spinach, chopped
1/2 tsp. salt + 1/2 tsp. black pepper, divided
1 Tbsp. butter
8-12 eggs (12 if you want more egg to veggie ratio)
2 Tbsp. milk
1/3 cup crumbled goat cheese (or feta, Boursin, or Parmesan would all be great options)
pinch crushed red pepper flakes
fresh chives, chopped

DIRECTIONS

  1. In a bowl, whisk together the eggs, milk, and half of the salt and pepper. Set aside.
  2. Heat oil in large non-stick skillet set over medium heat; cook mushrooms, garlic, pepper flakes, and remaining salt and pepper for 6 to 8 minutes or until mushrooms are golden and tender. Stir in spinach; cook for 2 to 3 minutes or until spinach is wilted.
  3. Remove the skillet from the heat and remove the vegetables from the skillet to a plate or bowl. Drain any extra liquid from the spinach-mushroom mixture and wipe the skillet clean with a paper towel.
  4. Add the butter to the skillet and return it to medium-low heat. Add the eggs, and as they begin to set gently move the spatula across bottom and side of skillet to form large, soft curds. When the eggs are about halfway done cooking, add the spinach-mushroom mixture back to the skillet and continue cooking just until the eggs are thickened and no visible egg liquid remains. Sprinkle with goat cheese and chives. Season to taste with more salt and pepper, if necessary, and another pinch red pepper flakes, to taste. Serve immediately.

Serves 4-6.

Adapted from Eggs