I’m not a fast food fan. Occasionally my husband and kids can convince me to hit up Chick-Fil-a and while I don’t love the chicken, I do think their Chick-Fil-a sauce is really good. So I was excited when I found this recipe, which is so simple and just as delicious! Pair it with baked chicken tenders or grilled chicken or pick up a rotisserie. It’s also great on a chicken sandwich, as dip for fries (especially the sweet potato variety), or spread on a burger. (And if you’re wondering, that salad pictured in the background is my Spicy Southwest Slaw. Yum.)
Copycat Chick-Fil-a Sauce
INGREDIENTS
1/4 cup mayonnaise (I usually use half mayonnaise, half 2% plain Greek yogurt and add a pinch of salt and pepper) 1 tsp. yellow mustard 1/2- 1 Tbsp. honey (I use 1/2 Tbsp.) 1 Tbsp. bbq sauce
DIRECTIONS
In a medium bowl whisk all ingredients together. Refrigerate until ready to serve.
Serve with chicken nuggets/tenders, grilled chicken, or with fries or on a burger, etc!
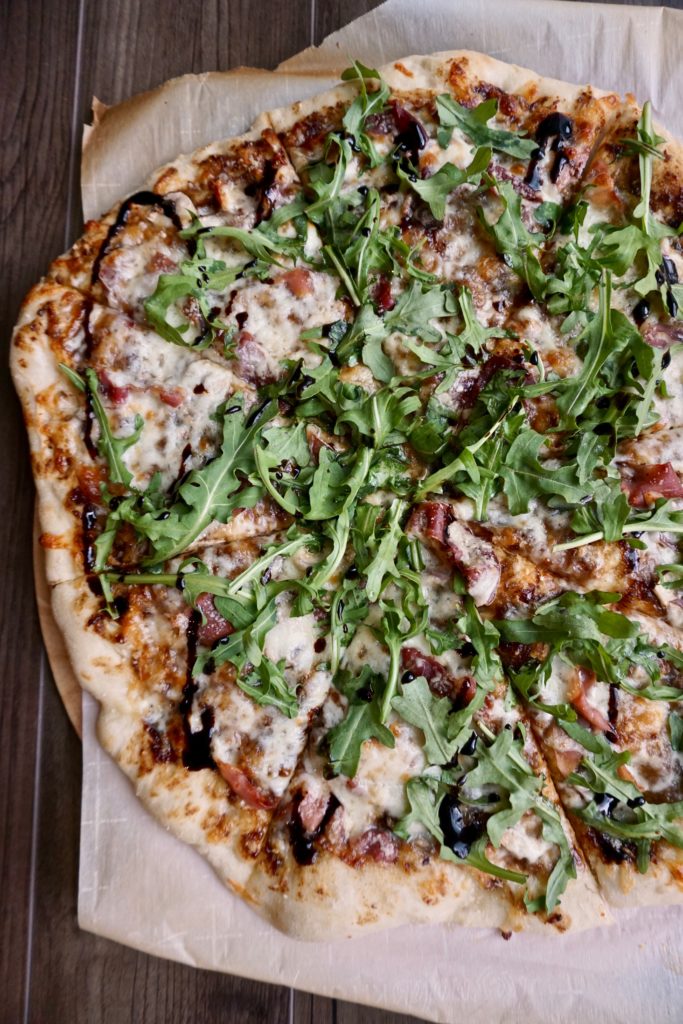
If you’ve been here long you know how much I love making homemade pizza (and dough). I’ve got a an index full of pizzas for you to try. Today’s recipe has become a regular at our house… pizza with fig jam, prosciutto and arugula. The contrast of sweet fig spread and salty prosciutto is amazing. Add some smooth mozzarella, peppery arugula, and finish with a drizzle of balsamic glaze and it’ll be a pizza you won’t forget!
I’ve linked to the pizza dough recipe/instructions that I’ve been using for years. But sometimes I too get lazy and use store bought instead. Homemade dough is always the tastiest but these toppings are also excellent on a pita, flatbread crust, etc.
Fig Jam, Prosciutto, and Arugula Pizza
INGREDIENTS
1 recipe pizza dough fig jam (Trader Joe’s makes a great fig spread) mozzarella, shredded or thinly sliced (fresh mozzarella is best but low-moisture can also be used) prosciutto, thinly sliced cremini mushrooms, thinly sliced (optional, I love adding them for some extra nutrition and protein) freshly grated Parmesan baby arugula balsamic glaze, for serving (optional)
Spread a thin layer of fig jam on the prepared crust. Top with mozzarella cheese, prosciutto*, mushrooms (if using), and a sprinkle of Parmesan.
Bake in preheated oven (on pizza stone) for 10-12 minutes until the crust is puffed and golden and the cheese has melted and browned.
Remove from the oven and top with arugula, another sprinkle of Parmesan, and drizzle with balsamic glaze (optional). Slice and serve.
*You can bake the pizza with the prosciutto on top if you like it crisp, or wait and add the prosciutto after the pizza bakes if you prefer it soft. The original recipe linked below shows it added at the end with the arugula, Parmesan, and balsamic glaze.
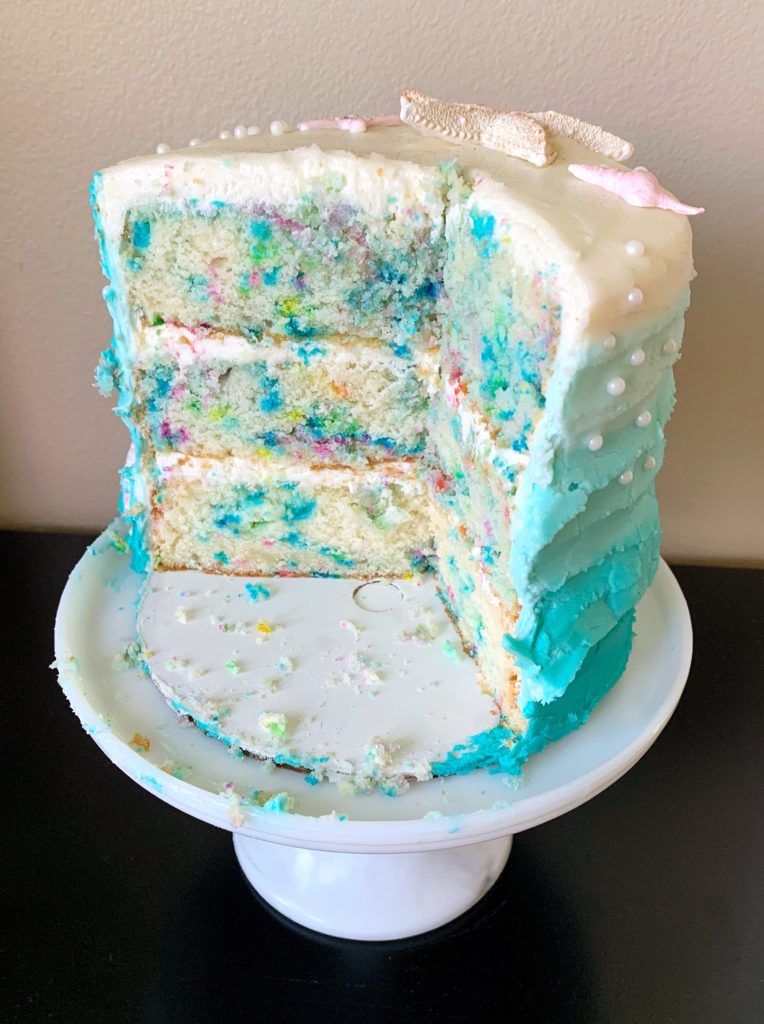
For Clara’s 7th birthday last year (she turns 8 in less than 2 weeks now!) we had an Under the Sea party and this was her mermaid cake. With THE BEST vanilla cake recipe from Sally (her site is my go-to for cakes), several youtube ombre frosting tutorials, and the sea creatures purchased from etsy, it wasn’t too hard to make!
I added some pretty sprinkles to the batter (instructions included in the notes below) and frosted the cake with Sally’s classic vanilla buttercream. I did use three 6-inch cake pans instead of the 9-inch ones called for in the recipe, with a slightly reduced baking time. (I can’t remember what I did with the extra batter but making a few cupcakes on the side isn’t a bad idea!) This really is a wonderfully light, yet moist, and flavorful vanilla cake.
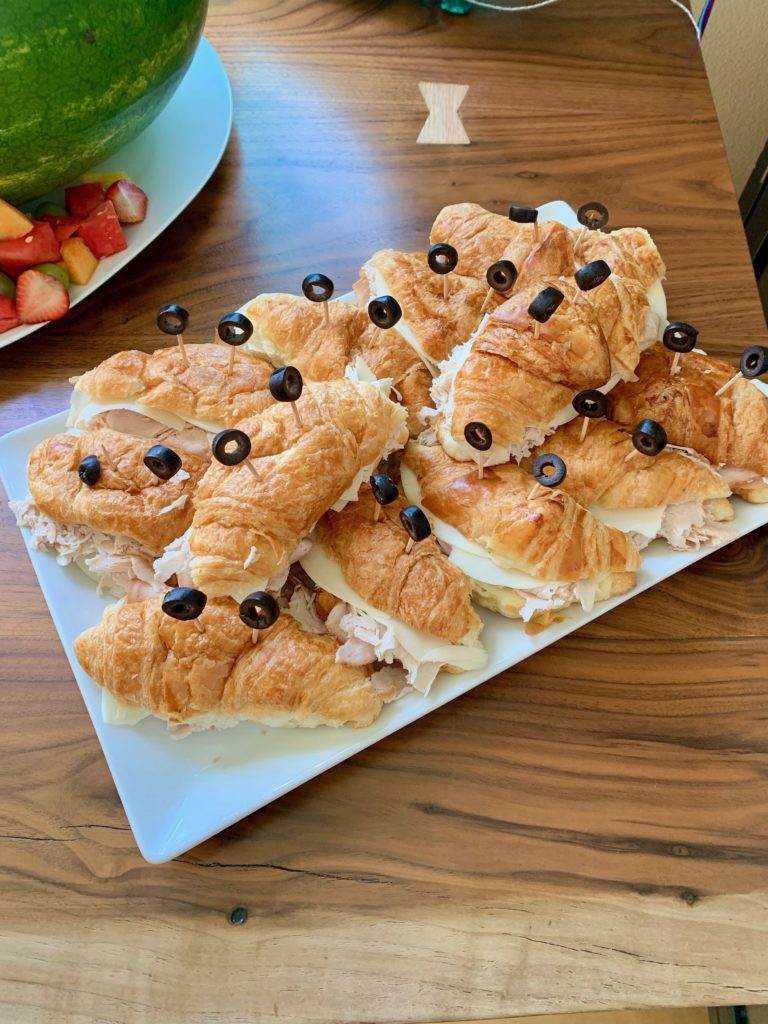
In keeping with the Under the Sea theme we had a shark watermelon (thanks to my sister, Brooke, who took the time to carve it) and crab croissant sandwiches (olives and croissants are two of Clara’s favorite foods)!
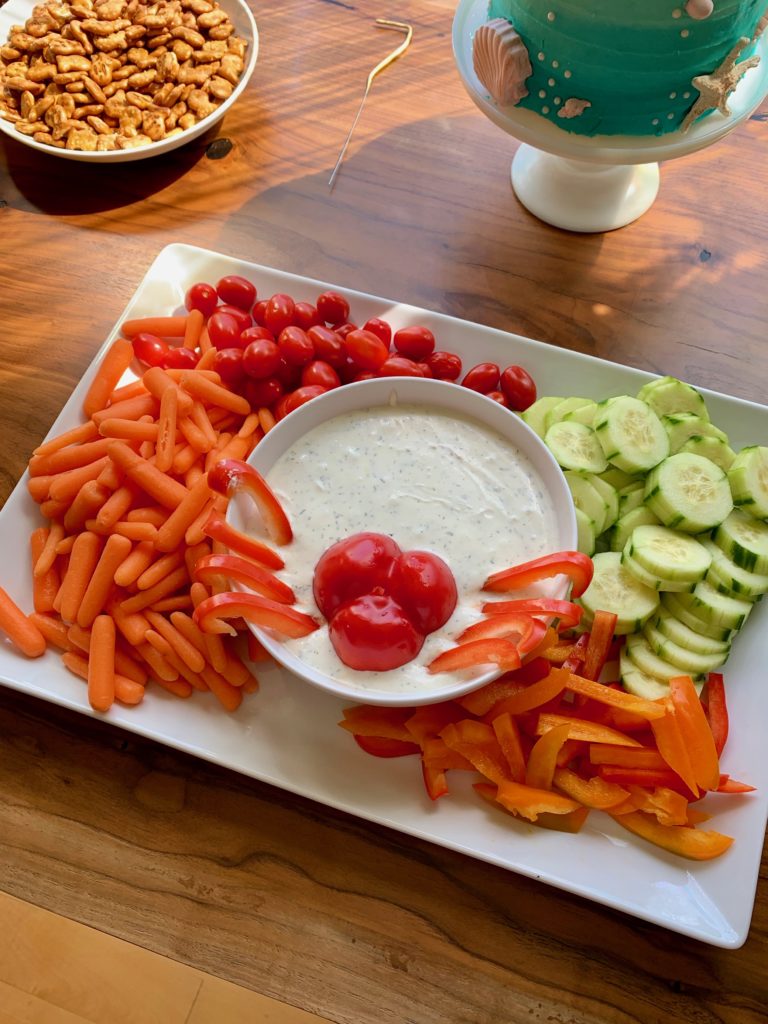
There was also a veggie tray and dip that had a little crab hanging out it it…
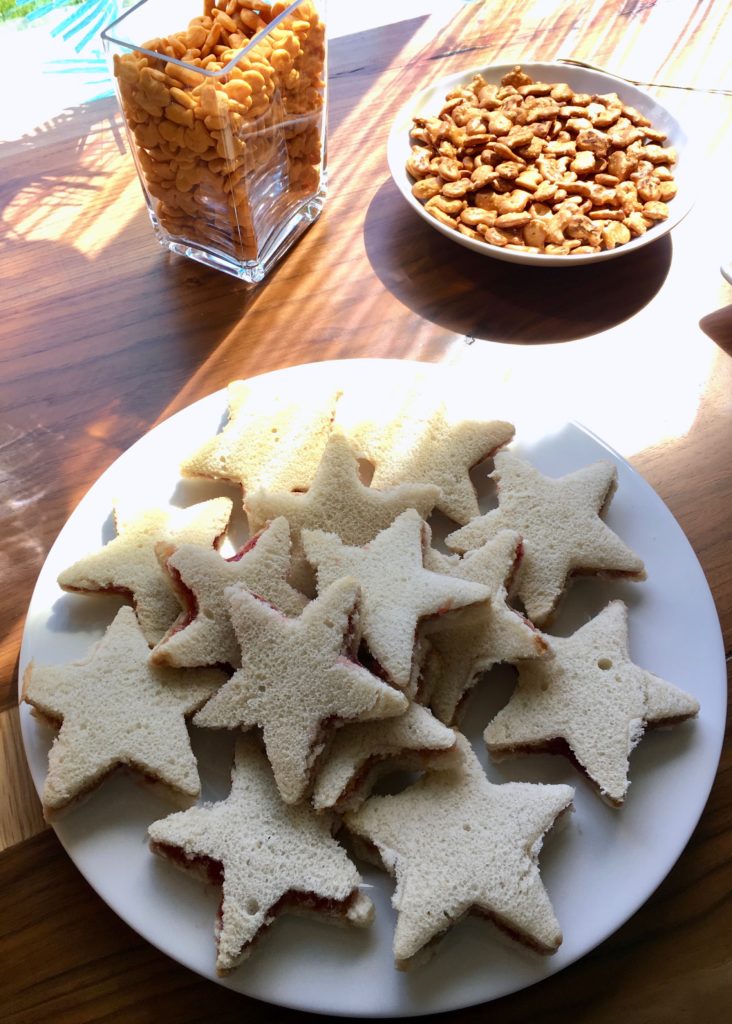
… and bowls of goldfish crackers and pretzels and a plate of peanut butter and jelly starfish!
I’m so glad we had a big party for her 7th birthday since this year we’ll be celebrating under “lockdown”. Of course there will still be good food and lots of love and cake!
If you want details about specific ingredients or substitutions, etc. follow the links to Sally’s original post. There are also tons of positive reviews… I’m not the only one who loves this recipe!
Vanilla Layer Cake with Vanilla Buttercream Frosting
INGREDIENTS
Vanilla Cake:
3 and 2/3 cups cake flour (spooned and leveled) 1 tsp. salt 1 tsp. baking powder 3/4 tsp. baking soda 1 1/2 cups unsalted butter, softened to room temperature 2 cups granulated sugar 3 large eggs + 2 additional egg whites, at room temperature 1 Tbsp. pure vanilla extract 1 1/2 cups buttermilk, at room temperature
Vanilla Buttercream Frosting:
1 1/2 cups unsalted butter, softened to room temperature 6 cups powdered sugar 1/3 cup whole milk or heavy cream 1 1/2 tsp. pure vanilla extract 1/8 tsp. salt
DIRECTIONS
Preheat oven to 350 F. Grease three 9-inch cake pans, line with parchment paper, then grease the parchment paper. Parchment paper helps the cakes seamlessly release from the pans.
Make the cake: Whisk the cake flour, salt, baking powder, and baking soda together. Set aside.
Using a handheld or stand mixer fitted with a paddle or whisk attachment, beat the butter and sugar together on high speed until smooth and creamy, about 3 minutes. Scrape down the sides and up the bottom of the bowl with a rubber spatula as needed. Beat in the 3 eggs, 2 egg whites, and vanilla extract on high speed until combined, about 2 minutes. (Mixture will look curdled as a result of the egg liquid and solid butter combining.) Scrape down the sides and up the bottom of the bowl as needed. With the mixer on low speed, add the dry ingredients just until combined. With the mixer still running on low, pour in the buttermilk and mix just until combined. You may need to whisk it all by hand to make sure there are no lumps at the bottom of the bowl. The batter will be slightly thick.
Pour batter evenly into cake pans. Weigh them to ensure accuracy, if desired. Bake for around 23-26 minutes or until the cakes are baked through. To test for doneness, insert a toothpick into the center of the cake. If it comes out clean, it’s done. Allow cakes to cool completely in the pans set on a wire rack. The cakes must be completely cool before frosting and assembling.
Make the frosting: In a large bowl using a hand-held mixer or stand mixer fitted with a whisk or paddle attachment, beat the butter on medium speed until creamy, about 2 minutes. Add confectioners’ sugar, milk, vanilla extract, and salt with the mixer running on low. Increase to high speed and beat for 2 minutes. Add more confectioners’ sugar if frosting is too thin, more milk if frosting is too thick, or an extra pinch of salt if frosting is too sweet.
Assemble and decorate: Using a large serrated knife, slice a thin layer off the tops of the cakes to create a flat surface. Discard (or crumble over ice cream!). Place 1 cake layer on your cake stand, cake turntable, or serving plate. Evenly cover the top with about 1 and 1/2 cups of frosting. Top with 2nd cake layer and evenly cover the top with about 1 and 1/2 cups of frosting. Top with the third cake layer. Spread the remaining frosting all over the top and sides. I use and recommend an icing spatula to apply the frosting.
Refrigerate cake for at least 1 hour before slicing. This helps the cake hold its shape when cutting.
Cover leftover cake tightly and store in the refrigerator for up to 5 days.
NOTE: To make a sprinkle cake, fold about 3/4 cup of sprinkles into the cake batter. Avoid nonpareils (the little balls), which tend to bleed their color.
Chicken noodle soup is good but replace the noodles with cheese-stuffed tortellini and chicken soup is suddenly much more exciting! I have one child who doesn’t eat soup (it’s a texture thing I’ve realized), but even she enjoys this one if I drain off most of the broth. It has a touch of creaminess but isn’t too indulgent and packed with good for you things like carrots and garlic and celery (and spinach if you choose to add some like I do). I also stir in a handful of freshly grated Parmesan, and serve extra for sprinkling on top.
Chicken Tortellini Soup
INGREDIENTS
1 Tbsp. olive oil 1 Tbsp. butter 1 small sweet onion, diced 2 large carrots, chopped 1/2 cup celery, chopped (I used 1/2 tsp. celery salt instead) 3 cloves garlic, minced 1/2 tsp. dried oregano dash red pepper flakes 1/2 tsp. salt 1/2 tsp. pepper 2-3 cups cooked shredded chicken 5 cups low-sodium chicken broth 1 8-10 oz. package of your favorite tortellini ~1/2 cup frozen spinach (optional, 1-2 cups chopped if you used fresh) 1 cup whole milk or half and half 1 1/2 Tbsp. flour freshly grated Parmesan cheese (optional)
DIRECTIONS
Heat a large pot over medium heat and add the olive oil and butter. Once the butter melts, add in the onion, carrots, celery, garlic, oregano, red pepper, salt and pepper. Stir and cook until the veggies soften, about 5 to 6 minutes. Stir in the shredded chicken and cook for a minute or two. Add in the chicken stock and bring the mixture to a boil, then reduce it to a simmer. Add in the tortellini and spinach (if using) and cook it for 5 minutes.
While the tortellini is cooking, fill a shaker cup with the milk. Add the flour to the milk and shake the cup for at least 30 seconds. After 5 minutes, stream in the milk slurry while stirring. Bring the soup back to a simmer and let it simmer for 10 or 15 minutes as it thickens.
Taste it and season more with salt and pepper to taste, if necessary. Sprinkle with freshly grated Parmesan and serve.
Another recipe I’ve been making for years that’s a favorite around here. My friend Megan who I haven’t seen in far too long made these for me when I visited her in Chicago (back when we had two less babies each… things have changed!). I was pregnant with Gwen at the time and couldn’t enjoy much of anything I ate… but these were so good! I made sure to snag the recipe and once I recovered my appetite again starting making them myself.
I add a few extra spices (oregano, cayenne) and some chopped spinach (because why not!) but otherwise follow the original recipe closely. BONUS they freeze well- instructions are provided below!
UPDATE: I recently made these vegetarian by replacing the chicken with black beans and corn and they were just as delicious! So I’ve since revised the recipe to include that option below.
Baked Creamy Chicken (or Bean and Veggie) Taquitos
INGREDIENTS
1/3 cup (3 oz.) cream cheese 1/4 cup salsa verde (we LOVE Trader Joe’s brand) 1 Tbsp. fresh lime juice 1/2 tsp. cumin 1 tsp. chili powder 1/2 tsp. onion powder 1/4 tsp. garlic powder pinch Mexican oregano (optional) pinch cayenne pepper (optional) 3 Tbsp. chopped cilantro 2 Tbsp. sliced green onions 2-3 cups shredded cooked chicken (rotisserie chicken works great here) OR for a vegetarian version: 1 can black beans, drained and rinsed + 1 cup frozen corn 1 cup grated Pepper/Colby/Monterey Jack cheese (or Cheddar, Mexican blend, etc.) 1/2- 1 cup frozen chopped spinach (measured frozen), thawed and excess water squeezed out (optional) 8-12 (depending on size) flour or corn tortillas cooking spray or olive oil or melted butter salt and freshly ground black pepper, to taste
DIRECTIONS
To make the filling, heat cream cheese in the microwave for about 20-30 seconds so it’s soft and easy to stir. Add green salsa, lime juice, cumin, chili powder, onion powder, garlic, oregano, and cayenne. Stir to combine and then add cilantro and green onions. Add chicken (or beans and corn), spinach (if using), and cheese and combine well. Add a pinch of salt and freshly ground black pepper, to taste. (You can prepare up to this step ahead of time. Just keep the mixture in the fridge.)
Preheat oven to 425. Line a baking sheet with foil and lightly coat with cooking spray.
If using corn tortillas, work with a few tortillas at a time and heat in the microwave, wrapped in damp paper towels until they are soft enough to roll without cracking. Usually 20-30 seconds will do it. If using flour tortillas straight from the fridge, it helps to warm them in the microwave so they’re easier to roll. Place 2-3 T of chicken (or bean) mixture on the lower third of a tortilla, keeping it about 1 inch from the edges. Roll up tortillas and place seam down on a baking sheet, not touching one another. Spray lightly with cooking spray, or lightly brush with olive oil/butter and sprinkle lightly with salt (optional).
Place pan in oven and bake for 15-20 minutes or until crisp and the ends start to get golden brown. Remove from oven and let cool slightly before serving. Dip in sour cream, salsa, guacamole, etc. or our favorite sour cream-salsa verde combo*!
*Whisk to combine sour cream with extra salsa verde. I usually don’t measure but it’s about equal parts sour cream and salsa. It makes the BEST dipping sauce!
FREEZER INSTRUCTIONS: Prepare the taquitos through rolling them out and placing them on the baking sheet. Place the baking sheet in the freezer and freeze until solid, then transfer to a large freezer bag. When ready to cook, preheat oven to 425 and place the taquitos on a lined baking sheet. Bake for 20-25 minutes or until golden brown and crispy.


/ COMMENT / Share