Thai Coconut Soup with Chicken and Rice

March 26, 2015

IMG_7234

As long as I’ve known Clara (almost 3 years now!) she’s been soup-averse. Not a fan of purees or anything swimming in broth. She’ll usually try them, and then lose interest. I’ve often gotten away with draining the liquid off and serving soup less “soupy”. But rarely does she devour, with pleasure, a bowl of anything soupish without resistance. This was the soup though that made history.

Curry spices + rich coconut milk + shredded chicken + rice + lime juice + cilantro…. essentially coconut chicken curry in soup form. It comes together in about 15 minutes and Dustin, Clara, and I agreed: it’s absolutely delicious!

If you want to complicate things (and maybe add an extra bit of nutrition/flavor), you could saute a small onion, a few cloves of garlic, and some diced red bell pepper before adding the spices at the beginning. But totally not necessary. This soup was full of flavor and perfect just as written. We like our soup thick so I added lots of chicken and rice- cut back on both for a thinner consistency. And you’re always welcome to spice it up to taste. When serving a child, I usually just provide pepper flakes on the side. Serve with warm naan for dipping.

Thai Coconut Soup with Chicken and Rice

INGREDIENTS

1-2 Tbsp. butter, olive oil, or coconut oil
1/2 tsp. curry powder
1/4 tsp. cinnamon
1/4 tsp. ground ginger
1/4 tsp. paprika
1/4 tsp. chili powder
dash cayenne pepper (to taste)
salt and freshly ground black pepper, to taste (I added ~1 tsp. salt)
1 large carrot, grated
2 cups homemade or low-sodium chicken broth
1 15-ounce can coconut milk
2 1/2 cups cooked shredded chicken (I used half of a Whole Foods rotisserie chicken)
2 cups cooked white or brown rice (I used white Jasmine rice)
2 Tbsp. lime juice
1 Tbsp. low-sodium soy sauce
fresh cilantro, chopped for serving

DIRECTIONS

1. In a large pot or dutch oven, melt the butter/oil over medium heat, then stir in the spices and let cook for about 30 seconds, stirring frequently. Add the carrots, stir to combine and let cook, stirring occasionally, for about 5 minutes, until the carrots are soft.

2. Add the remaining ingredients (chicken broth through soy sauce) and bring to a low boil, then let simmer for about 5 minutes. Season with salt and pepper to taste, stir in fresh cilantro, and serve immediately.

Serves 4-6.

(Adapted from Everyday Reading)

Orange Spice Rubbed Salmon

March 24, 2015

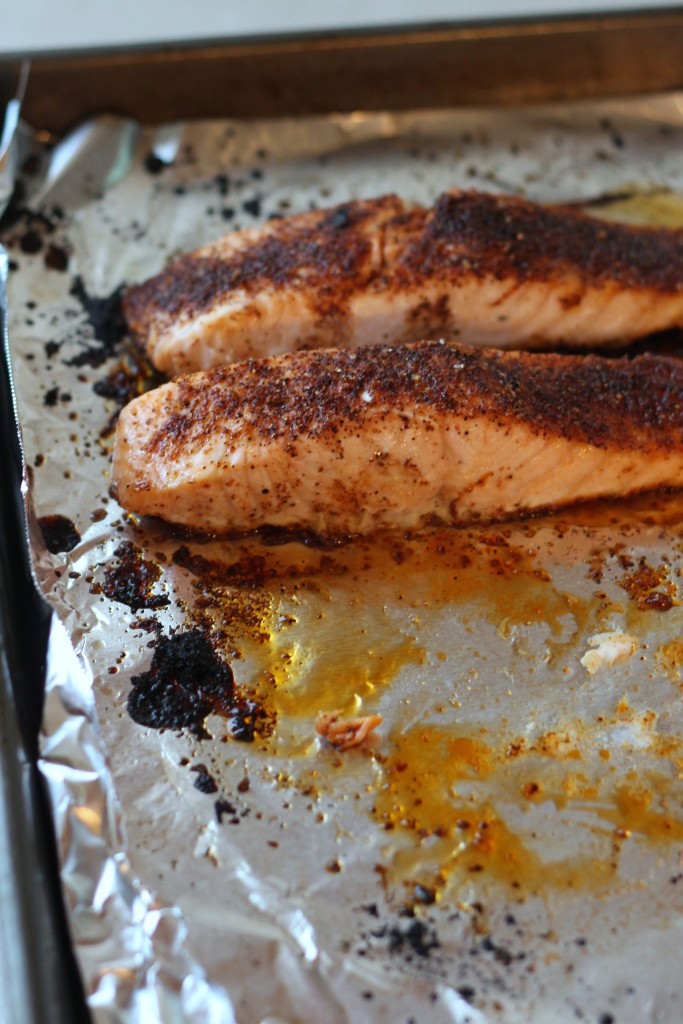
IMG_7221

I love a recipe as concise as this. Notice the directions have two steps! And one of them is “preheat broiler”. Then mix spices, rub, and cook. I can do that anytime, any night. OK, measuring out the spices and zesting the orange might take a whole minute. But this is about as simple as it gets. And still so flavorful and impressive. The orange flavor is subtle against the smoky-sweet chili rub. To sum it up succinctly: some delicious salmon.

Orange Spice Rubbed Salmon

INGREDIENTS

1 Tbsp. brown sugar
1 tsp. chili powder
1/2 tsp. orange zest
1/2 tsp. ground cumin
1/2 tsp. sweet or smoked paprika (I used sweet this time, but I bet smoked would be awesome)
1/4 tsp. salt
1/4 tsp. ground coriander
1/8 tsp. freshly ground black pepper
4 (1 – 1 1/2 lbs. total) salmon fillets, skin removed

DIRECTIONS

1. Preheat broiler.

2. Combine first 8 ingredients in a small bowl. Rub spice mixture over both sides of salmon fillets. Place salmon on a broiler pan coated with cooking spray (I line mine with foil first for easy clean-up). Broil for 8 minutes or until salmon flakes easily when tested with a fork.

Serves 4.

(Adapted from Cooking Light)

Blueberry Lemon Layer Cake with Whipped Cream Cheese Frosting

March 23, 2015

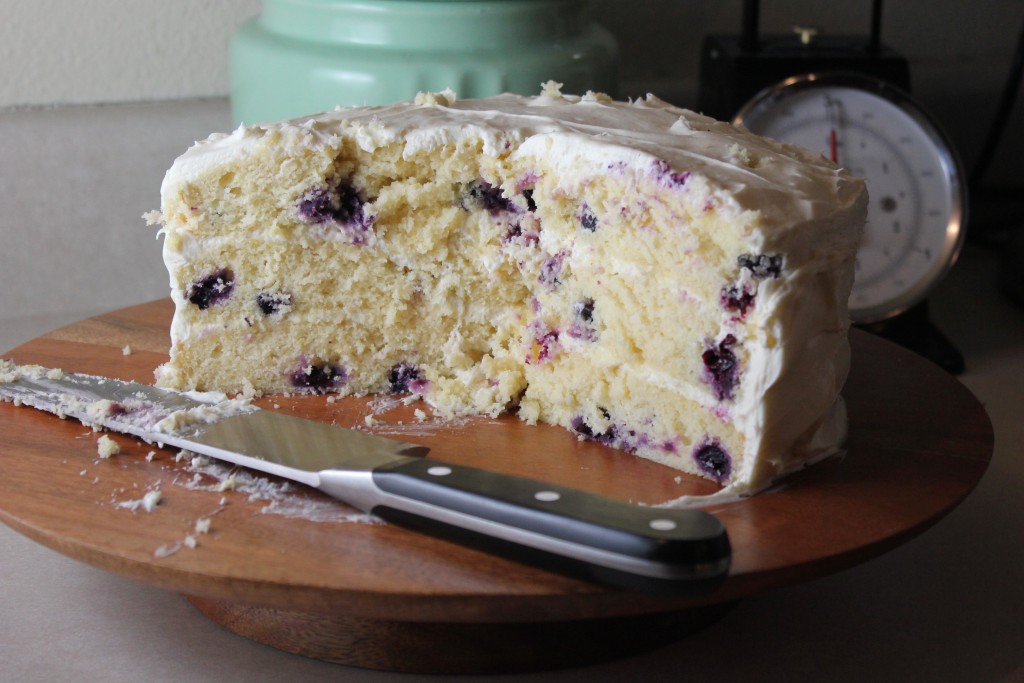
IMG_7201

My birthday cake! Baked by Clara, assisted by my mom (with my guidance on the high altitude adjustments*). I wanted something refreshing and spring-like to celebrate this year and decided on this cake at first sight. Blueberry + lemon + my favorite whipped cream cream cheese frosting. You can go with the original recipe and make regular cream cheese frosting, but I promise this whipped cream version is amazing!

I don’t have too many suggestions, just make sure not to overmix your batter or overbake your cake. Both will result in a denser, dryer result which is no good. If I’d had extra blueberries, I would have decorated with them. Or top it with some toasted coconut or almonds. Leftover cake can be frozen and later defrosted for continued enjoyment.

Blueberry Lemon Layer Cake with Whipped Cream Cheese Frosting

INGREDIENTS

cake:
1 cup unsalted butter, softened to room temperature
1 1/4 cups granulated sugar
1/2 cup packed light brown sugar
4 large eggs, at room temperature
1 Tbsp. pure vanilla extract
3 cups all-purpose flour (careful not to over-measure)
1 Tbsp. baking powder
1/2 tsp. salt
1 cup buttermilk
zest + juice of 3 medium lemons
1 1/2 cups blueberries, fresh or non-thawed frozen
1 Tbsp. all-purpose flour

frosting:
1 1/2 cups heavy whipping cream
8 oz. cream cheese, softened to room temperature
2 cups powdered sugar
1 tsp. pure vanilla extract
1/8 tsp. salt

DIRECTIONS

1. Preheat the oven to 350 F. Spray three 9×2 inch cake pans with nonstick spray. Set aside.

2. Make the cake: Using a handheld or stand mixer with a paddle attachment, beat the butter on high until creamy – about 1 minute. Add granulated and brown sugars and beat on medium-high speed until creamed, about 2-3 minutes. Scrape down the sides and bottom of the bowl as needed. Add eggs and vanilla. Beat on medium speed until everything is combined, about 2 full minutes. Scrape down the sides and bottom of the bowl as needed. Set aside.

3. In a large sized bowl, toss together the flour, baking powder, and salt. Slowly add the dry ingredients to the wet ingredients. Beat on low speed for 5 seconds, then add the buttermilk, lemon zest, and lemon juice. Remove from the mixer and stir lightly until everything is just combined. Toss the blueberries in 1 Tablespoon of flour and fold into the batter. Batter is extremely thick. Do not overmix at any point. Overmixing will lend a tough, dense textured crumb.

4. Spoon batter evenly into 3 prepared cake pans. If only using 2 cake pans, your bake time will be longer. Bake the three layers for about 21 minutes or until a toothpick inserted in the center comes out clean. Remove from the oven and allow to cool completely before frosting.

5. Make the frosting: Using a handheld or stand mixer with a whisk attachment, whip the heavy cream until stiff peaks form. Set aside. In a separate bowl, beat cream cheese on medium speed until smooth and light. Add the powdered sugar, vanilla extract, and salt with the mixer running on low. Increase to high speed and beat for another minute. Add the whipped cream and beat for another minute until smooth and airy. Refrigerate until ready to use.

6. Assemble and frost: First, using a large serrated knife, trim the tops off the cake layers to create a flat surface (if needed- I didn’t have to). Place 1 layer on your cake stand. Evenly cover the top with frosting. Top with 2nd layer, more frosting, then the third layer. Top with frosting and spread around the sides. The recipe doesn’t make a ton of frosting, just enough for a light frost. Top with blueberries or lemon garnish if desired. Refrigerate a bit before serving so the cake can set.

7. Make ahead tip: Prepare cakes and frosting 1 day in advance. Keep cakes at room temperature, covered tightly. Refrigerate prepared frosting in an airtight container until ready to use. Frosted or unfrosted cakes may be frozen up to 2 months, thaw overnight in the refrigerator and bring to room temperature if desired before serving.

*for high altitude: – 2 Tbsp. granulated sugar, + 1 egg, + 3 Tbsp. flour, decrease baking powder by half, + 2 Tbsp. buttermilk, increase baking temperature to 375 F, decrease baking time to ~18 min

Makes a 9-inch round, 3 layer cake.

(Cake adapted from Sally’s Baking Addiction, Frosting from All Recipes)

Roasted Cauliflower with Parmesan

March 19, 2015

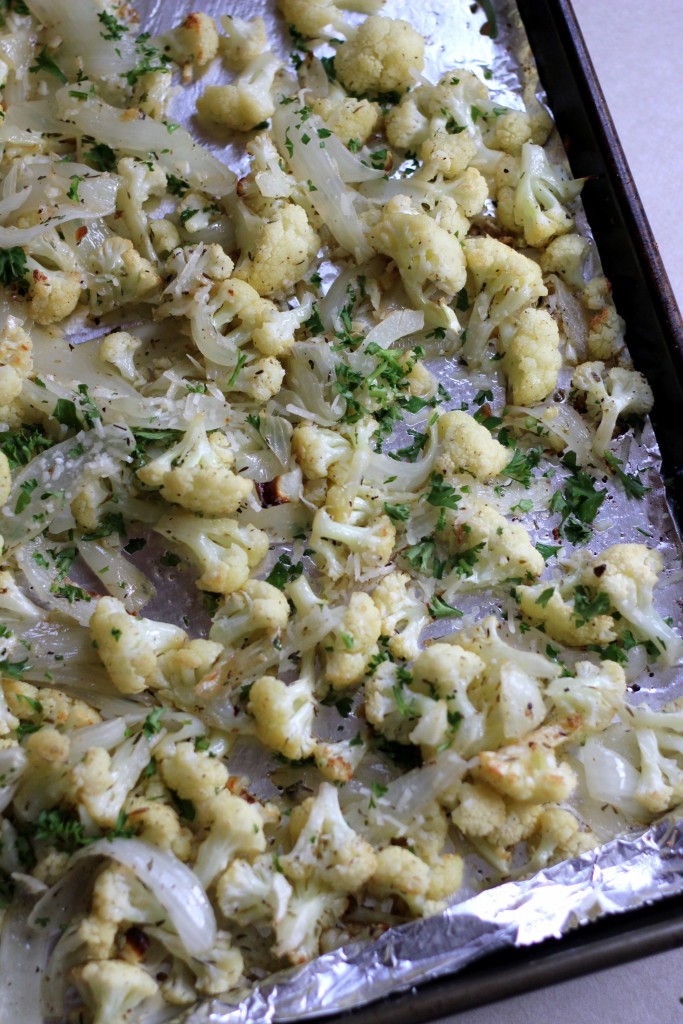
IMG_7165-002

Roasted Cauliflower revisited- with the addition of a sweet onion, garlic, thyme, and Parmesan. Another way to make your veggies taste like candy. If you really don’t like onions, go ahead and leave them out. But they caramelize and crisp and are arguably the best part. I can’t actually remember if I added the Parmesan partway through cooking (as the recipe instructs) or at the end. (I tend to skim recipes and miss such details- oops.) No matter, either way it’ll probably taste the same.

Roasted Cauliflower with Parmesan

INGREDIENTS

1 head cauliflower
1 medium onion, sliced (optional- I used a sweet onion)
4 thyme sprigs (or a sprinkling of dried thyme)
3 large cloves garlic, minced
3 Tbsp. olive oil
~1 tsp. kosher salt
freshly ground black pepper
1/2 cup freshly grated Parmesan (or Pecorino)
fresh parsley, chopped for garnish

DIRECTIONS

1. Preheat oven to 425 F. Cut 1 head cauliflower into florets; toss on a large rimmed baking sheet with the onion, thyme, garlic, and olive oil; season with kosher salt and freshly ground black pepper. Roast, tossing occasionally, until almost tender, 15- 20 minutes. Sprinkle with 1/2 cup grated Parmesan, toss to combine, and roast until cauliflower is tender, 5-10 minutes longer.

Serves 4.

(Adapted from Bon Appetit)

Teriyaki Chicken Stir Fry with Pineapple

March 13, 2015

Processed with VSCOcam with c2 preset

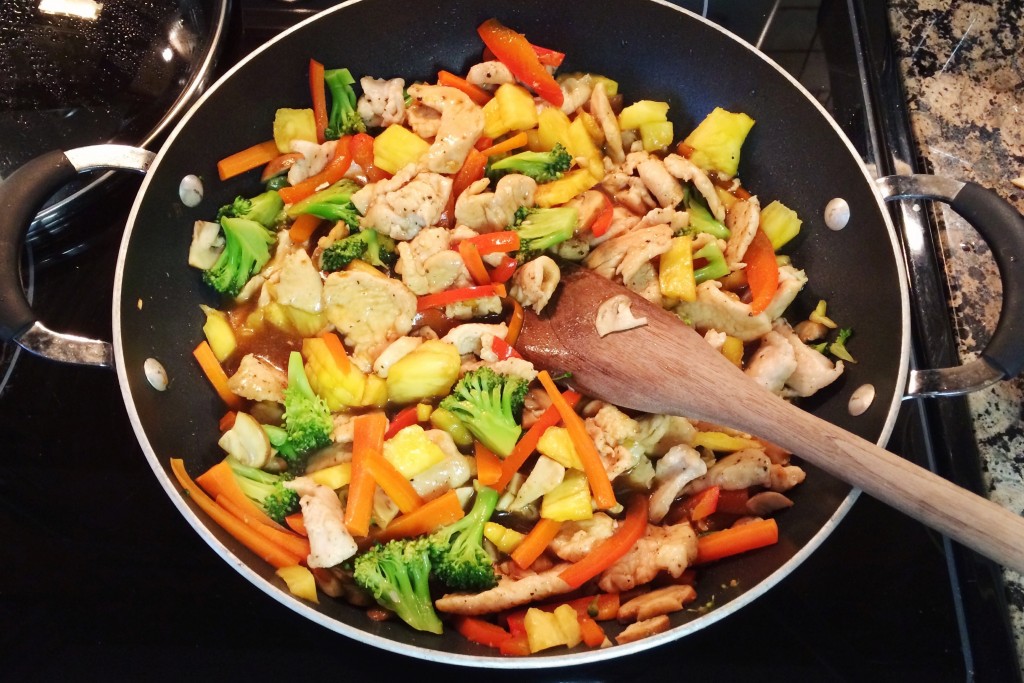
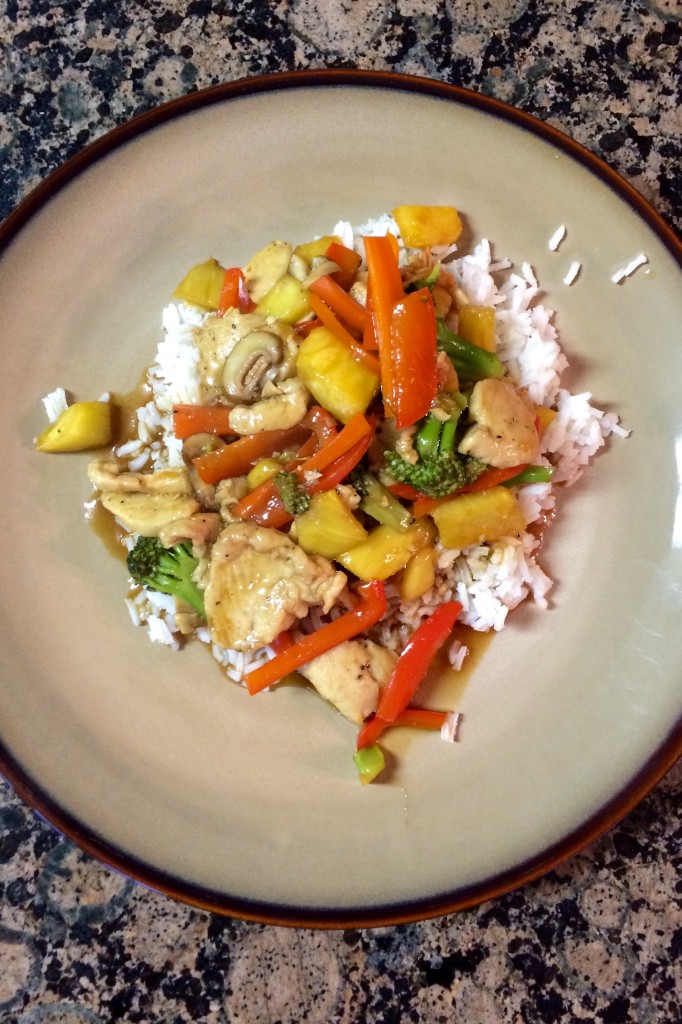
Clara and I are in Virginia visiting my parents this week and because my mom LOVES Chinese food we decided to try out this new recipe. Well, I’m sharing it here so obviously it was a success! (Despite some pretty awful iPhone photos. I wanted to bring my camera in case a delicious meal needed photographing but after squeezing both of our belongings into one bag there wasn’t an extra ounce of space. Blankie, pillow, lambie, lambie’s blankie, video monitor, alarm clock that lights up when it’s time to wake up in the morning and on and on- nothing must be left behind if we want to get any sleep!) I could write a lengthy essay about traveling with a toddler, but back to the recipe. I’m not an expert stir-frier. But this recipe fooled me into thinking so. It doesn’t take much skill and the result is A++!

FullSizeRender (2)

Thinly (very thinly) sliced chicken breast is stir-fried with fresh veggies (I chose broccoli, carrot, mushrooms, and red pepper), fresh pineapple (use canned in a pinch but fresh, yum!), and a pineapple juice- based sweet and sour teriyaki sauce. I blanched my carrots and broccoli before they went into the pan so they’d cook quicker (we don’t like them too crunchy). And served it all over steamed white rice with some peas and green beans on the sides.

Teriyaki Chicken Stir Fry with Pineapple

INGREDIENTS

stir fry:
1 1/2 lbs. boneless skinless chicken breast
1 Tbsp. cornstarch
1 tsp. salt
1/2 tsp. freshly ground black pepper
~2 Tbsp. canola, grapeseed, peanut, or coconut oil
3 cups broccoli florets
1 cup chopped carrot
1 cup sliced mushrooms
1 red bell pepper, seeded and sliced
1/4 cup pineapple juice
~2 cups chopped fresh pineapple (or a 20-oz. can pineapple chunks, drained and juice reserved)

sauce:
1/2 cup pineapple juice
1/3 cup low-sodium soy sauce
1 Tbsp. molasses
2 Tbsp. brown sugar
1 Tbsp. rice vinegar
1 clove garlic, minced
1 tsp. freshly grated ginger
2 tsp. cornstarch

steamed white or brown rice, for serving

DIRECTIONS

1. Very thinly slice the chicken breasts, pat them dry, and toss them in a medium bowl with the cornstarch and salt and pepper. Let the chicken sit for about 10-15 minutes while whisking the sauce and prepping vegetables.

2. For the sauce, combine all the ingredients together in a bowl or liquid measuring cup and whisk until smooth.

3. Heat about 1 Tbsp. oil in a large, 12-inch nonstick skillet over medium-high heat until rippling and hot. Add half of the chicken to the skillet in a single layer without overlapping and let it cook until nicely browned, about 30-45 seconds. Flip the chicken and let it cook through on the other side, 1-2 minutes. If your chicken is sliced super thin, it won’t take long to cook through. Remove the chicken to a plate and repeat with the remaining chicken.

4. Add another tablespoon or so of oil to the pan if needed and heat again until hot and rippling. Add all of the vegetables to the hot skillet and cook, stirring often, until the vegetables are bright in color and barely tender. Add about 1/4 cup of the reserved pineapple juice to the skillet and cover (you can add water here instead of the juice, if desired). Cook, letting the vegetables steam for 2-3 minutes until crisp-tender (add more liquid, if needed, if it dries up). (NOTE: I blanched my broccoli and carrots in boiling water for 2 minutes and then cooled them under cold water before stir-frying, so they would cook quicker. If you like your veggies super crisp don’t bother blanching.)

5. Add the pineapple and chicken back to the skillet. Whisk the sauce to recombine and then stir the sauce into the skillet and simmer for 2-3 minutes until slightly thickened. Serve immediately over hot, cooked rice, if desired.

Serves 6.

(Adapted from Mel’s Kitchen Cafe)