Charred Corn Salad with Basil Vinaigrette

June 6, 2014

IMG_5734

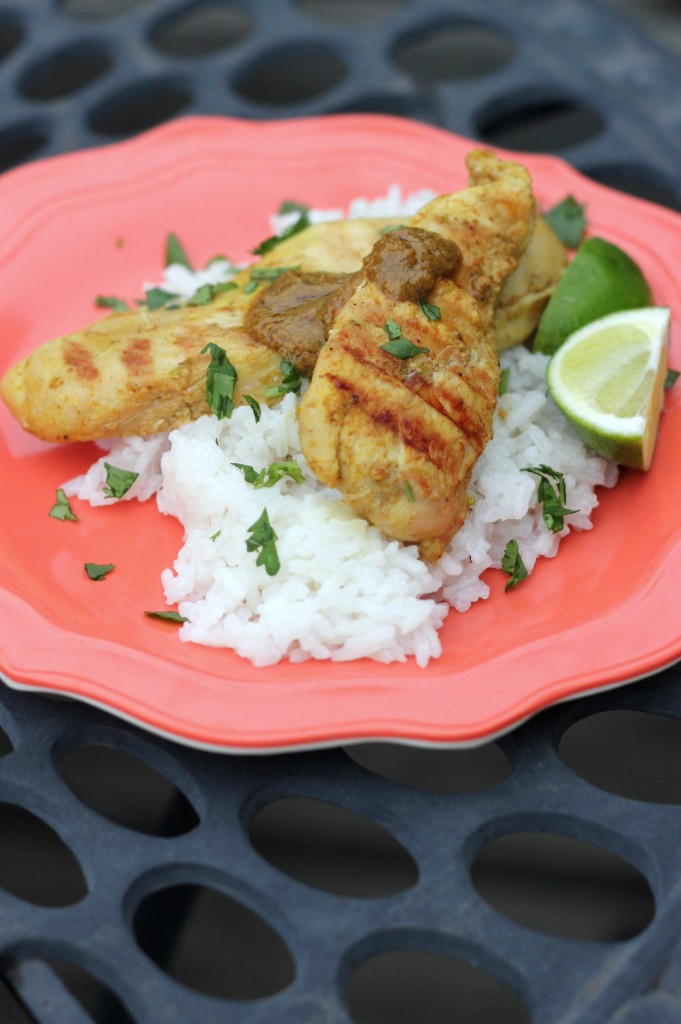
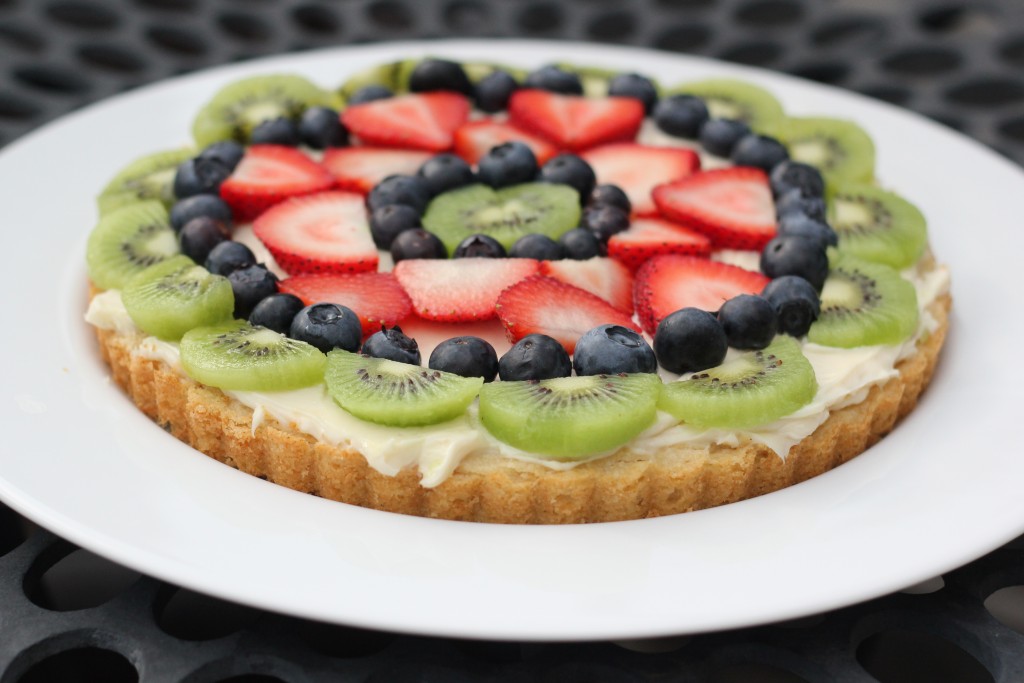
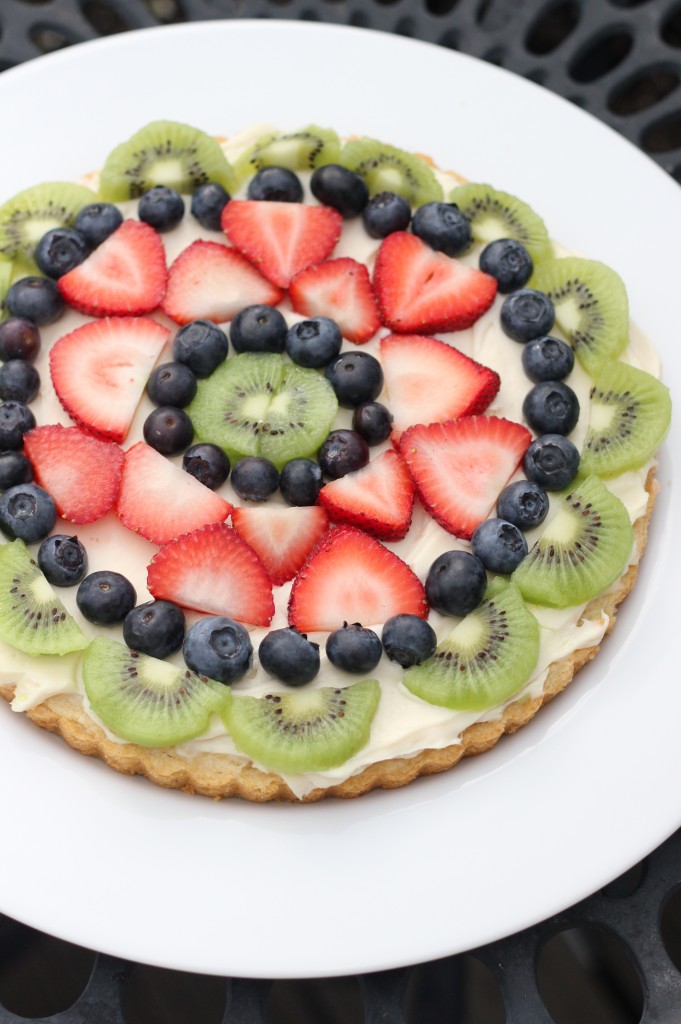
For memorial day we grilled these steak kabobs (the recipe can be used for chicken, turkey, steak, pork… all yum) and had that sugar cookie crust fruit pizza I already shared for dessert. On the side I served a Smoked Gouda pasta salad that mimics the addictive one you can find at Whole Foods (I’ll be posting it next) and this charred corn salad. Both were a bit hit. Thankfully there was so much food to go around we had a bit leftover and I hoarded them to devour the next day. And both tasted just as good- maybe better- with age.

IMG_5743

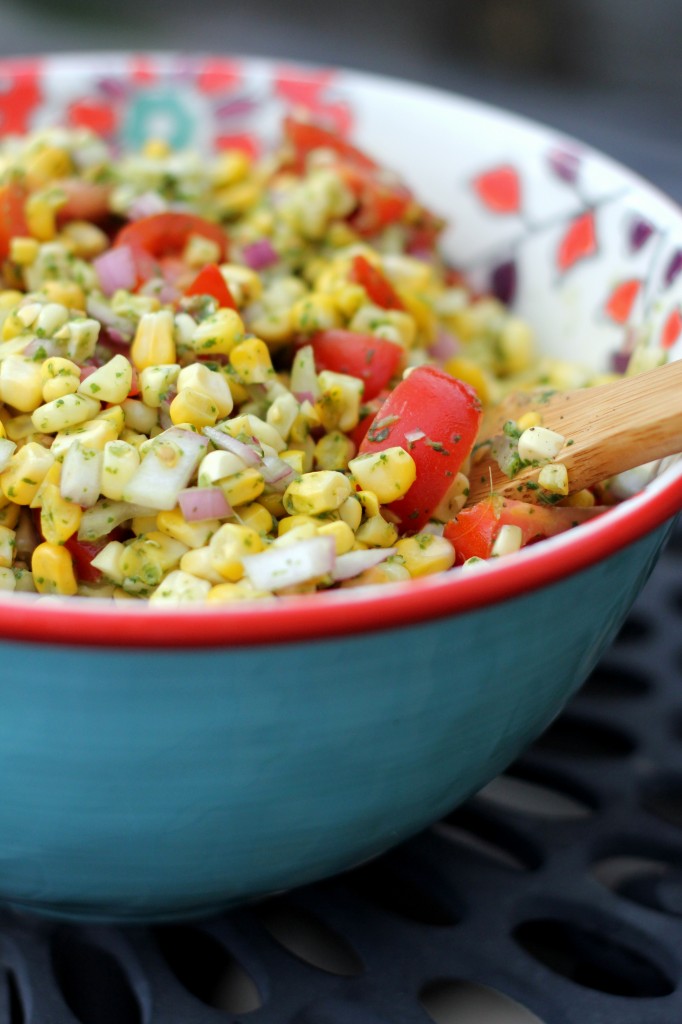
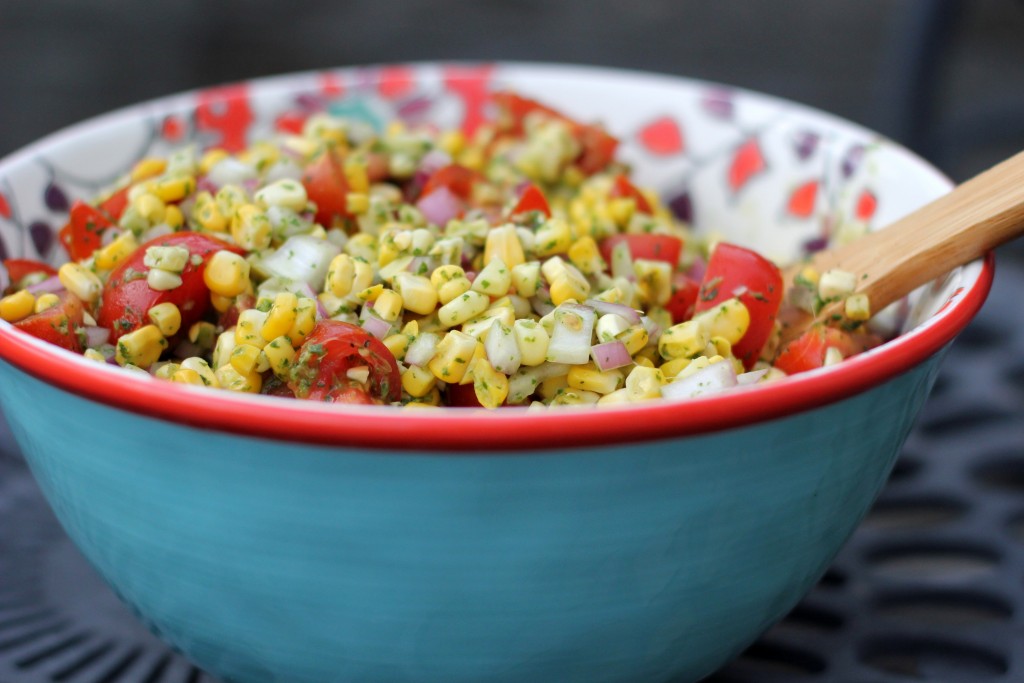
I charred my ears of corn on my trusty Griddler, but I bet an outdoor grill would provide even more flavor. The charred kernels are cut off the cob and tossed with red onion, cherry tomatoes, and an amazing basil vinaigrette. Think lots and lots of fresh basil with some garlic, olive oil, and cider vinegar. Let it sit a few hours to marinate if you can resist. And enjoy it all summer.

Charred Corn Salad with Basil Vinaigrette

INGREDIENTS

6 ears fresh corn on the cob, shucked
1-2 Tbsp. canola oil
kosher salt and freshly ground black pepper
1 1/2 cups packed fresh basil leaves
1 clove garlic, grated
1/4 cup cider vinegar
1/4 cup extra-virgin olive oil
1 (10-16 oz.) container small cherry or grape tomatoes, halved
1/2 small red onion, diced

DIRECTIONS

1. Preheat an indoor grill pan or outdoor grill over high heat.

2. Brush or rub each cob with some canola oil and sprinkle with salt and pepper. Place the corn on the hot grill and char each side, 2 to 3 minutes per side. You want the corn to get great char marks! Once the corn has charred, set aside until cool enough to handle. Once the corn has cooled, stand each ear up, stalk end down, in a wide, shallow bowl and, using your knife, slice the corn kernels off the cob.

3. Meanwhile, make the vinaigrette. In a food processor, add the basil and garlic and pulse until the basil starts to break down. Add the vinegar. Continue pulsing while adding the oil in a steady stream and process until smooth. Season with salt and pepper. (I added 1/2 tsp. kosher salt.)

4. In a large mixing bowl, combine the corn, tomatoes and red onion. Drizzle the basil vinaigrette over the salad and toss to combine. Season to taste with salt and pepper.

Serves 8.

(Adapted from Kelsey Nixon, Cooking Channel)

Grilled Coconut Lime Chicken with Coconut Rice

June 3, 2014

IMG_5700

Next month we say goodbye to Chicago and will be moving to Colorado Springs! I’m thrilled to be finished with residency/school (forever- hopefully). But I’m sad to leave this city (especially now that it’s warm and beautiful and the summers here really are so fun). I am excited to have more quiet, more convenience, more space. A yard possibly?! To hike, to explore, to discover another city, another state.

My biggest worry about living in Colorado Springs? The altitude. Baking. I’m a little freaked out that I’ll arrive and whip out my cake pans and pizza stone and suddenly everything I make will implode or turn out flat and gross. Any altitude bakers out there? Any advice to offer me? I’ve done a little research on the matter and it seems like there are so many factors that can affect your success while baking at altitude. It’s overwhelming.

Totally unrelated to my future baking dilemmas is this recipe. It is, however, perfect for summer on the grill. (Or my indoor griddler which I LOVE and use nonstop/ year round. I should be paid to advertise for this thing. Full disclosure: I’m not and there’s no affiliate link.) The chicken and sauce are succulent and the rice is just the right amount of coconutty. I even used light coconut milk and it wasn’t at all lacking in flavor. Grill some asparagus on the side and dinner it is.

Grilled Coconut Lime Chicken with Coconut Rice

INGREDIENTS

Chicken:
3 Tbsp. canola or grapeseed, etc. oil
zest and juice of 1 lime
1 tsp. ground cumin
1 1/2 tsp. ground coriander
2 Tbsp. low-sodium soy sauce
1 1/2 tsp. kosher salt
2 Tbsp. sugar (I used brown sugar)
2 tsp. curry powder
1/2 cup canned coconut milk (I used light)
pinch cayenne pepper
2 lbs. boneless, skinless chicken breasts, cut into strips
1/4 cup fresh cilantro, chopped for garnish
lime wedges, for serving

Coconut Rice:
1 cup jasmine rice
1 cup canned coconut milk (I used light)
1 cup water
1/2 tsp. salt

DIRECTIONS

1. In a large bowl, whisk together the oil, lime zest, lime juice, cumin, coriander, soy sauce, salt, sugar, curry powder, coconut milk, and cayenne pepper. Place the chicken in a large ziploc bag and pour the marinade over the chicken. Seal the bag and refrigerate for at least 2 hours and up to 8 hours.

2. For the coconut rice, bring the rice, coconut milk, water and salt to a simmer in a medium saucepan. Cover, reduce the heat to low and simmer for 15 minutes until the liquid is mostly evaporated. remove from the heat and let stand for 5-10 minutes before fluffing with a fork and serving. (For brown rice, adjust the cooking time according to package directions.)

3. Preheat outdoor grill or indoor grill pan to medium-high heat. Grill the chicken until the juices run clear (will be firm to the touch). While the chicken is cooking, pour the marinade into a small or medium saucepan. Bring the mixture to a rolling boil and boil for 10 minutes, stirring occasionally.

4. Place the grilled chicken on a serving platter or plate. Drizzle with sauce (reserve the remaining sauce to serve separately) and sprinkle fresh cilantro over the top. Serve with rice, lime wedges, and additional sauce.

Serves 4-6.

(Adapted from Mel’s Kitchen Cafe)

Sugar Cookie Crust Fruit Pizza

May 30, 2014

IMG_5765

I keep starting to write about our day to day life (job searching, moving, the most annoying masters thesis in the world, toddlers who are this very minute singing while kicking the wall and NOT napping) and then decided I’m boring myself and all you’re really here for is a recipe. So, a recipe it is.

IMG_5775

We bbq’d on Memorial Day and tried three new recipes and loved them all. So I’ll be sharing them. Starting with dessert, naturally. A giant sugar cookie spread with a generous layer of lemony cream cheese frosting and topped with as much fruit as you can fit. Some people call it fruit pizza. I just know it’s delicious and the perfect thing to make when it’s 4pm and your guests are arriving at 5 and you need a dessert STAT. It does cook quickly, just be warned that you must let it cool completely before frosting or you’ll end up with a puddle of fruit on top.

Sugar Cookie Crust Fruit Pizza

INGREDIENTS

1/2 cup (1 stick) unsalted butter, softened
1/2 cup sugar
1/4 cup light brown sugar
1 large egg
1 tsp. pure vanilla extract
1/4 tsp. almond extract
1 1/4 cup all purpose flour
1/2 tsp. baking powder
1/4 tsp. salt

Spread:
1 (8 ounce) package cream cheese, softened
3/4 cup powdered sugar
1 1/2 tsp. vanilla extract
1/2 tsp. lemon zest

Fresh Fruit:
strawberries, blueberries, raspberries, blackberries, peaches, kiwi, mango, etc.

DIRECTIONS

1. Preheat oven to 325 F.

2. In a medium bowl, mix together the flour, baking powder, and salt. In a large mixing bowl cream together the butter and sugars until smooth. Add the egg, vanilla, and almond extract and mix until just incorporated. Slowly incorporate the flour mixture into the creamed butter and mix until blended. Remove dough from bowl and press into a greased 10 inch tart pan or pizza pan.

3. Bake in preheated oven for 10 to 12 minutes, or until the edges just start to brown. Remove from oven and let cool on a cooling rack.

4. In a large mixing bowl, beat the cream cheese, sugar, vanilla, and lemon zest until smooth. Spread evenly on the cooled crust. Arrange fresh fruit in desired pattern on top of filling and chill until ready to slice and serve.

Makes a 10-inch round cookie.

(Adapted from Kelsey Nixon via Lahatchita Eats)

Skillet Pizza

May 22, 2014

IMG_5632

Skillet pizza again. But this time not deep dish. My usual honey whole wheat dough recipe, but halved (so a whole recipe would make 2 pizzas). I love using a pizza stone and for a large pizza, it works wonderfully. But this new method is the closest I’ve come to an authentic puffy, light, oven-fired crust. The prepared crust (with toppings) is placed in a hot cast iron skillet on the stove top and then immediately transferred to the broiler where it cooks for less than 3 minutes!! It’s so fast and the result is awesome.

IMG_5631

On your first attempt you are pretty much guaranteed to make a mess. Transferring the prepped pizza to the HOT skillet is tricky. Dump more flour/cornmeal than feels comfortable under that crust while you are topping it and then it should slide easily. Don’t worry if some cheese or toppings land under the crust or if it doesn’t look pretty. It will taste great no matter what. And the little bits of cheese that end up on the outside of the crust crisp up against the skillet and those were my favorite bites (think Pequod’s crispy cheese crust- yum).

If I haven’t yet convinced you that you need a cast iron skillet, maybe this recipe will do the trick?

Skillet Pizza

INGREDIENTS

1 recipe pizza dough (to make 2 skillet pizzas)
flour or cornmeal, for dusting
12-inch round cast iron skillet
toppings of choice

for this pizza I used:
crushed tomato sauce (makes enough for 2 large pizzas, or about 4 skillet pizzas)
chicken sausage
roasted mushrooms
red onion
black olives
shredded mozzarella
freshly grated Parmesan
pinch crushed red pepper flakes

DIRECTIONS

1. Prepare the dough according to recipe directions.

2. When the dough has finished rising, preheat the broiler. Meanwhile, place a large (12-inch recommended) cast iron skillet on the stove over high heat and preheat for 10 minutes, until very hot (turn down the heat slightly if it starts to smoke).

3. Divide the dough into 2 equal portions. Generously flour or sprinkle cornmeal over a large pan or pizza peel. Carefully stretch the dough to the size of your skillet (about 12 inches). Place on the prepared pan/peel and top with desired toppings.

4. When the skillet is ready, carefully transfer the pizza from the pan/peel to the HOT skillet. (If it’s not sliding off then you didn’t place enough flour/cornmeal under the crust. It’s OK if it doesn’t land perfectly in the skillet. We’re going for taste, not looks here.) Immediately transfer the HOT skillet to the oven and place under the broiler. After 45 seconds-1 minutes, rotate the pizza 180 degrees and continue broiling for approx. another 2 minutes until the crust is puffed and golden and the cheese is bubbling (it happens FAST). Remove from the oven and repeat with the remaining dough.

Makes 2 skillet pizzas (approx. 12-inches round), each pizza serves 2.

(Adapted from Bev Cooks and Kitchen Konfidence)

Sweet and Sour Stir-fried Pork with Pineapple

May 12, 2014

IMG_5519

This might be the first Chinese food recipe I’ve shared. I like Asian food. I love Thai and Japanese. But I have a hard time with Chinese. The Chinese restaurants and take-out I’ve tried have yet to impress me. (Except for one place we found just before we left Richmond. I’d have gone back there if I’d had the chance.) American-Chinese food just seems so heavy, so greasy. Too much sugar and salt. I know great Chinese food exists and I hope to someday experience it. My mom on the other hand adores Chinese food and could probably eat it for every meal. Which is how I feel about Mexican (which, of course, she dislikes). Choosing a restaurant gets tricky when left to the two of us.

IMG_5491

This recipe convinced me to give Chinese another chance- at home. It would surely be fresher/lighter/healthier than take-out. And it included a few of my favorite things- pork tenderloin and pineapple. Well, I loved it! Chunks of tender pork, crisp peppers, and juicy pineapple, simmered in a sweet (but not overly) and sour sauce all served over rice and garnished with peanuts for crunch. So good.

A note about the rice: I’ll be honest, I’ve yet to master cooking any rice, but brown has been the biggest challenge. Then I found this method and it really works! No more soggy, clumpy rice. Hooray! (I also tried Alton Brown’s baking method but wasn’t as impressed.)

Sweet and Sour Stir-fried Pork with Pineapple

INGREDIENTS

1 cup brown rice (I used jasmine)
1/4 cup low-sodium soy sauce
1/4 cup rice vinegar
3 Tbsp. sugar
1 1/4 pounds pork tenderloin
1 Tbsp. cornstarch
kosher salt and freshly ground black pepper, to taste
1 Tbsp. peanut oil
2 cloves garlic, minced
2 bell peppers (any color- I used red and yellow), sliced
1/2 cup diced fresh pineapple
4 green onions, thinly sliced on the diagonal
2 Tbsp. roasted peanuts, chopped for serving (optional)

DIRECTIONS

1. Cook the rice according to package directions (about 45 minutes cook time). **Or follow this method for perfect brown rice- works great!!**

2. Meanwhile, in a small bowl or measuring cup, whisk together the soy sauce, vinegar and sugar.

3. Slice the pork into 1/2-inch-thick rounds, then slice again to make 1/2-inch-wide strips. Place the pork in a medium bowl and sprinkle with the cornstarch and salt and pepper, and toss to coat.

4. In a large skillet or wok, heat the oil over high heat until very hot. Add the pork and stir-fry until the pork is almost cooked through and begins to brown, about 2 minutes. Remove the pork from the pan and set aside on a plate. Add the garlic and bell peppers and stir-fry until the vegetables begin to soften, about 5 minutes. Add the pineapple and scallions and the pork back in and continue to stir-fry until the pork is cooked through and the vegetables are tender, 1 to 2 minutes longer.

5. Whisk the soy sauce mixture and add it to skillet. Cook until the sauce thickens, 2 to 3 minutes. Serve over the rice and garnish with roasted peanuts if desired.

Serves 4.

(Adapted from Kelsey Nixon)