Miso Glazed Salmon

March 28, 2014

miso salmon

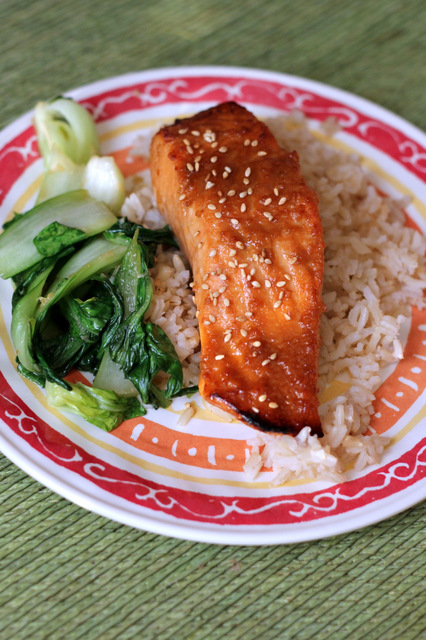
This was my first time purchasing and cooking with miso, but it won’t be my last. When I fall in love with a new ingredient I become a little obsessed (so don’t be surprised if I share a bunch more miso recipes in the near future). Miso paste isn’t cheap (I found it at Whole Foods- I’m guessing Asian groceries would be a better deal), but the amazing flavor it lends is worth the splurge. Plus, a small tub of it will last a good six months in the refrigerator so I’m determined to use mine all up.
miso salmon

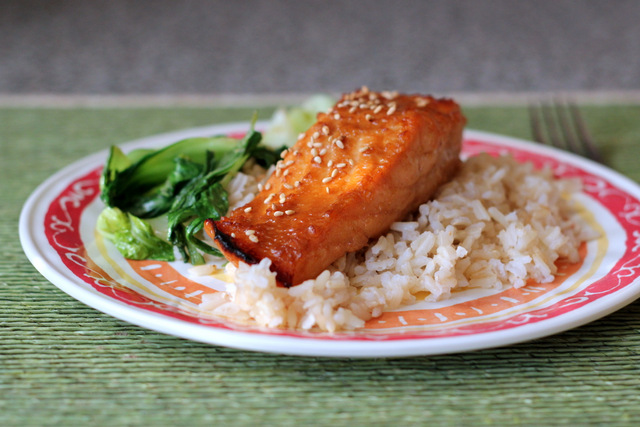
This recipe combines sweet white miso with soy sauce, brown sugar, and bit of rice wine vinegar for a sweet and salty and umami (whatever that is) experience. All I care is that it’s delicious. And so quick and easy! The fish can be marinated ahead of time for extra flavor- or not. I’ve made it both ways and it was just as good with the sauce brushed on right before and during broiling.

Unrelated to this salmon, does anyone have a favorite carrot-ginger-miso dressing recipe? I’ve tried several but yet to be impressed. If so, please send it my way…

Miso Glazed Salmon

INGREDIENTS

1- 1 1/2 lbs. salmon fillets
2 Tbsp. sweet/mild white miso
2 Tbsp. low-sodium soy sauce (reduce if using regular soy sauce)
2 Tbsp. rice wine vinegar
2 tsp. brown sugar (or honey)
toasted sesame seeds, for garnish
fresh chives, chopped for garnish

DIRECTIONS

1. In a small bowl, whisk to combine the miso, soy sauce, vinegar, and brown sugar (or honey).* Place the salmon fillets in a shallow dish or resealable plastic bag and pour the marinade over top. Place in the refrigerator and marinate 30 minutes or up to several hours. If you’re short on time, the marinade can be brushed over top the fish and cooked immediately, it just won’t be quite as flavorful.

*Note: Marinade ingredients can be adjusted to taste- a little more/less soy sauce to adjust saltiness, more/less sugar to adjust sweetness, more/less vinegar to adjust the sour note, etc.

2. Preheat broiler. Remove the fish from the marinade and place on a baking sheet lined with aluminum foiled and lightly coated in cooking spray. Broil 8-10 minutes, until the salmon is just cooked through and flakes easily with a fork. If you haven’t marinaded the fish, baste with the extra sauce partway through cooking.

Serves 3-4.

(Adapted from Cooking Light)

Pearl (Israeli) Couscous with Cherries and Arugula

March 20, 2014

IMG_4098

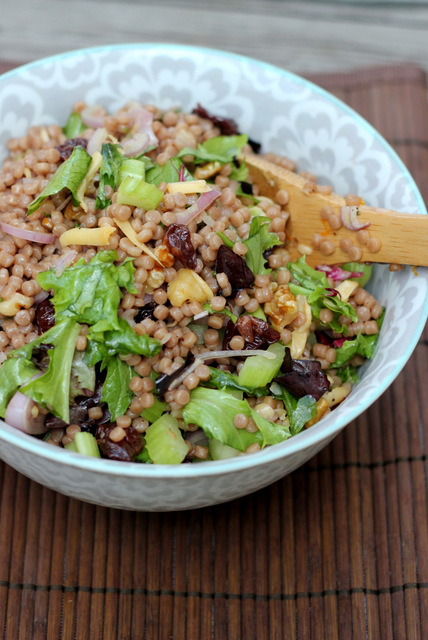
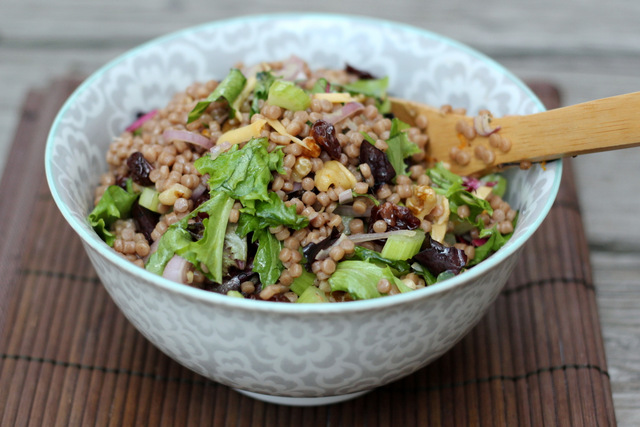
… and toasted walnuts, celery, shallots, orange juice/zest, and smoked gouda. Sound spectacular? I thought it was. Spell check keeps telling me that I’m supposed to capitalize Gouda. Is cheese suddenly a proper noun? Hold on.

Just did some research: Apparently, when cheese is named after a place there is controversy over whether it should be capitalized. Such a complicated world. I’ll give deference to Gouda from now on.

IMG_4105

P.S. If you haven’t noticed by now, I’m not an English major or altogether very good at grammar. I try. But I am grateful when you point out big mistakes, particularly any that might being confusing to a recipe.

Anyway, I can cook a few things and that’s what is most important here. I made this salad for lunch today and it motivated me to get back on here and share. Pearl couscous (also known as Israeli) is dreamy. It’s actually a mini pasta ball but I like it so much better than most pastas. Cuteness might be a factor. If you don’t have everything on hand for this salad, I’m sure it would still be wonderful with some improvisation. Another dried fruit or toasted nut, red onion instead of shallot, red pepper or carrot in place of the celery. Whatever. Just be warned that cleaning up couscous that has been enjoyed by a toddler is no fun at all.

Whole Wheat Pearl Couscous with Cherries and Arugula

INGREDIENTS

8 oz. pearl couscous (whole wheat if you can find it), cooked according to package directions
1/4 cup freshly squeezed orange juice + orange zest, to taste
2 Tbsp. olive oil
1 Tbsp. red wine vinegar
1 tsp. honey or maple syrup
2/3 cup dried cherries
1/2 cup walnuts, chopped and toasted
2 stalks celery, chopped
2 shallots, thinly sliced
2-3 oz. baby arugula (I used spring mix with arugula), finely chopped
2 oz. smoked gouda or sharp white cheddar, shaved or grated
salt and freshly ground black pepper, to taste

DIRECTIONS

1. Cook couscous according to package directions. When done, spread on a large baking sheet to cool and set aside.

2. While the couscous is cooking, combine the orange juice, oil, vinegar, and honey or maple syrup in a small saucepan and bring to a boil. Stir in the cherries and remove from the heat. Lit sit about 5 minutes until the cherries are plump and soft.

3. Once the couscous has cooled to lukewarm, place it in a large bowl and pour the cherries and liquid over top. Toss to coat. Add the walnuts, celery, shallots, arugula, cheese, and a bit of orange zest to taste and toss to combine. Season to taste with salt and freshly ground black pepper. Serve immediately or after refrigerating.

Serves 6.

(Adapted from theKitchn)

Red Velvet Cupcakes with Cream Cheese Frosting

February 28, 2014

IMG_3694

This was my Valentine’s treat to myself. And Dustin and Clara. But I never know for sure if Dustin will like a dessert I make, unless it’s chocolate chip cookies or  a brownie without nuts or frosting. He’s picky about his cake, can’t handle anything too rich or chocolatey (there is no such thing), and claims to dislike any dessert tainted with fruit, raisins, or coconut. Except that he usually eats them anyway. I don’t know what to believe so I continue baking what I please and just deal with the occasional complaints. Clara will eat anything sweet. Despite years of suggesting he learn to cook, bake, make anything, Dustin is still lost in the kitchen. So if I want a homemade holiday treat (or any meal, for that matter), I have to make it myself. I’ll be baking my own birthday cake next week. I’ve done so almost every year since we’ve been married- except for last year when we picked up german chocolate cupcakes from a local bakery (which are my favorite, Dustin can’t stand the frosting).

red velvet cupcake

These red velvet cupcakes were approved by every member of the family. It was my first red velvet cake (I’ve made a whoopie pie version before) and needn’t look further. The cupcakes were soft and fluffy and not at all dry. And I could have eaten a whole bowl of the cream cheese frosting. It would be a great compliment to so many cakes- carrot, spice, hummingbird, chocolate. But let’s stop talking about cake. I’m suddenly very hungry.

Collages3

I realized I haven’t posted any photos of Clara (or myself) on here in a very long time. She’s no longer a baby and perhaps some of you would like to see us once and a while. Here a few shots from my private Instagram feed. Clara is 2 months shy of 2 and talks like she’s grown up already.

Red Velvet Cupcakes with Cream Cheese Frosting

INGREDIENTS

Red Velvet Cupcakes:
4 Tbsp. unsalted butter, at room temperature
3/4 cup sugar
1 egg
2 1/2 Tbsp. unsweetened cocoa powder
2 Tbsp. red food coloring
1/2 tsp. pure vanilla extract
1/2 cup buttermilk
1 cup + 2 Tbsp. all-purpose flour
1/2 tsp. salt
1/2 tsp. baking soda
1 1/2 tsp. distilled white vinegar

Cream Cheese Frosting:
4 oz. butter, at room temperature
4 oz. cream cheese, at room temperature
2 1/2 cups powdered sugar
2 tsp. pure vanilla extract
scant 1/4 tsp. ground cinnamon (optional)

DIRECTIONS

1. Preheat oven to 350 F. Line a 12-cup muffin/cupcake pan with liners.

2. In a large bowl with an electric mixer, cream the butter and sugar until light and fluffy, about 3 minutes. Turn the mixer to high and add the egg. Beat until well incorporated, scraping down the sides of the bowl if necessary.

3. In a separate small bowl, mix together the cocoa powder, vanilla extract, and red food coloring to make a thick paste. Add to the batter and mix on medium speed until well combined, stopping the mixer to scrape down the sides of the bowl if necessary.

4. Reduce the mixer speed to low and add half of the buttermilk. Add half of the flour and mix until combined. Scrape the bowl if necessary and add the remaining buttermilk and flour. Beat on high until smooth. Reduce the mixer speed to low and add the salt, baking soda, and vinegar. Turn to high and beat for another couple minutes until completely smooth.

5. Divide the batter evenly between the cupcake liners and bake for 15-20 minutes, until a toothpick inserted into the center of a muffin comes out clean. Cool for several minutes in the pan before removing the cupcakes to a wire rack to cool completely before frosting.

6. To make the frosting, beat or whisk butter and cream cheese in a large bowl with an electric mixer on medium-high speed for 5 minutes. Reduce the speed to low and slowly add the powdered sugar until well incorporated. Add the vanilla and cinnamon (if using) and mix to combine. Increase the speed to medium-high and whip for a few more minutes until the frosting is light and fluffy, scraping down the sides of the bowl if necessary.

Makes 12 cupcakes and more than enough frosting (recipe and frosting can be doubled to make an 8 or 9-inch layer cake).

(Adapted from Brown Eyed Baker and Joy the Baker)

Moroccan Beef Meatball Tagine

February 26, 2014

IMG_3476

My posts have slowed down a bit recently and I don’t anticipate that changing anytime soon. This longggg winter has evolved into a pattern of Clara getting sick, nobody getting sleep, tired me going crazy stuck home in the cold with a sick toddler, escaping out of town to restore my sanity, picking up germs traveling, and the cycle repeats. Are the trips worth it? Absolutely. But I could do with a little health and warmth around here. That’s my excuse anyway for why I’ve been less focused on cooking. It’s happening. I still have some awesome recipes to share. But excuse me if they’re a little less frequent.

Clara and I are headed out of town again next week (home to VA!). And then to Utah again in April for another sister’s wedding. (Poor Dustin gets left behind. But he’s so busy I’m sure we’re hardly missed. Until he’s comes home and has to make microwave his own dinner, that is.) I’m also hoping to sneak up to Ann Arbor sometime in March. We need to see more of this part of the country before we’re gone permanently. (No news on that front. We’re just aware that Dustin finishes residency in June and we’ll be unemployed and homeless if we don’t figure it out soon!)

Our Valentine’s Day didn’t turn out quite as, uh, romantic as expected. Clara was extra sick (since her baseline is sick now-days) and so instead of dinner and a movie out, we stayed in and babysat so our neighbors could go out. I did make pasta (Dustin’s true love) and red velvet cupcakes (recipe shortly!) and we rented a movie after the babes were asleep. So this past weekend we finally made it out to dinner at a Moroccan restaurant I’ve been dying to try. It was a small, funky smelling, hole-in-the-wall, practically under the freeway, but surprisingly charming kind of place. And we weren’t disappointed. The food was fantastic and we’ll be back. But I have to say. I think my own tagine is just as good.

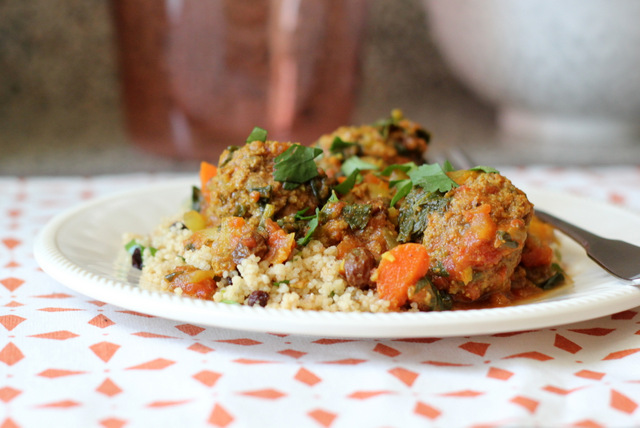
This is my latest attempt at Moroccan food with a tagine consisting of ground beef meatballs simmered with carrots and raisins in a spicy tomato stew. The ingredient list is long, but the method is straightforward and the flavors outstanding. Best served over couscous or with warm pita for soaking up the rich broth.

Moroccan Beef Meatball Tagine

INGREDIENTS

Meatballs:
1 1/4 lbs. ground beef
1/3 cup coarsely grated onion
1/3 cup panko breadcrumbs
1/4 cup chopped fresh cilantro
1 large egg, beaten
2 cloves garlic, minced
1 tsp. turmeric
1/2 tsp. ground cinnamon
1/2 tsp. ground nutmeg
1/4 tsp. ground ginger
up to 1/2 tsp. cayenne pepper (I just used a pinch)
1/2 tsp. freshly ground black pepper
1/2 tsp. kosher salt

Stew:
1 Tbsp. olive oil
1 large onion, chopped
2 cups thinly sliced carrots
4 cloves garlic, minced
2 cinnamon sticks
1 tsp. tumeric
1/8 tsp. saffron threads, crumbled (recommended, but won’t be ruined without)
1 cup beef broth
28 oz. can diced or crushed tomatoes
1/4 cup golden raisins
1/4 cup chopped fresh cilantro + extra for garnish
5 oz. baby spinach, chopped
couscous, for serving (I used this recipe but halved the oil)
lemon, for serving (optional)

DIRECTIONS

1. To prepare the meatballs, gently mix all of the ingredients in a large bowl. Roll the meat into 2-inch round meatballs and place on a baking sheet.

2. Preheat oven to 350 F.

3. Heat oil in a large heavy ovenproof pot over medium heat. Add the onion and carrots and saute until the onion is soft and browned, about 15 minutes. Add the garlic and spices and stir for 2 minutes. Add the broth, tomatoes with their juice, and raisins. Bring the stew to a simmer. Carefully add the meatballs to the stew, gently pressing into the liquid to submerge. Sprinkle the cilantro over top. Cover the pot and place in the oven. Bake until the meatballs are cooked through and the carrots are tender, about 35 minutes.

4. Add the spinach to the stew and cook for another 5 minutes, until wilted. Gently stir in the spinach, making sure not to break up the meatballs. Remove the cinnamon sticks and season to taste with salt and freshly ground black pepper. Serve over couscous garnish with cilantro and lemon.

Serves 6.

(Adapted from Bon Appetit)

Skillet Fresh Green Beans

February 21, 2014

green beans

Nothing too fancy to share with you today. Just good old green beans, prepared another favorite way. Between this recipe and the roasted green beans I posted not long ago, we’ve been eating a lot of them around here lately. But nobody is complaining, so that says something. These green beans are slowly simmered on the stove (with garlic and onion and chicken broth) while, ideally, the rest of your dinner is cooking. Try them with this stuffed chicken and some classic mashed potatoes. Yum.

Skillet Fresh Green Beans

INGREDIENTS

1 lb. fresh green beans, ends trimmed
1-2 Tbsp. butter or olive oil or a combination of the two
2 cloves garlic, minced
1 cup onion, chopped
1 cup homemade low-sodium chicken or vegetable broth
1/2 cup chopped red bell pepper (optional, I omitted)
~1/2 tsp. kosher salt
freshly ground black pepper, to taste

DIRECTIONS

1. Heat oil and/or butter in a large skillet over medium heat. Add the garlic and onions and cook for several minutes. Add the green beans and cook for another minute until they turn bright green. Add the chicken broth, red pepper (if using), salt and some freshly ground black pepper. Turn heat to medium-low and cover partway with a lid, leaving a large enough crack for steam to escape. Cook for 20-30 minutes, stirring once or twice, until the liquid evaporates and the beans are fairly soft, yet still a bit crisp. (If the pan dries out too quickly you can add more chicken broth during cooking.) Season to taste with salt and freshly ground black pepper before serving.

Serves 6.

(Adapted from The Pioneer Woman)